Category: Engine
Dream Cruise and First Drive!
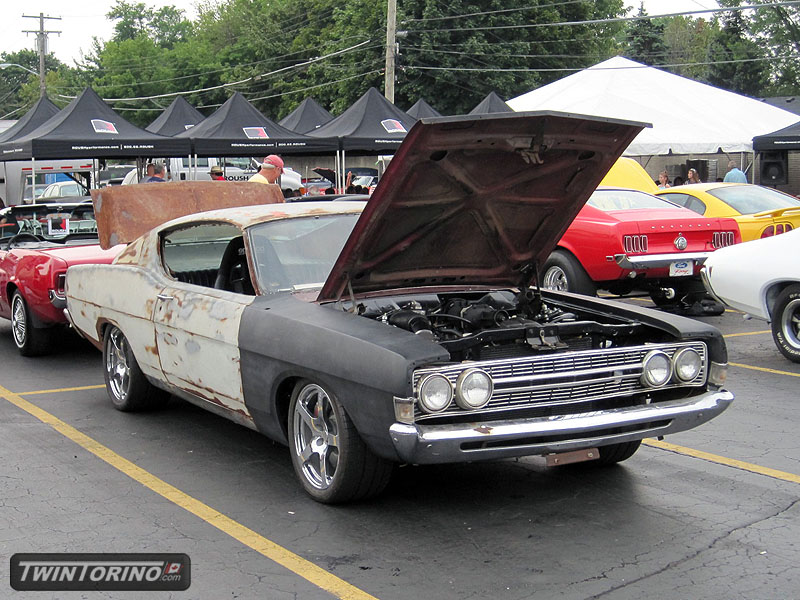
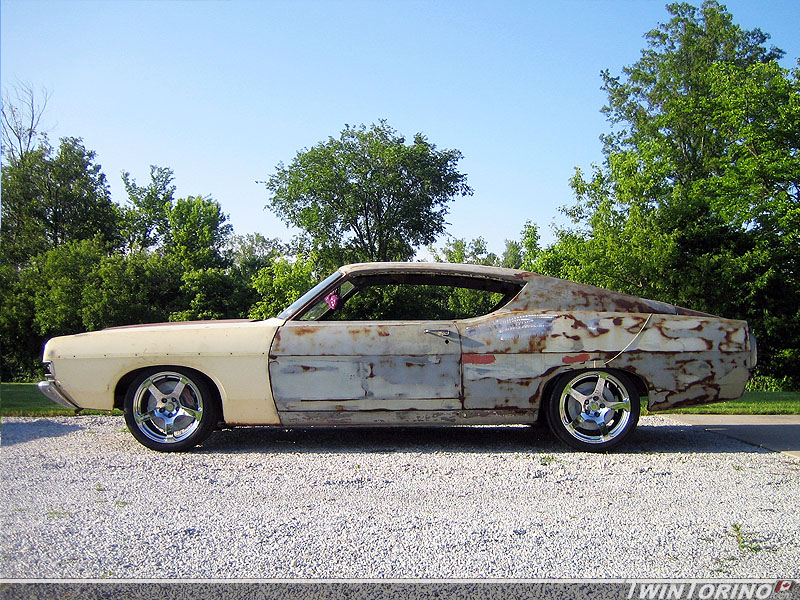
Finally.. after all these all nighters we made it to the Woodward Dream Cruise, and managed to put some miles on the car. I am still in shock that this all panned out. Thanks to all the local gang for helping out – Iain, Luke, Mike, Matt, Rick, Larry.
We got so many parts and pieces on the car in the past 2-3 weeks, that I can’t list or document everything. I hope to at least get the car in one color for now.. and do the final paint next year sometime. I’ll let the pictures tell the rest of the story – interior shots and movie clips to follow shortly..
Engine Teardown and Oil System Upgrade
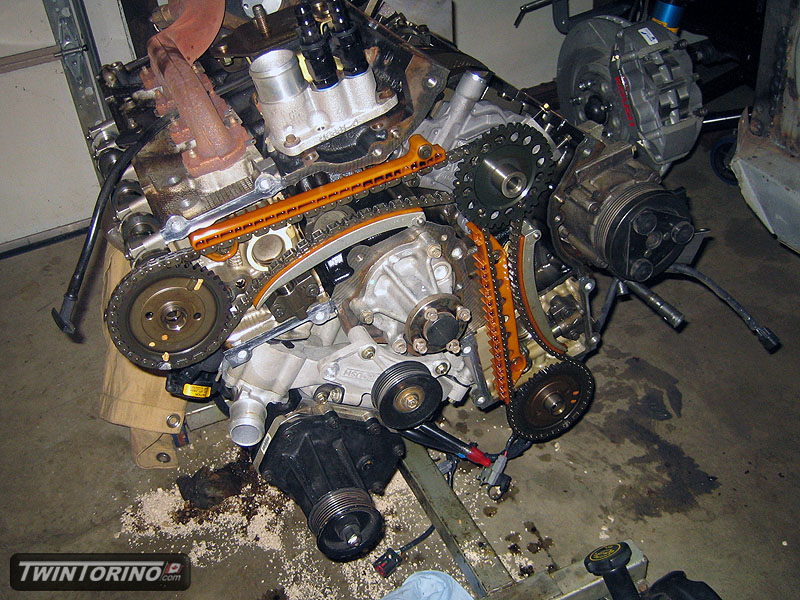
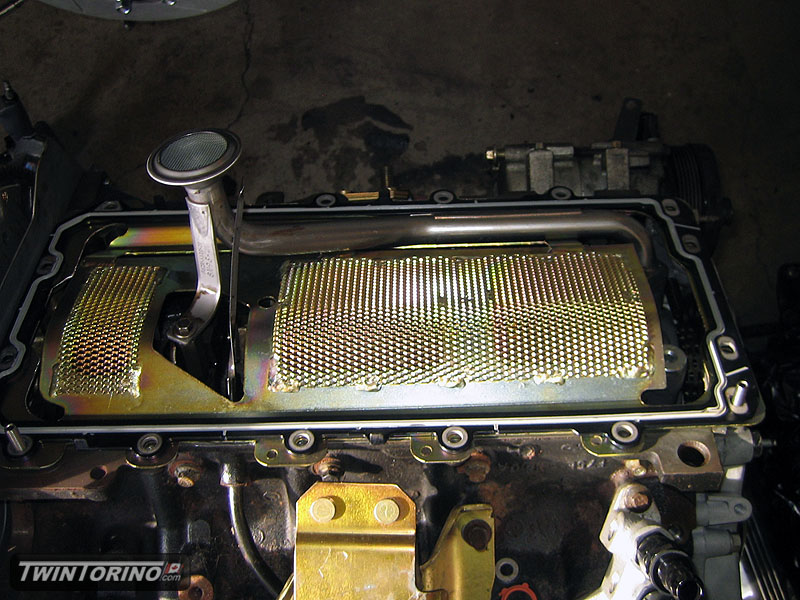
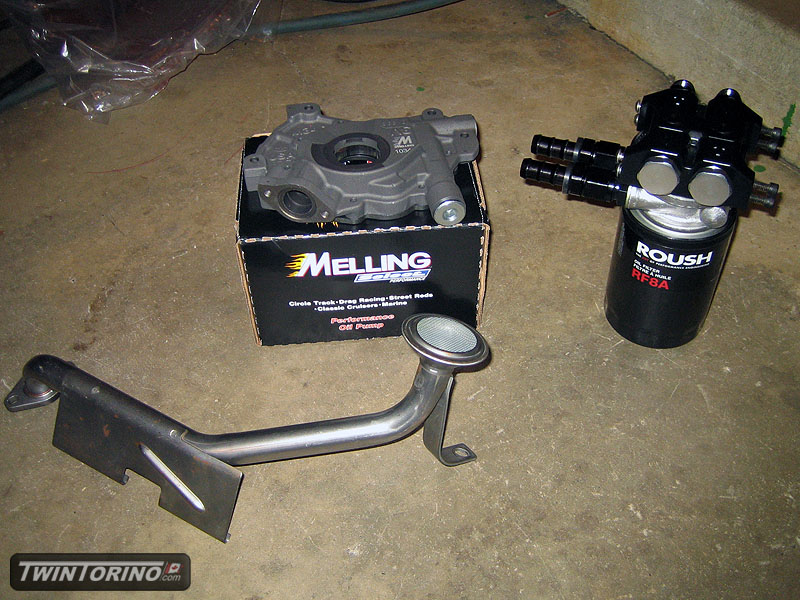
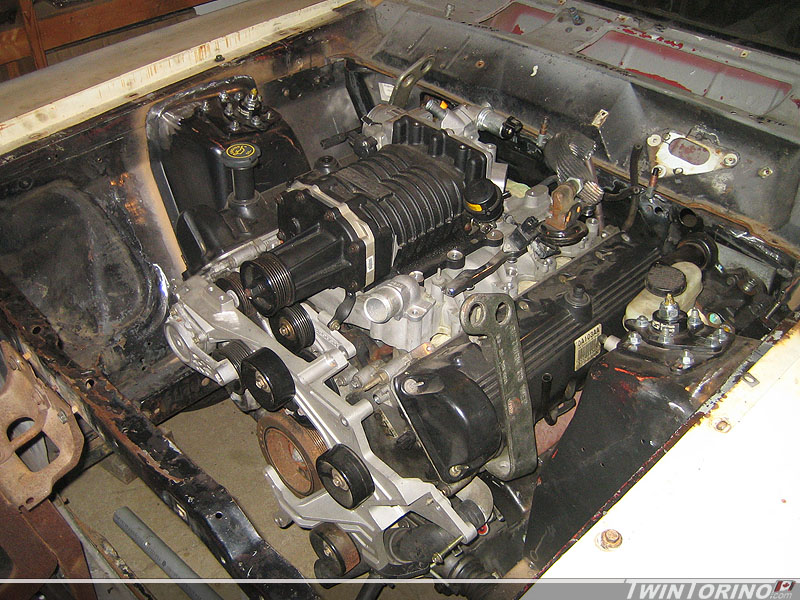
Pulled apart the engine to put in the new Melling oil pump, Canton windage tray and Moroso pan. Changing the oil pump in the new motors sure is not as simple as it once was. Oil pump in a modular motor is on the crank snout behind the timing gears. After getting everything back together, had to work on all the little things like custom throttle/cruise control cable bracket (based off a 2004 Cobra one) since the dual bore throttle body setup is a one-of on this car.

SF Connectors Done and New Parts..
Almost there..
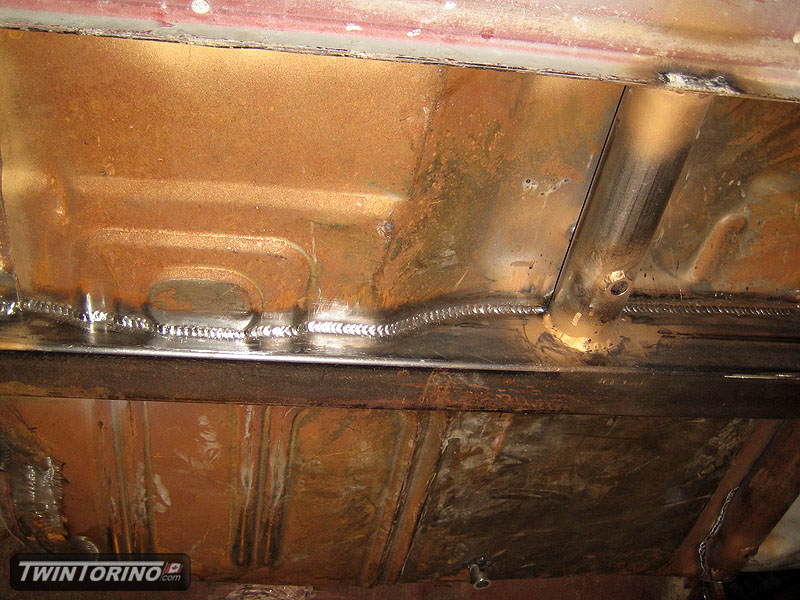
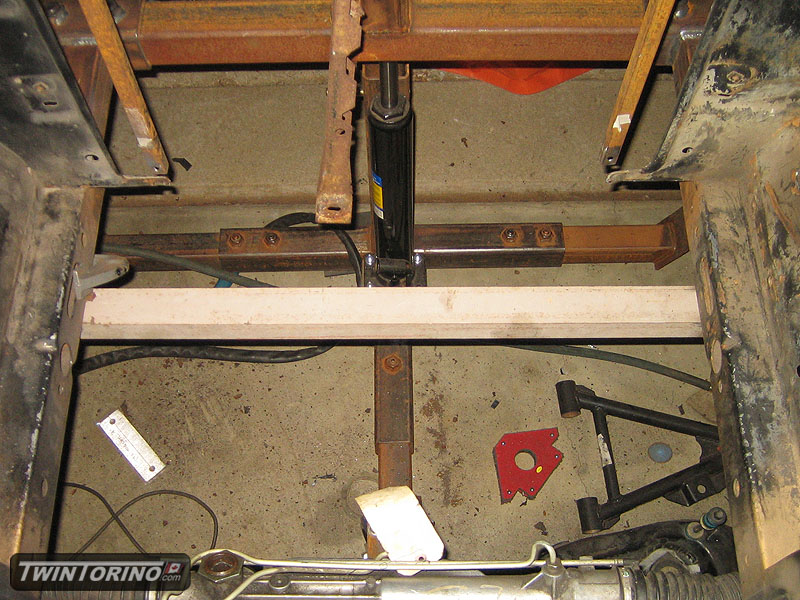
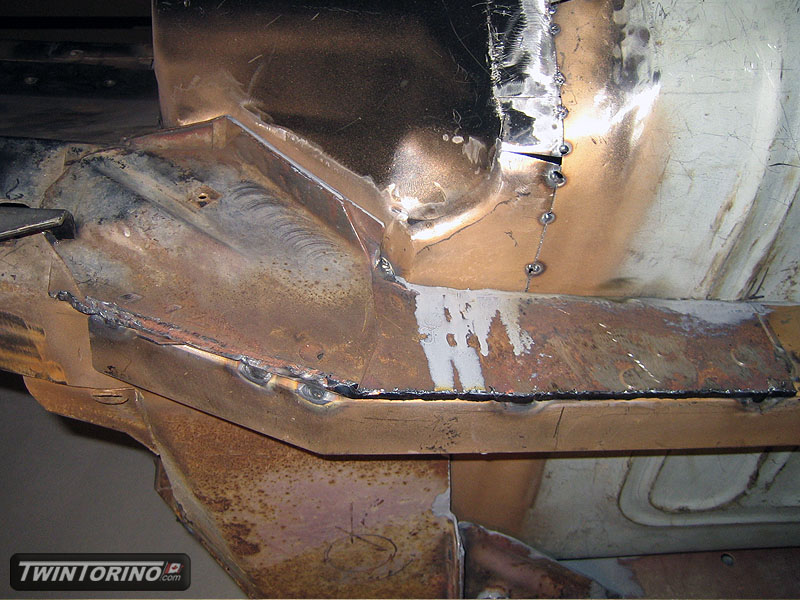
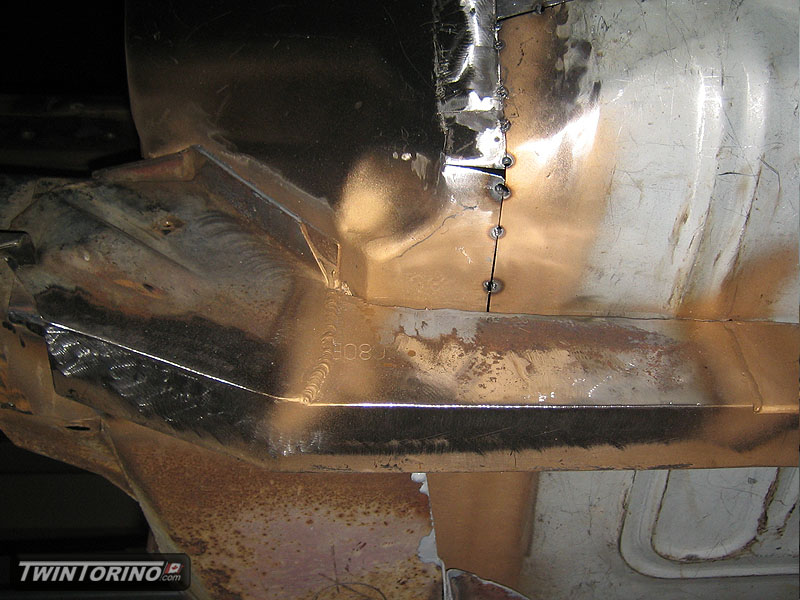
Have most of the underbody final welded (pass side shown from underneath car). Was a bunch of rust on the front crossmember under the rad – so we just cut it out. Will replace with 3″x2″ steel section which will fit perfectly – the nice thing is it only needs to be cut to length and can be welded in. No sense in spending lots of time on spot repair since the suspension points that use the underside of this are long gone anyway.
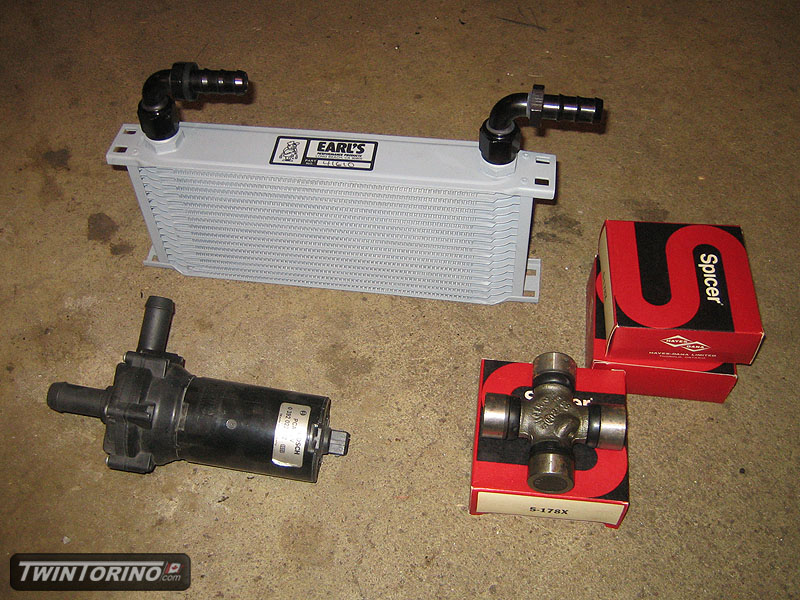
Also found an Earls oil cooler, Bosch intercooler pump and Spicer 1350 series u-joints on Ebay in the last few weeks. Just need to get a Speedway 36″ 1.25″ OD splined sway bar for the front and the major purchases for this car will be close to complete.
Coolers and SF Connectors..
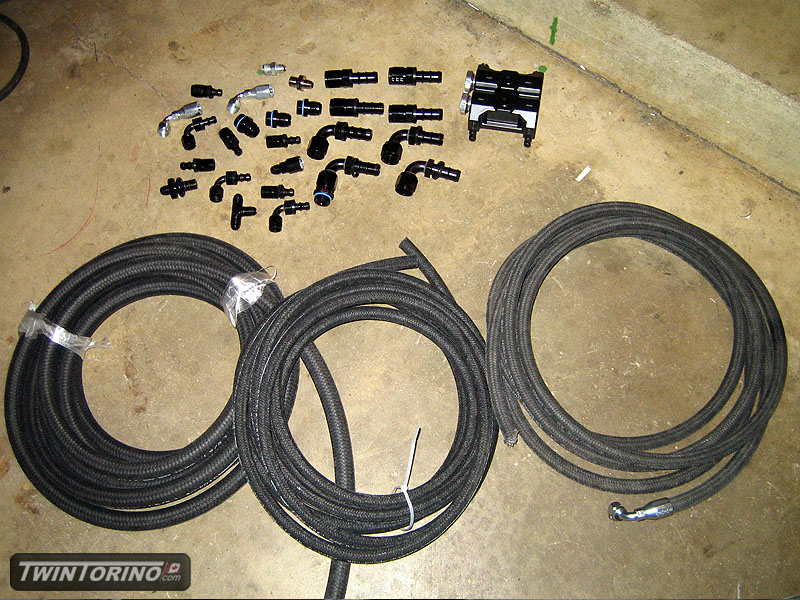
Could only put it off so long.. finally had to buy some new parts for the car for a change. Working on getting the cooling, power steering, fuel and brake systems up and running. Wanted to have all the fittings in black and with black polyester weaving on the hoses. Took a while to track down all the parts for the right price, but we have everything now for one car.
Also got upgraded parts to run the remote oil cooler and also a better pump and Cobra pickup to keep the engine happy on the track.
Started cleaning up the underbody and began welding everything underneath. I am not sure how we would have done this without a rotisserie.
Pullmax..
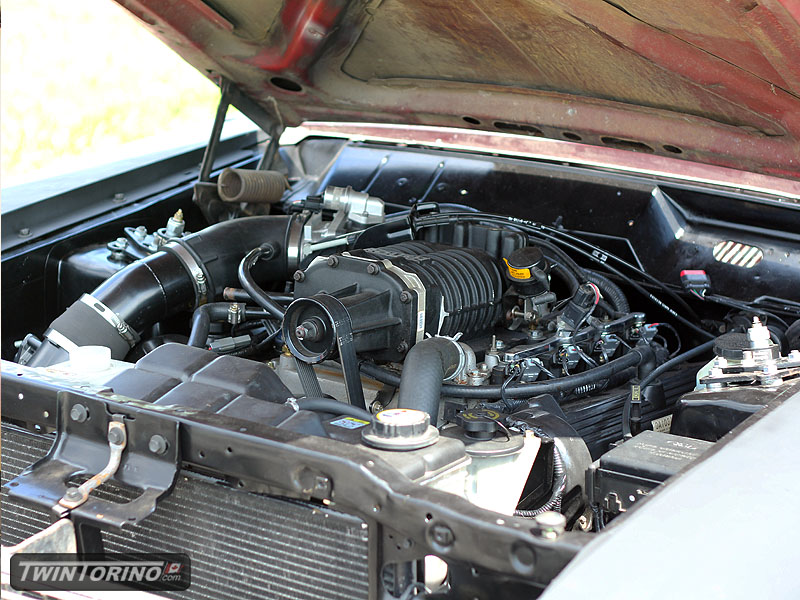
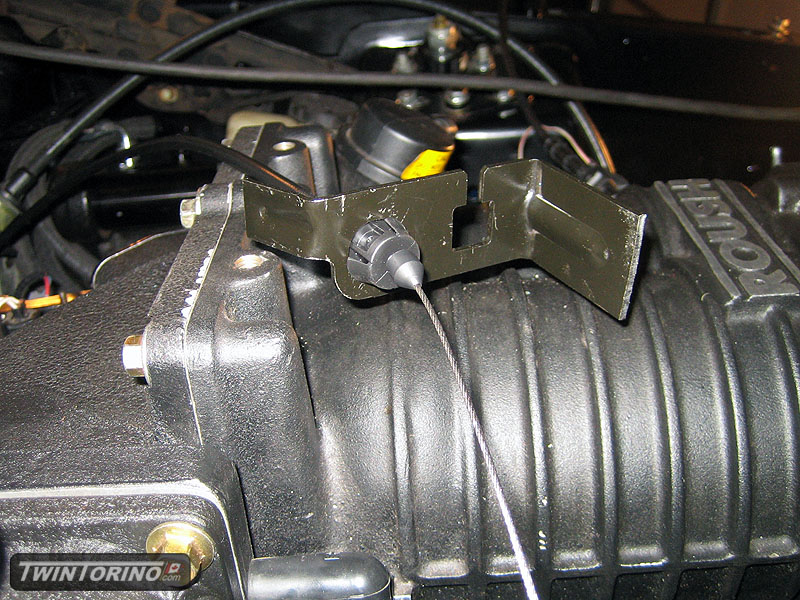
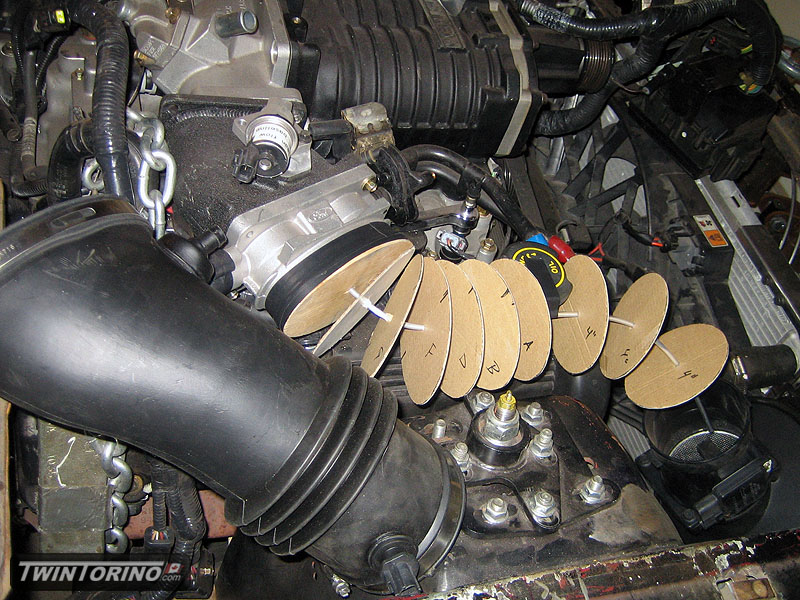
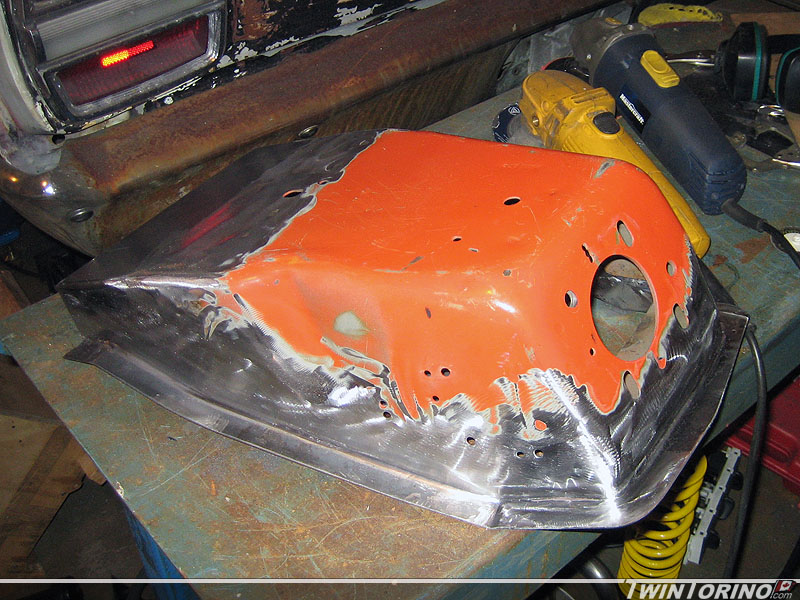
Moving right along on progress. Back to the engine – we are converting the engine to dual bore throttle body instead of single in attempt to get a bit more power out of it. It is a known issue with the M90 blower kits as the pressure drop across the throttle body is much higher with the single bore. This also means we now need to make up a custom clear air tube, which will either be carbon fiber or aluminum (see below for how).
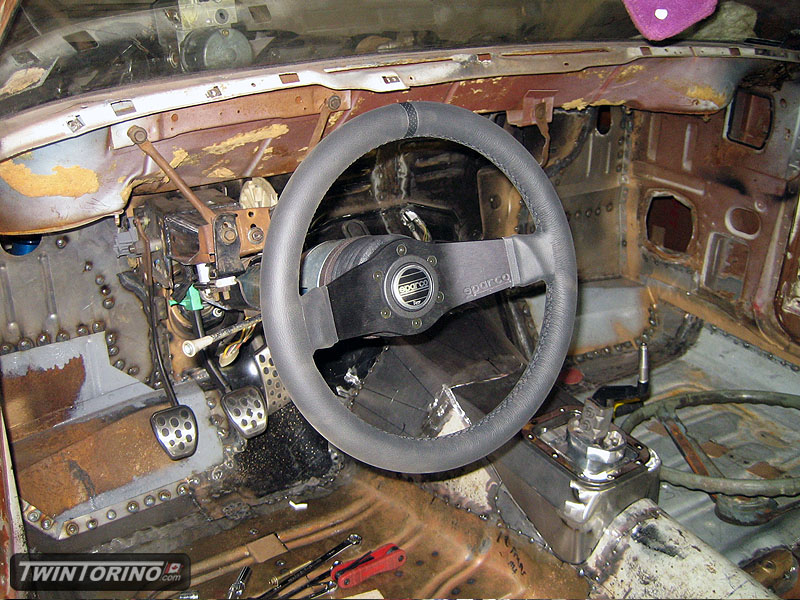
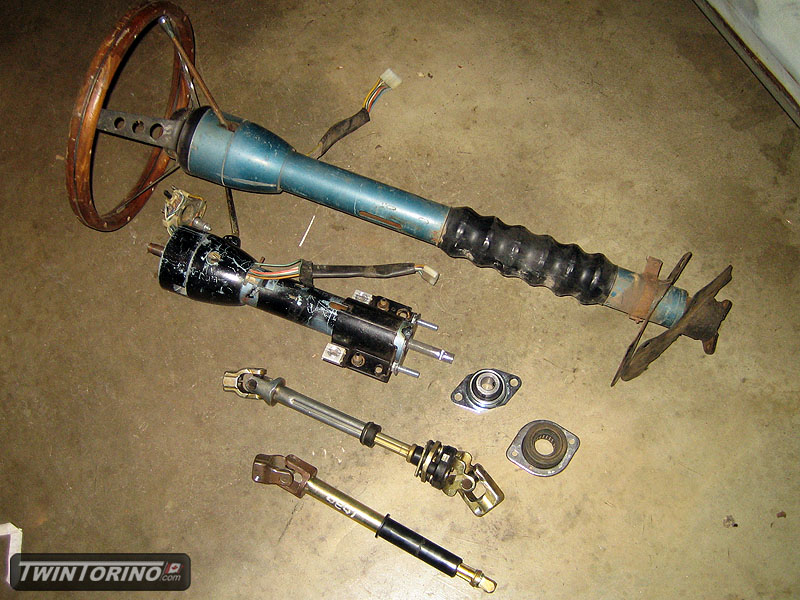
Got the steering column modified, and got a Momo Ford specific adapter for the steering wheel. Adapter/wheel takes some getting used to, but it is growing on me. For those of you running smaller OD steering wheels on these cars.. how the heck do you see the gauges??
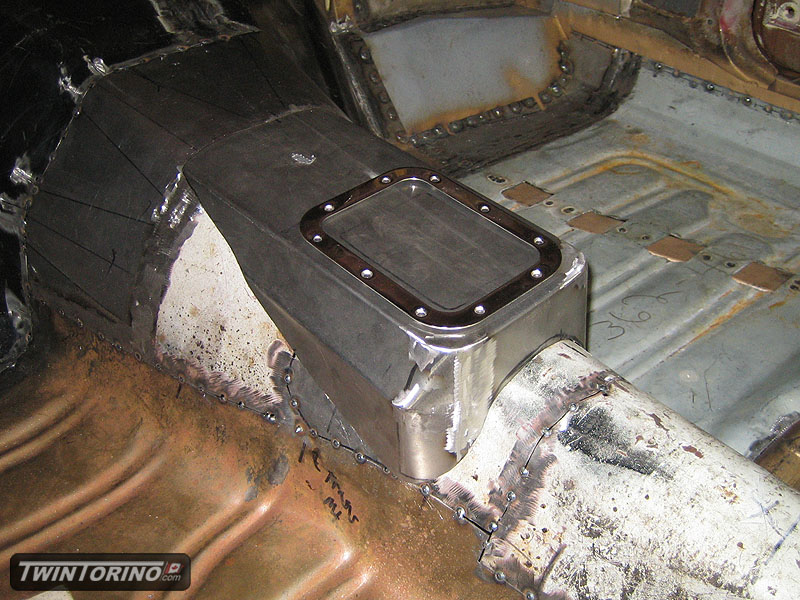
We were not really sure how we were going tin integrate the Ford fuel pump into the tank. Then one day the lightbulb went off and I realised that we should likely get someone to cut the tank flange off at an wrecking yard. Taking that one step further, we called al late model Mustang wrecking yard and they helped us up with
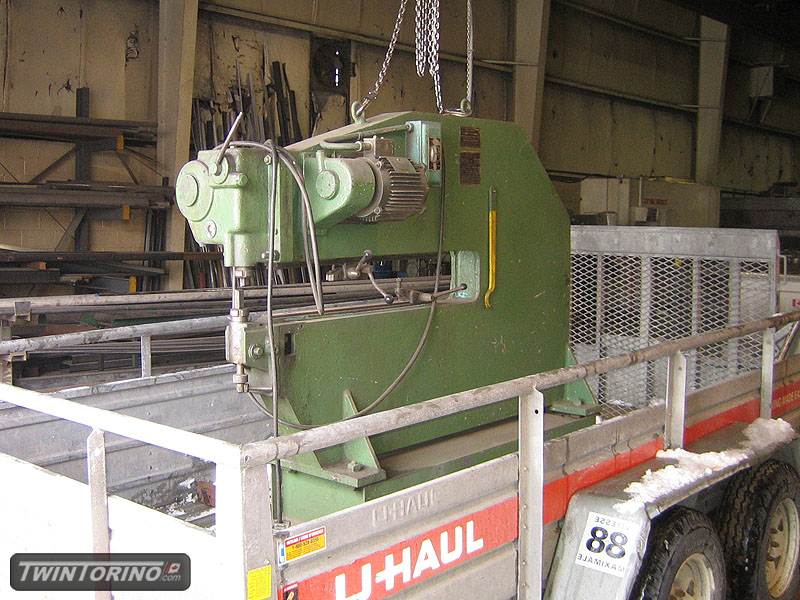
Took a road trip this weekend to grab a new toy that was too good to pass up. It is a Pullmax model D3. We have been looking for years and years for one of these to show up close to home and for the right price. This was only slightly more than the price it would be worth if scrapping it. It works like a charm and we just need to make up some tooling before we can experiment with making parts for the Torino. We even broke out the custom trailer for the event :).
Trans hump and steering..
Finally.. lots of free time to work away at things. Made up a shifter hump to conform to the carpet and clear the reverse lock-out solenoid on the transmission. Almost ready to cut the floor away and weld in. After that, floor fab is done and only needs to be final welded.
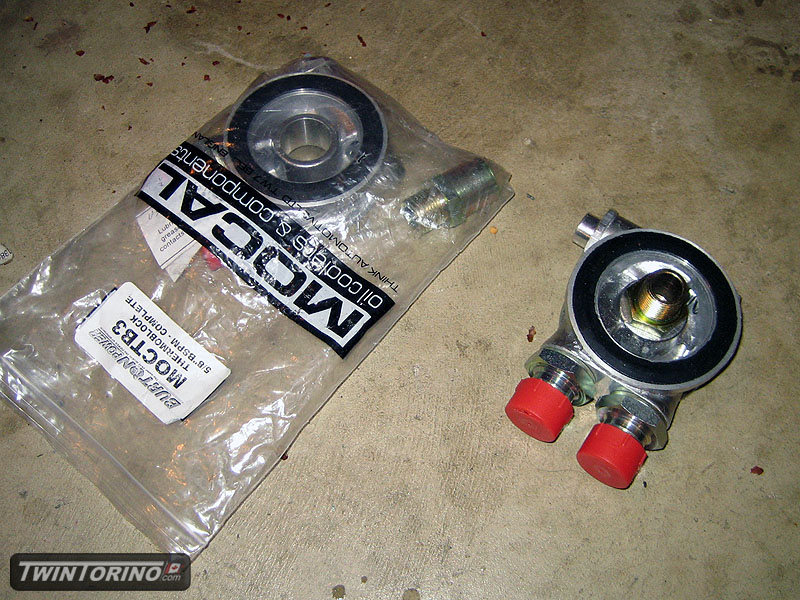
Found someone on Ebay selling oil thermostats cheap on Ebay so I grabbed a pair of them. These models are actually for a Lotus, but work fine with the Torino since it is set up for an oil filter with a 3/4-16 thread. You simply remove the oil filter and stack this on top and put the oil filter back on. Since we are running an external oil cooler, this is a must in order to let the oil in the engine get up to the proper temperature (same as a thermostat in the cooling system).
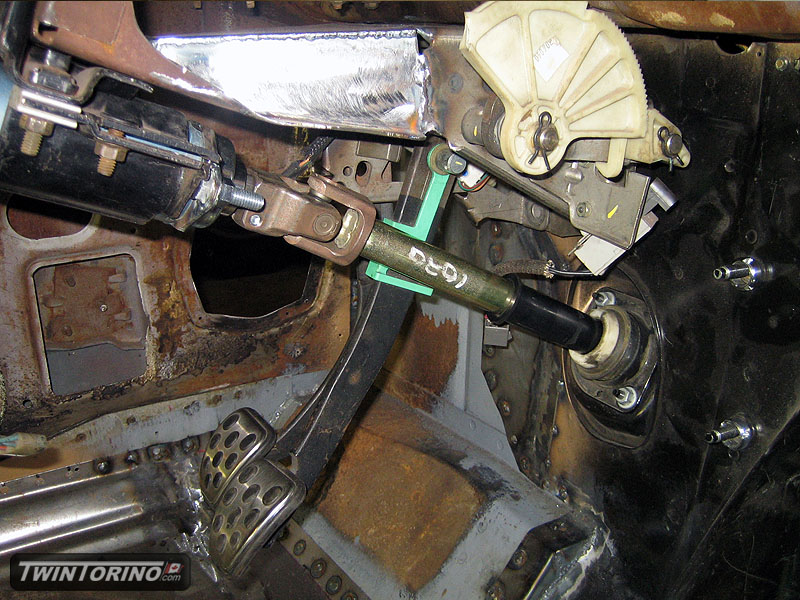
Moving onto the steering system, we found the necessary parts to make it work. The “trial” steering column was cut down considerably and a bracket was welded onto the end to accept a flange bearing. The inner shaft is then cut down to mate with the intermediate steering shaft. This shaft then connects to the lower shaft, which then connects to the rack. The steering colum has to be cut back so far to clear the brake pedal. This also reduces all of the u-joint angles. Believe it or not, these shafts are from a 2004 Lincoln Navigator ($20 on Ebay). The connection on the steering rack is a custom Ford only one, so this limited the choices to a Ford vehicle. Alternatively companies like Borgeson make the parts needed to put together all the shafts, but they are not cheap. Mustang ones will not work since the suspension is further forward. The firewall bearing is from a Mustang. For the first time in years – the Torino can once again be steered using the steering wheel.
Firewall, cooling module and more..
Suppose it is about time to post some updates. Making some decent progress lately.
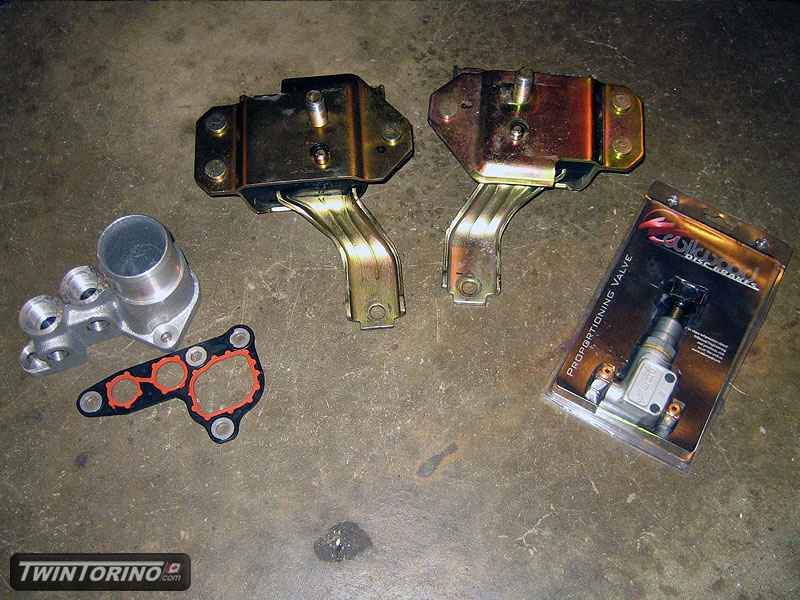
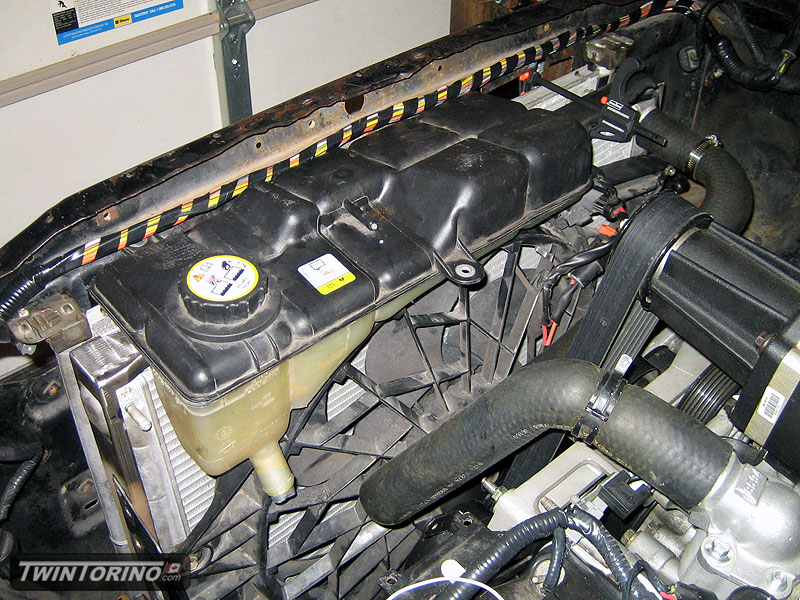
Keeping in the theme of used parts.. picked up some more of them. Found a set of nearly new Energy Suspension 4.6L motor mounts and also a Wilwood proportioning valve. Had to buy the oil filter adater new though – the one from Ford Racing is a nice piece (M-6881-C). Planning on running a remote oil filter w/t-stat and also an oil cooler in front of the cooling module. This part also increase the block inlet hose to 2″ to further reduce the possibility of water pump cavitation.
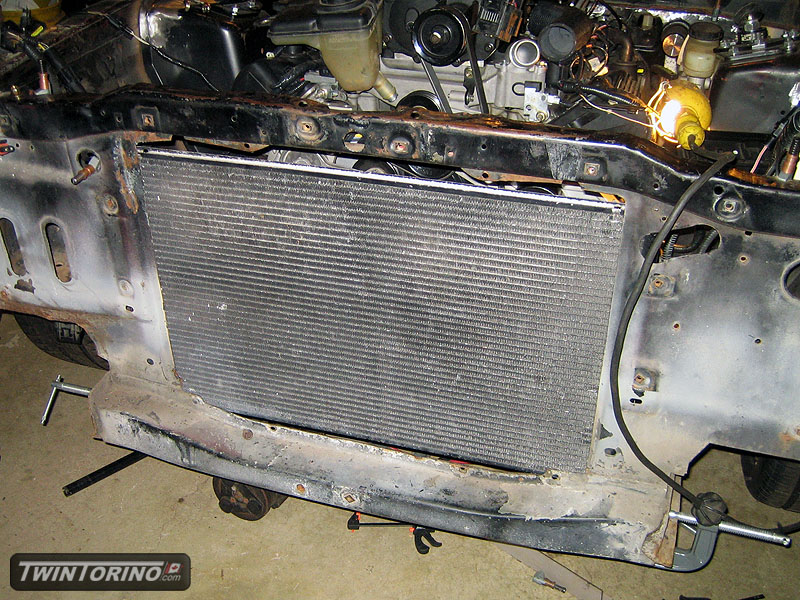
We made up custom radiator and condensor mounts which allow us to get them both between the frame rails to keep them as low as possible. This way the degas bottle can be mounted where it was intended to go and remain the highest point in the cooling system, but at the same time being low enough to clear the hood which is does nicely. All these parts are from a 2004 Cobra which uses a 36mm all aluminum radiator. All other Mustangs except the Mach 1 have plastic end tanks. A/C compressor is now in and the new Mustang heater box also fits on the firewall. Just need to run the lines and the A/C system will be complete.
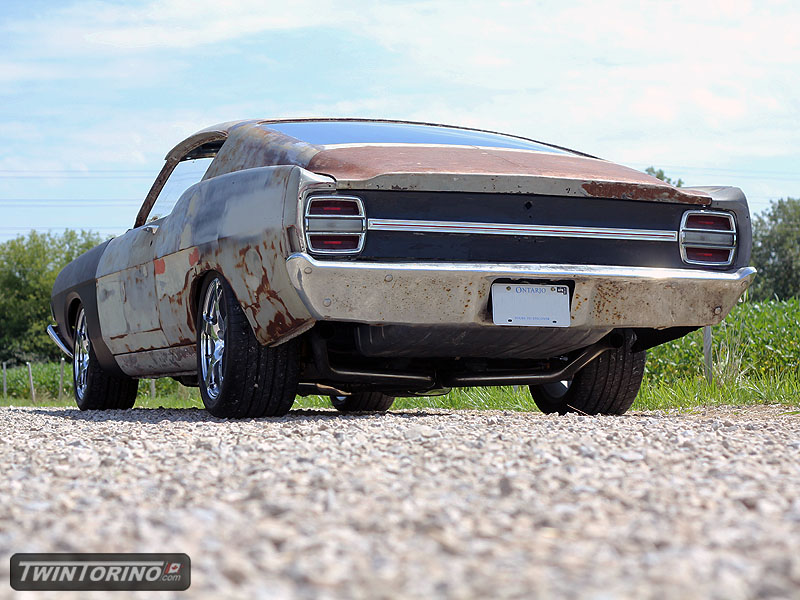
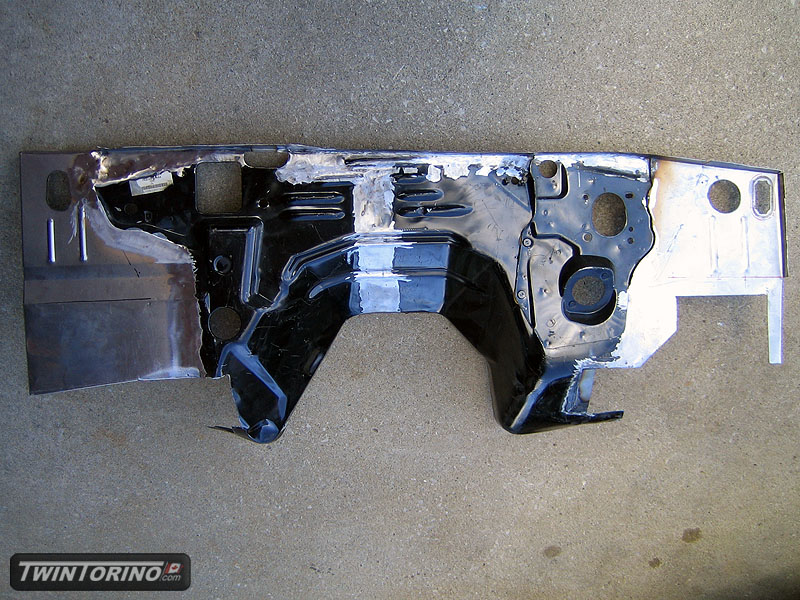
The firewall has been completed and is ready to install along with the floor pans. Rear suspension is nearing completion and just needs to be final welded. The only thing missing in the pic is the upper coil spring retainer. ABS wiring is now in place. Last thing to do is run the hard lines which will come next.
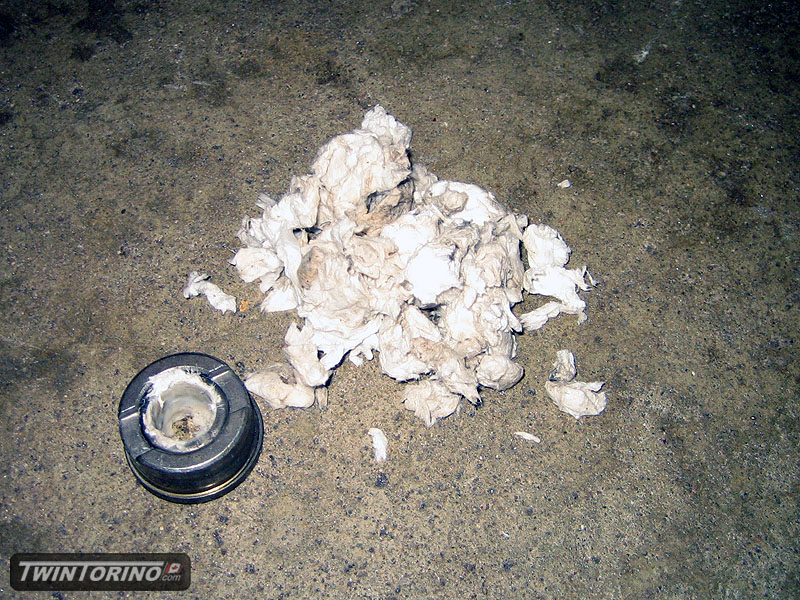
As an aside – I had never used the wet toilet paper trick to remove a pilot bearing so I figured I would give it a try. I am used to the messy grease trick. Surprisiningly this worked like a charm and clean-up is a breeze. You sure can fit a lot of paper in there! Installed a resurfaced 2004 Cobra aluminum flywheel, clutch, pressure plate, throwout bearing and clutch cable. Trans side of things is ready to go. Just need to get the mounts in.
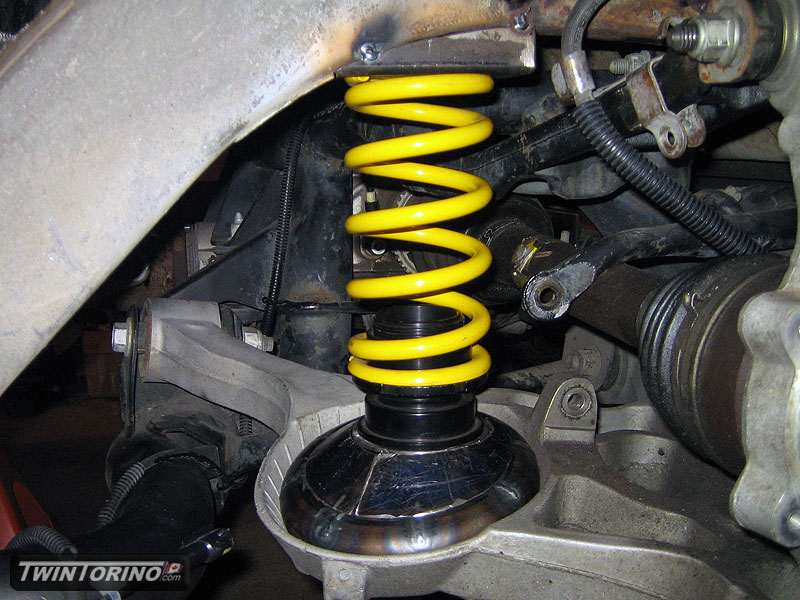
We put the car on the scales and put every part and piece we planned on putting on the car. Looks like the car will come in at around 3450lb curb weight (56%ft/44%rr). With driver and gear we are looking at around 3650lb track weight. We put the car in the air and measured all of the corner weights and using the motion ratios front and rear figured out what spring rates to use. We are using 2.5″ ID front springs and 60mm rear springs from Hypercoil. The target is to run a front ride frequency of ~1.55Hz and 1.7Hz in the rear for the street. For the track the ride frequencies will be similar front to rear.
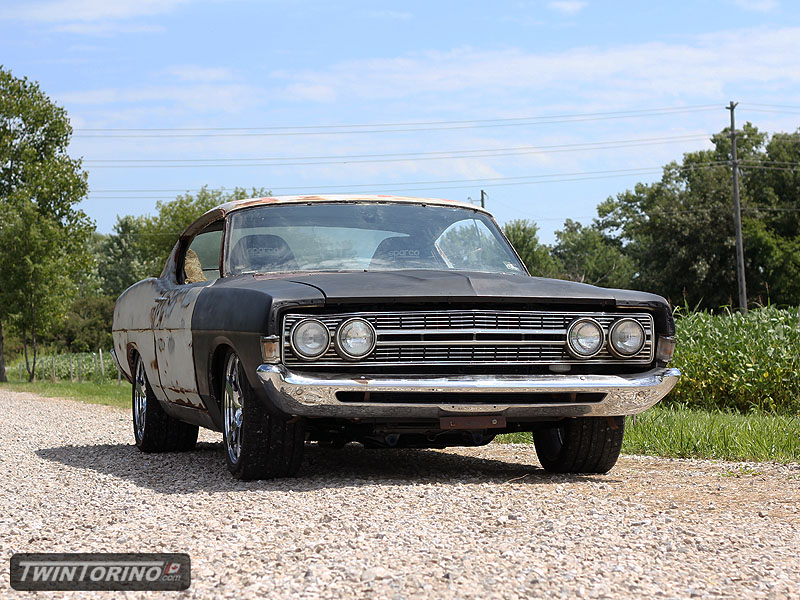
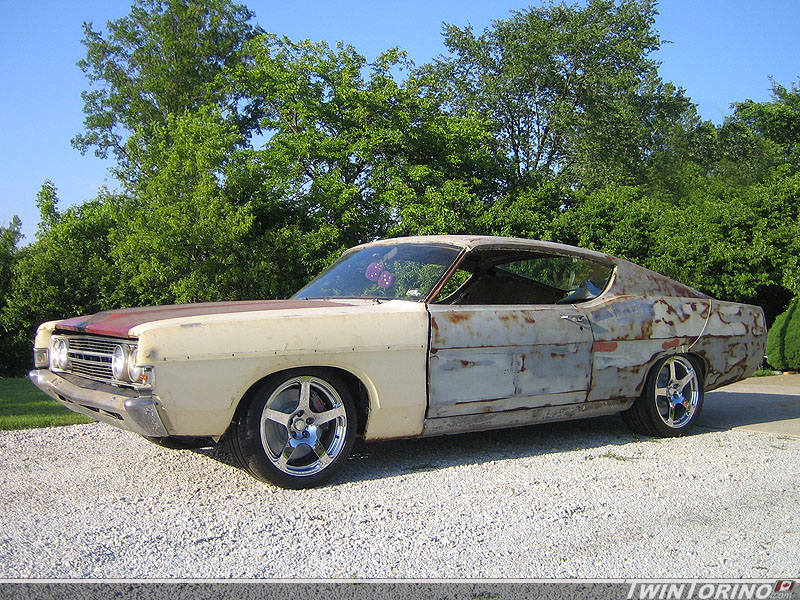
Wheels and Exterior Shots
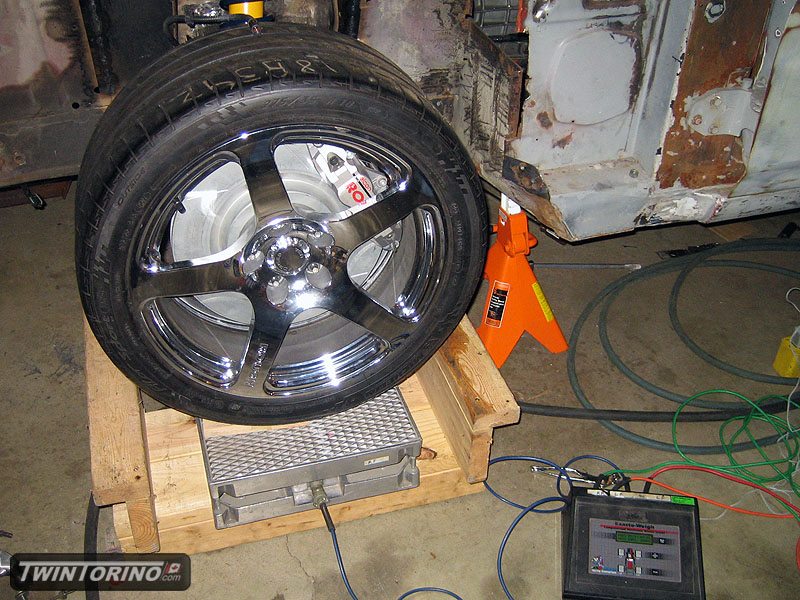
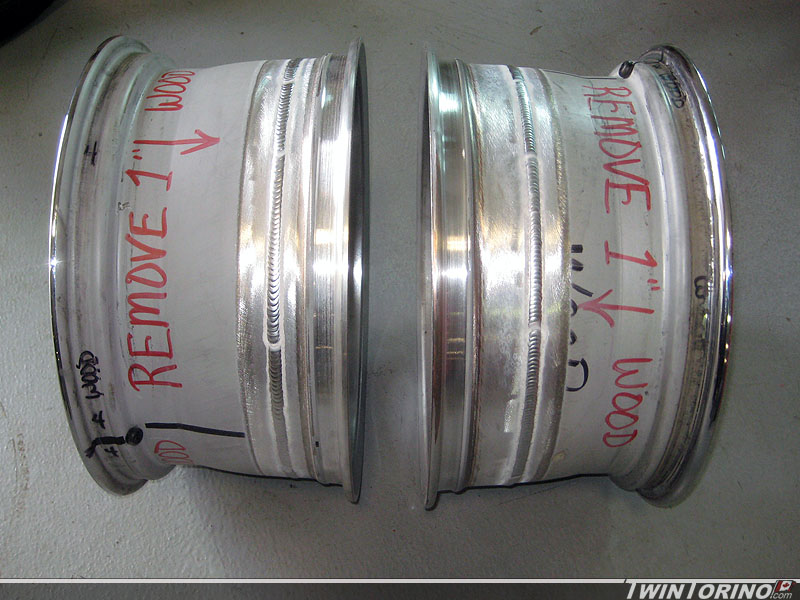
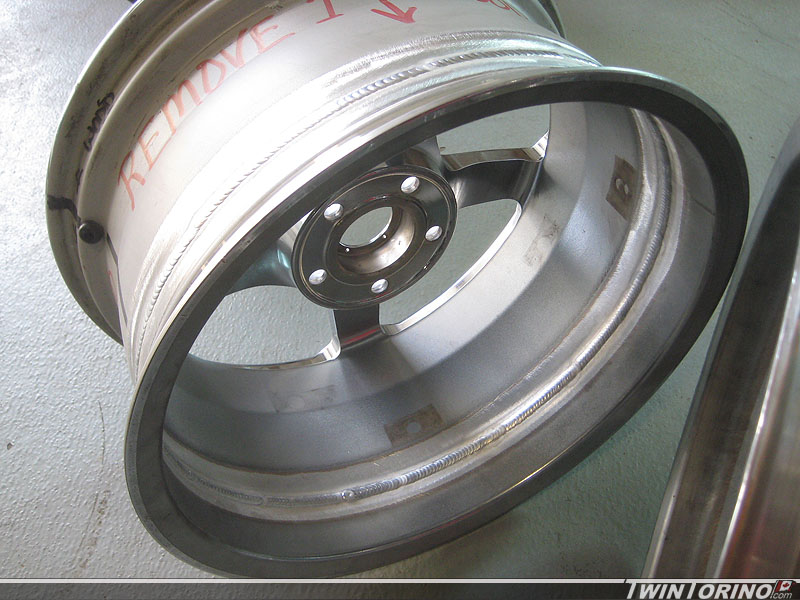
Finally time for some inspirationsal shots. Got the wheels back yesterday from Weldcraft – they did an excellent job. I measured run-out on the machine and they were near perfect. They also took very little weight to balance.
We mounted up the wheels yesterday and dropped the car on the ground and rolled it outside for the first time in years. Got the ride height pretty close to where it will be – looks pretty mean. Front suspension is riding on the coil-overs, and the rear is just blocked up using wood for now (waiting on springs).
Figued we may as well try throwing one of the engines in to see how everything fits while we are at it. Everything fits surprisingly well. Just need to establish where to drill holes in the relocated motor mounts to get the engine as far back as possible. Big thing is the supercharger clears the hood with lots of room to spare. May not end up running the hood scoop in the to keep the stealth theme going :).
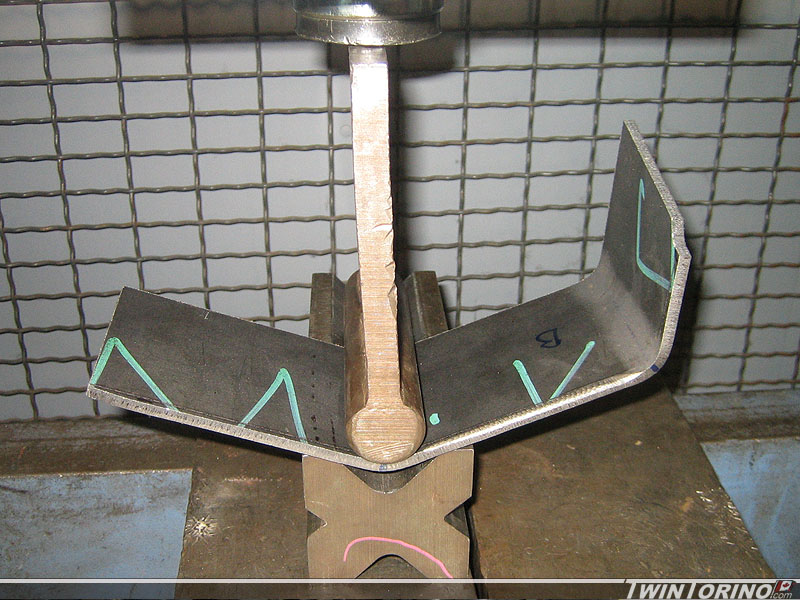
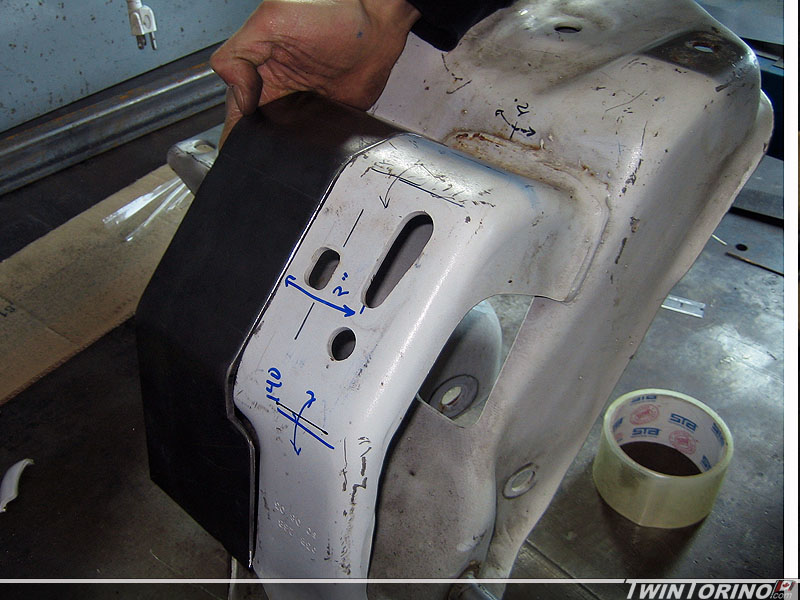
K-Member Engine Mounts and Wiring
Moving right along – have the Mustang K-member mounting tabs completed. Only thing left to do it shift the engine mounts back 3″ to get the engine as far back as possible. Since the steel on the stock mounts is 3/16″ thick, this means the std brake won’t cut it. Have to move the the hydraulic press for these bends. Got them ready to weld in over the weekend. Will get them welded in this week and then it is finally time to weld the front suspension permanently into the car.
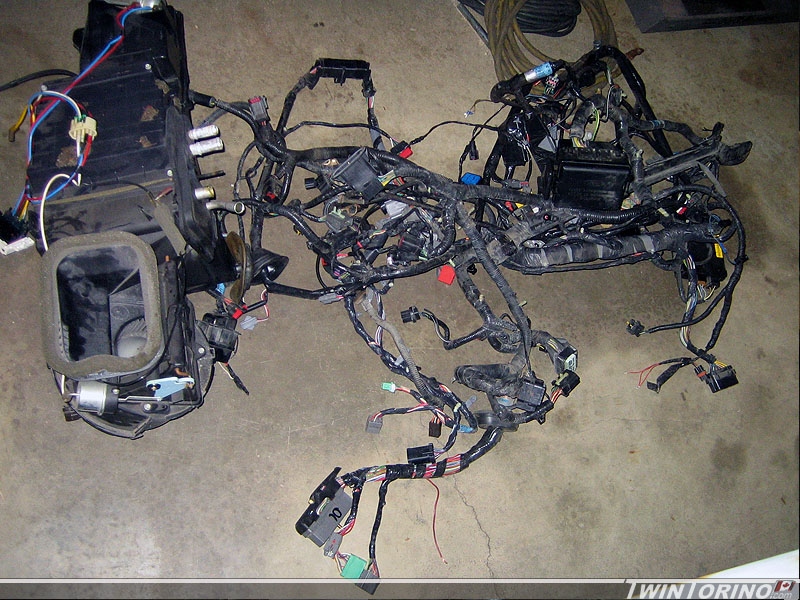
Also found a complete vehicle wiring harness set from a Mustang GT and heater box / ducting parts.
Engine Cradle Continued
Couple more updates from the past week.
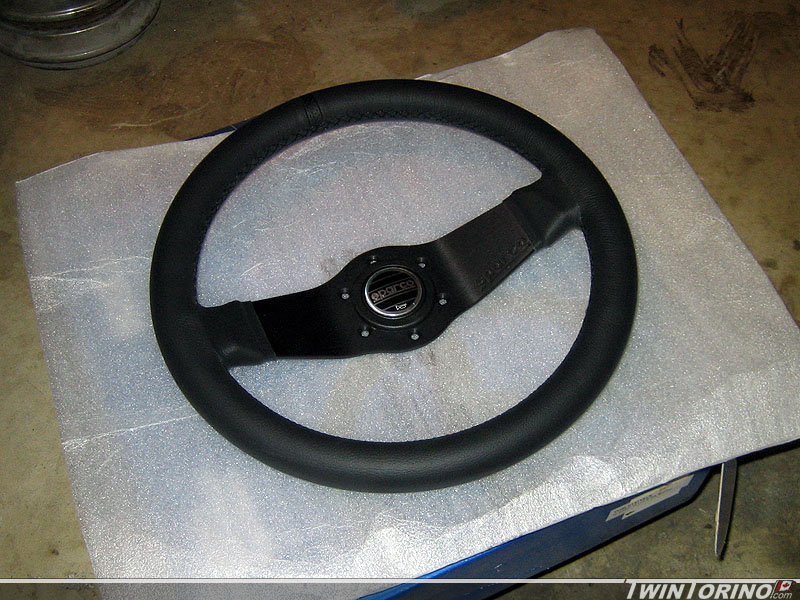
Finally found a steering wheel for the cars.. been looking for a while on this one. Two reasons for this choice: the style is “somewhat” similar to the original with the single horizonal bar, and secondly Sparco has been clearing out some wheels on Ebay cheap so this made them affordable too. We’ll see what it looks like in the car I guess. The model is called “Veloce” and is leather with the perforated leather strip at the top.
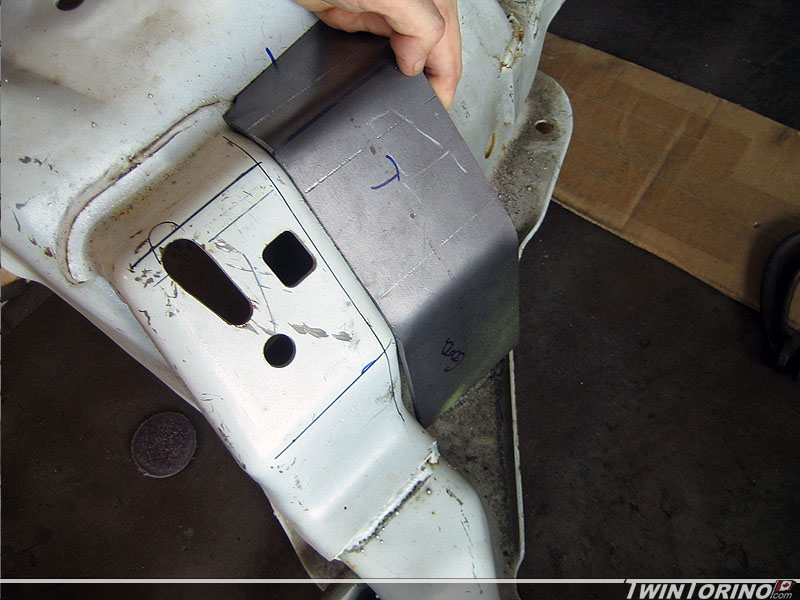
Moving right along on the front suspension. Pass side strut tower is done and ready to tack in. Next step was to make a perfectly centered and tight fitting k-member. The one we have been using to date is hacked up and really only for setting things up. Time to make another jig for this. As you can see, nothing too elaborate, but it serves it’s purpose. We used reference holes on the part used at the assembly plant to locate the jig. Then we made up 2×4’s that are the exact width between the frame rails. Finally two pieces of plywood are used to conform to the curves of the part. To use, the jig is placed on a Mustang K-member, sockets are placed in the 4 holes to located jig and then a utility knife blade is used to scribe lines on the parts. After that, we break out the plasma cutter and trim/grind to suit. Works like a charm! Making one for car #2 is now a breeze.
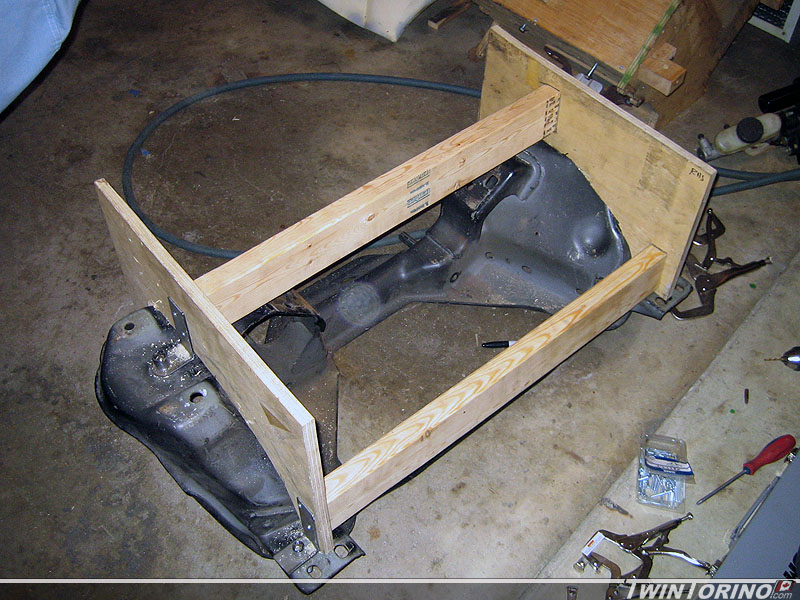
We used it to cut the k-member shown and it fits perfectly. That will make it very easy to weld in. Started on making up pieces to run under the frame rails to clean up the package and add a bit more stiffness. Kinda looks like the k-member was meant to be in there. Just need to make up the rear ones and the k-member will be ready to go in. Only thing left now is to weld in the filler panels and modify the motor mounts. After that, the front suspension is done!!