Articles Written By: Craig
First track day..
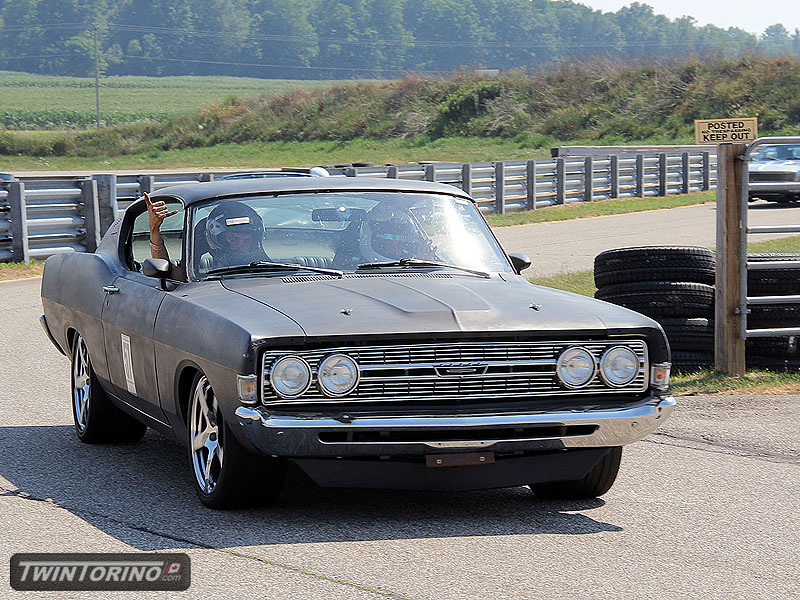
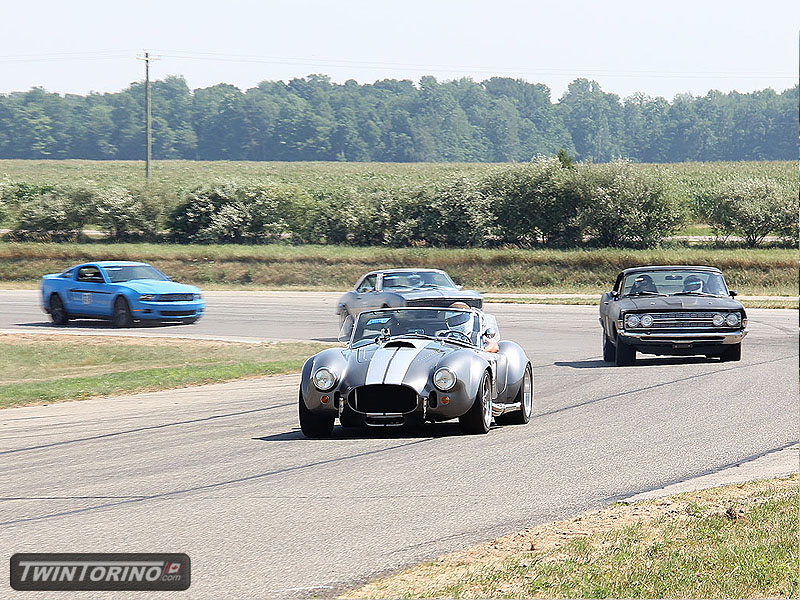
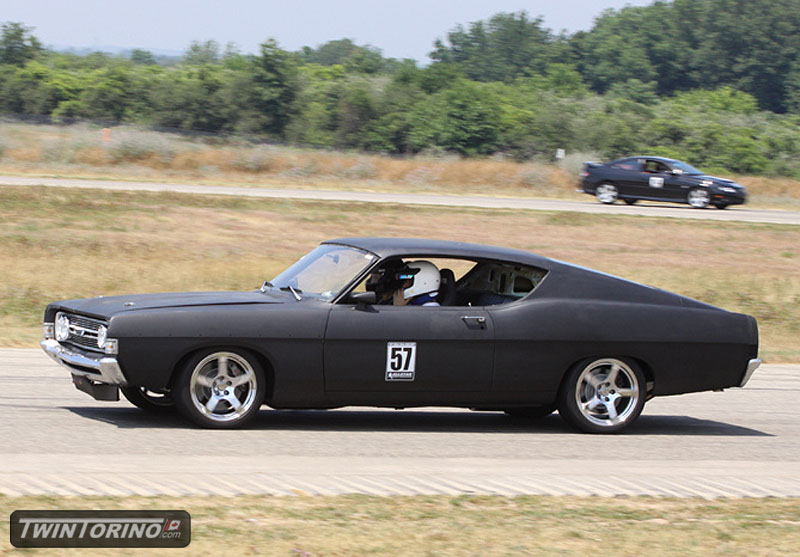
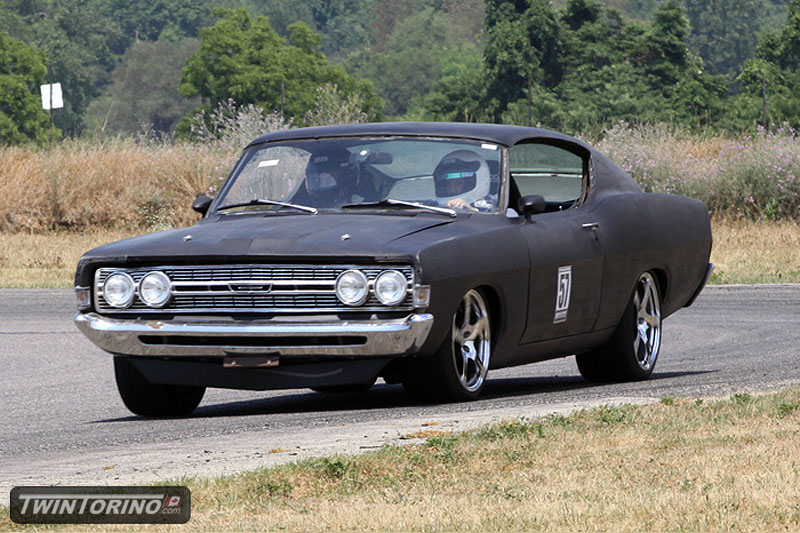
Finally time to put the car through its paces. This past weekend was the Motorstate Challenge at Gingerman Raceway in South Haven, MI. Had a great time out on the weekend. Did not push the car overly hard the first time out – just wanted to make sure everything worked as planned and started tuning all of the suspension components. ABS is still not functional – hope to have that turned on soon as it will make a big difference at the track. No heating issues or suspension issues which was great as it was quite hot out. Overall very happy how it worked. Couple more times out to the track and we should be much faster.

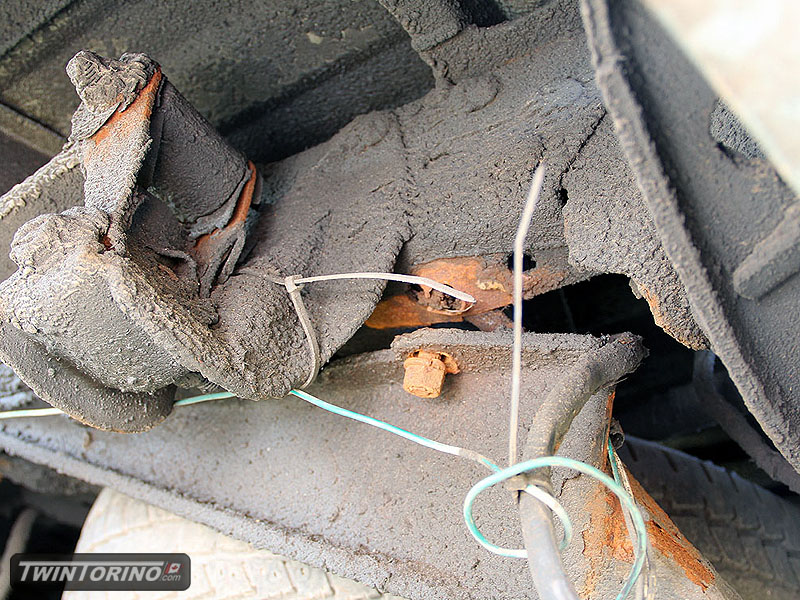
Didn’t break anything on the car.. unfortunately the same can’t be said about the truck. Halfway to the track (3.5 hour drive) the trailer hitch decided to pull itself through the frame rails. Made a loud bang and when we went to take a look – this is what we saw. No real fix for this on the go – pulled the Torino off the trailer and drove it the rest of the way. Also had to play it safe at the track since there was no ride home now if something broke. Ended up putting 300 miles more on the car than planned.
Couple of pictures taken by Lane Automotive. Maybe this is why front spoilers have stiffeners :). Need to add that to the t-do list. Special thanks to Torino420 for the Camaro spoiler idea.
Lots more pictures located at this site.
http://www.motorstate.com/photoGallery.htm
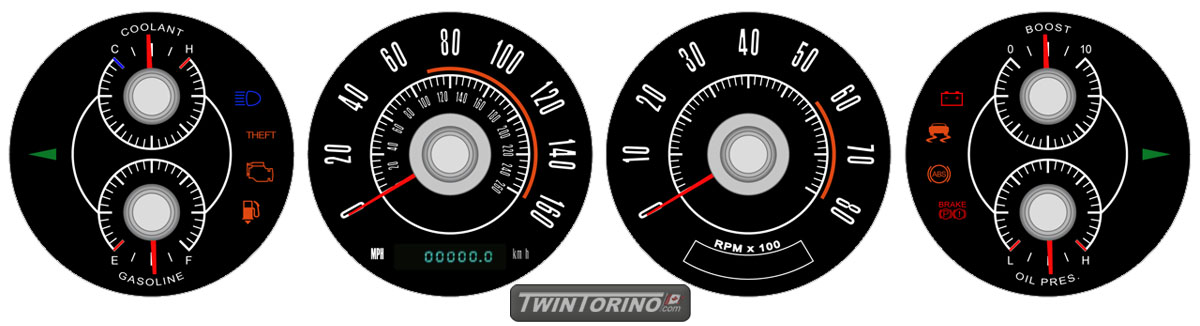
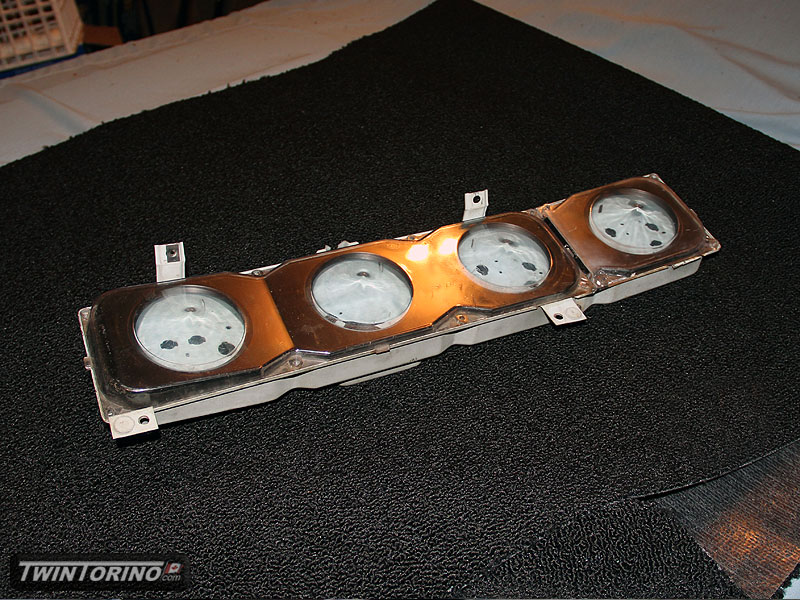
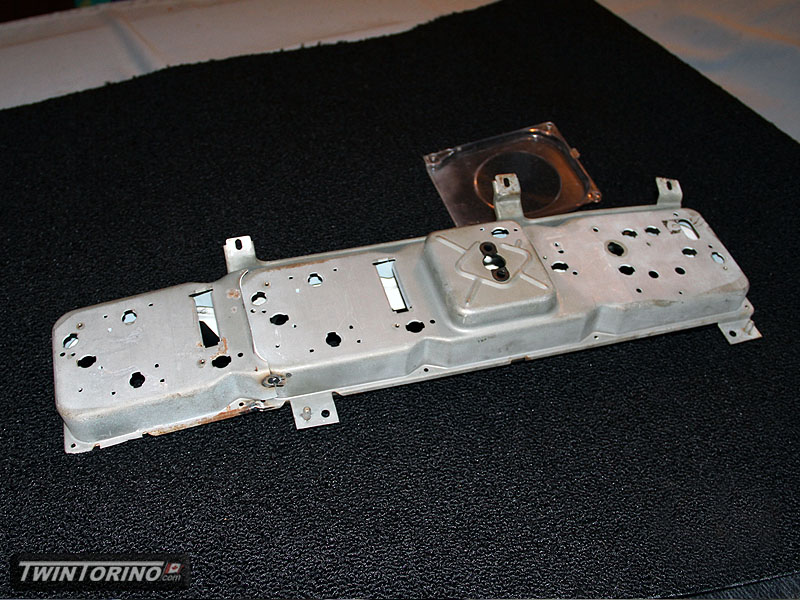
Ultra rare 4 pod cluster.. supposedly the only one every made :). Almost have it done and ready for the new gauges. Should have them done for the bash.
Detroit Train Station Pics..
Not a whole lot of obvious progress to report back although there have been lots of little things done. Have been having too much fun with the car having racked up well over 500km so far with no real issues. Car works great – especially after putting it on the alignment rack. Car is very well behaved and very responsive. I sure enjoy having 6th gear on the highway too. Going to put the smaller pulley on the supercharger this week to wake it up a bit more too.
Heading to an autocross next weekend and then the next big event will be Gingerman next month for the Motorstate Challenge.
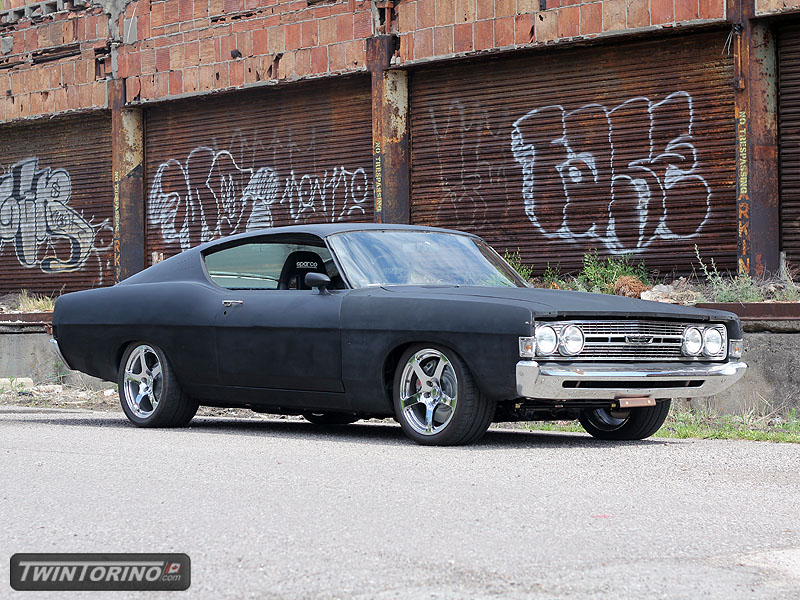
Car One Color Now!
Been a while since I have posted an update. Have been working on the cars a lot lately and finally have some time to post pics.
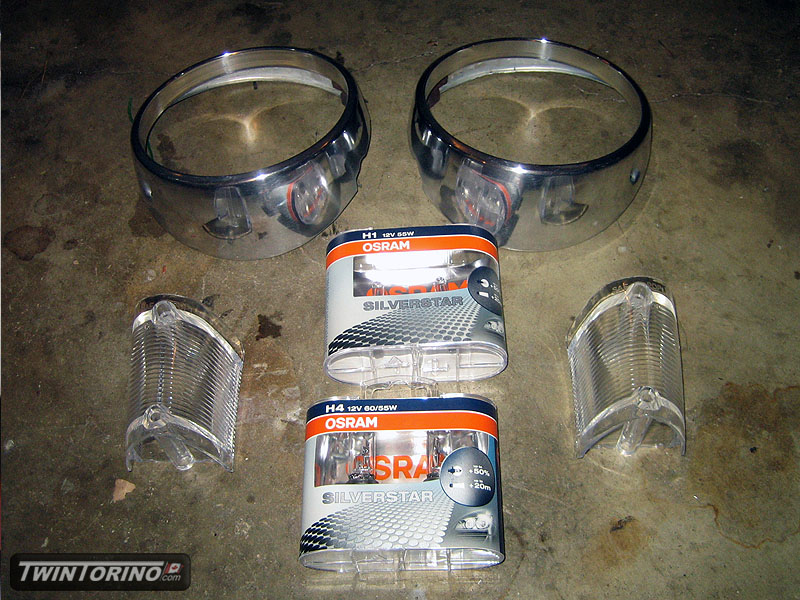
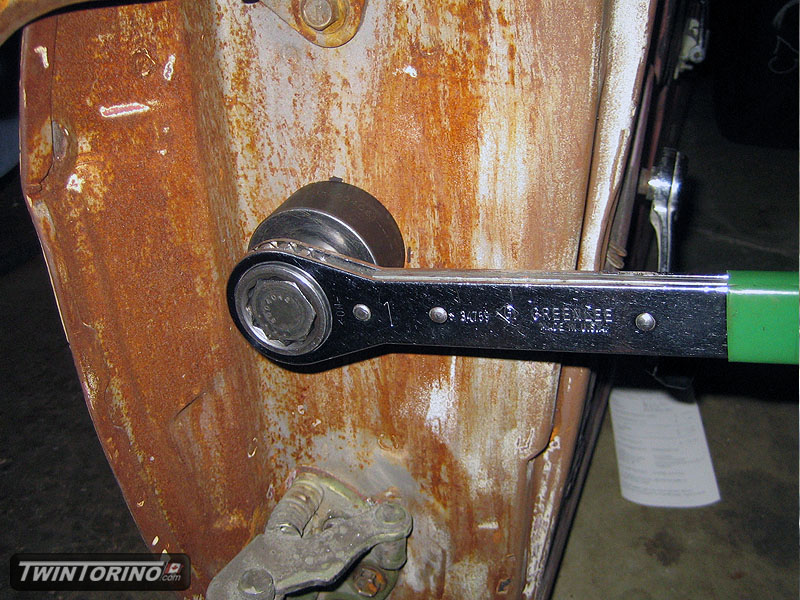
Wrapped up the front grille for the most part and got in bulbs (Osram Silverstars) from Europe. Also finished up the underbody and swapped out clutch discs (very long story while which would need to be told over drinks). Continued on finishing up most of the electrical in the interior and only need to get the cluster done and the will basically finish up the complicated part inside. Since the car had no power accesories in the doors, we had to add pass throughs. Tried using a Greenlee knock-out punch set this time and it worked perfect. Grommet is from a 1990’s Fox Body Mustang, but the part number actually traces back to the 70’s.
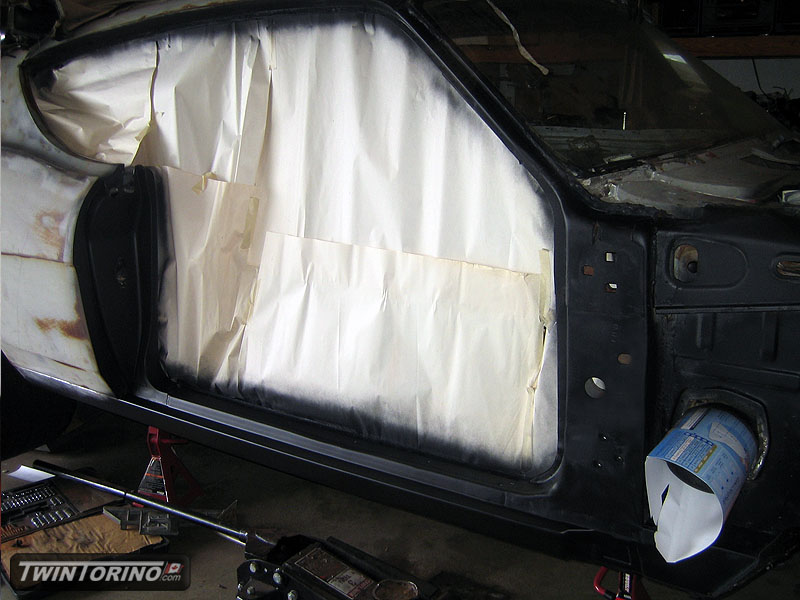
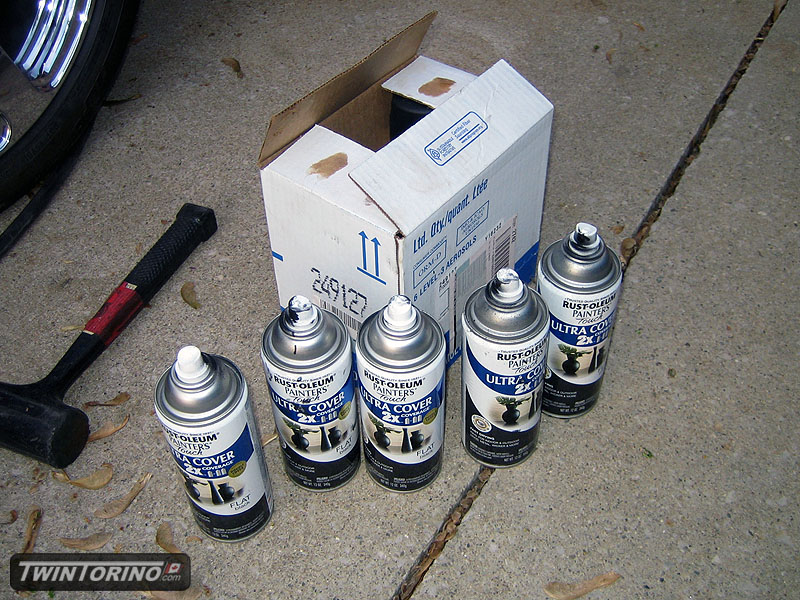
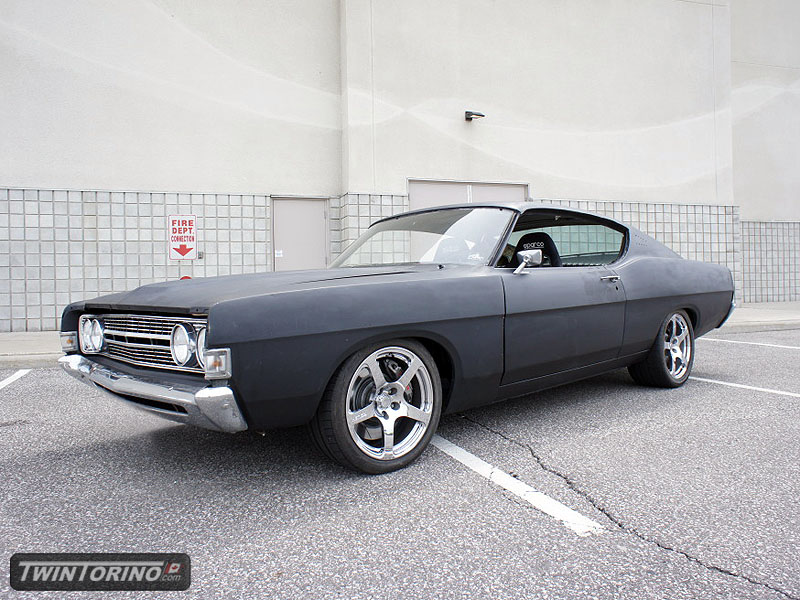
What next – time to put some paint on the car and make it one color. Paint of choice – Home Depot flat black of course. $50 of paint and a day of elbowgrease and it is now done for the time being. Paint booth was a morning in the garage followed by a nice hot sunny day outside :). We will finish up the trim etc of the coming months, but we wanted to make it at least road worthy again. We went to the first show of the weekend and put about 30 miles on the car. Works great. Time to get the car ready for Motorstate now.

Details and Lighting..
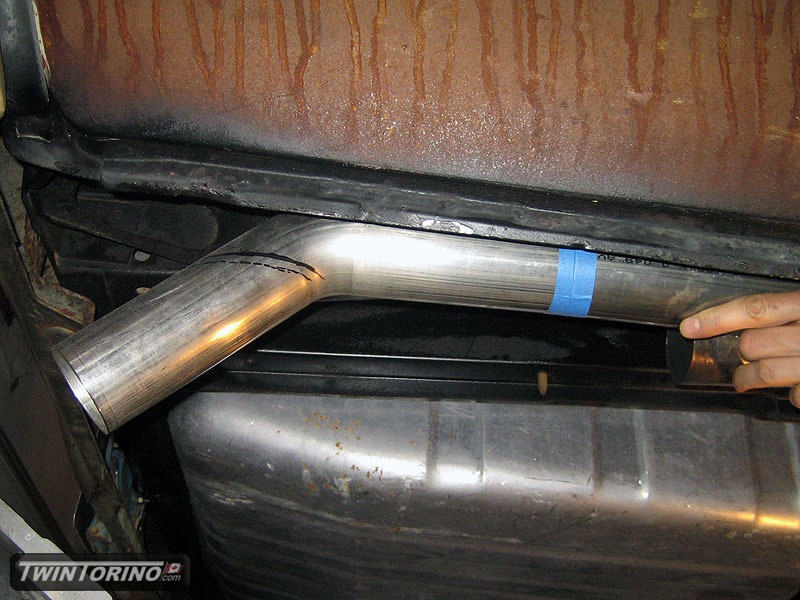
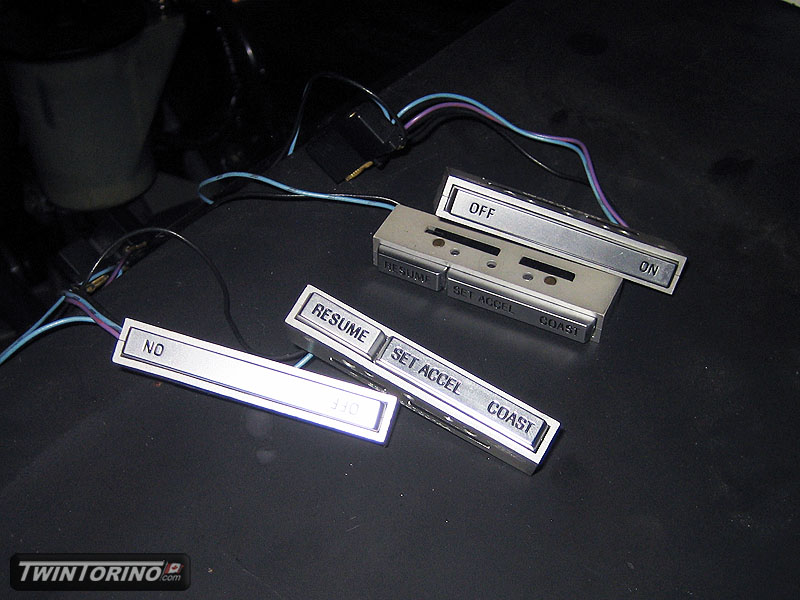
Moving right along.. time for the details now as we are slowly running out of things to do. Time to start making things look good. Have spent a lot of time sandblasting powdercoating brackets etc. Also decided to wrap up exhaust while we were at it. Going with the stealth tips for now and will be cut almost flush with the rear body line when done. Was not sure what to do about the cruise control as most steering wheel buttons don’t look right in an old car. Other issue is having the electronics on the buttons work with the modern electronics. Turns out a mid 80’s Crown Vic fits the bill here. They are metal looking buttons that do not look at all out of place on the Torino. They will likely make their way beneath the dash in custom housings.
Next was lightning. Lots of options here.. most of them are sub par. Seems most lights are looks over function. Several paths we can take here. Go out in left field and make a custom HID setup using the guts of a new Ford HID light (Mustang, Taurus, Explorer etc). That just screams $$ and time. We’ll revisit this later. Note that putting HID bulbs in a standard halogen based housing does not count. HID bulbs require their own custom projectors and provide horrible optics when placed in a non-HID designed housing, and will also blind oncoming traffic with even the low beams on. Not quite sure why this fad has taken off in the aftermarket. There is a reason why cheap HID kits are only $100, and high end ones with the correct housings are 10x as much.
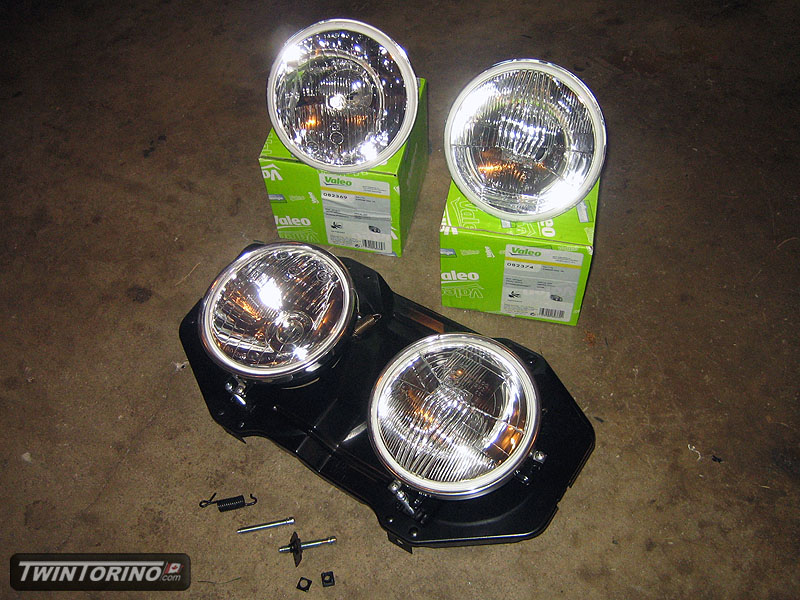
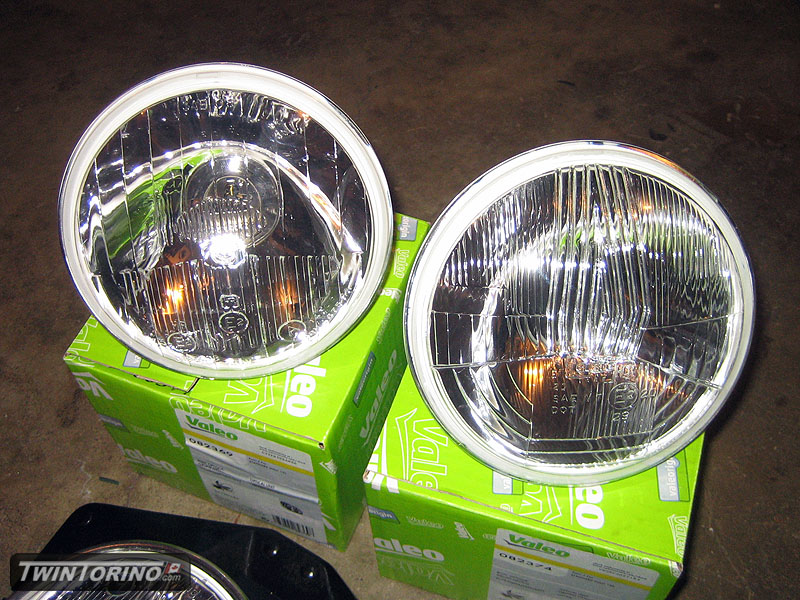
Ok.. back to the point here. Several options for Halogen based lighting. Goal was to run H4 for the outer bulbs and H1 for the inners. Main objective is to have a crisp lighting cut-off and glare free lightning. Basically be able run very bright lights without blinding oncoming traffic but still be able to see everything. Three obvious options in the order of increasing cost: Autopal, Bosch and Cibie. Pricing wise, one Cibie housing costs the same as a set of 4 Autopals. There are mixed reviews out there on the Autopals, plus they are not easily available with convex lenses – only flats here in North America. You can get the H4’s in convex (HL-103-H4), but no H1’s (HL-103-H1). I looked everywhere – only place you can get them is in Australia. Shipping cost rules out that option. Next is Bosch. Not a fan of the look of Bosch housings as they only come in flat lens, and they get mixed reviews. The last selection is Cibie lights. These rise above the rest and then some. They are pretty much the best you can buy as far as optics go. I was not really interested in paying the ridiculous prices they go for over here, so since we needed 8 total lights for both cars, I decided to order direct from the UK. Saved about $30/housing in the end with shipping included. I can’t wait to try these out. If they work as nice as they look, I will be all set. For now I will run the std 60/55W H4’s and 55W H1’s. Both with be Osram Silverstars which are on order from the UK. Note that since Torino parts are scarce, 1969 Mustang headlight kits were used and disassemled as used as donors. Since they rest of the car was built using the best of parts, the optics should be no exception.
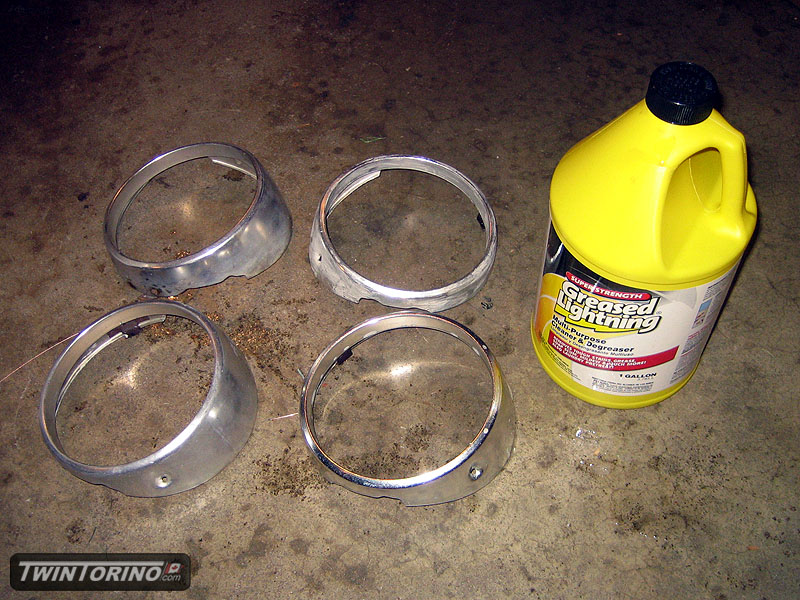
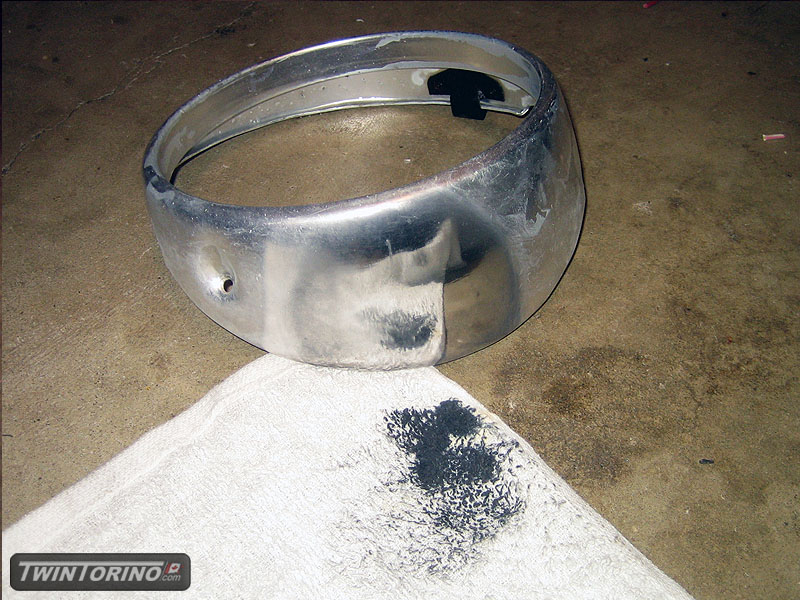
Next is the trim. Half the trim on this car is anodized aluminum. It may look nice new, but the years are not kind to this combo. Problem is the aluminum is anodized which means there is really nothing you can do to polish it up when it starts to dull. Solution here is to strip the anodize, re-polish and then re-seal, likely by powdercoating. After looking into this, I decided to give the cheap alternative a try first. This was Greased Lightning which I got from Home Depot for under $10. Did it work – sure did. The easy way to tell is to use std metal polish – if the rag turns black, you are in contact with bare aluminum. More to follow here, as well and getting started on stripping the grille.
Dash work continues
Most of the work has been going on in the interior. This is the downfall to not using a modern mustang dash on the car, although I think this will be pretty slick when completed.
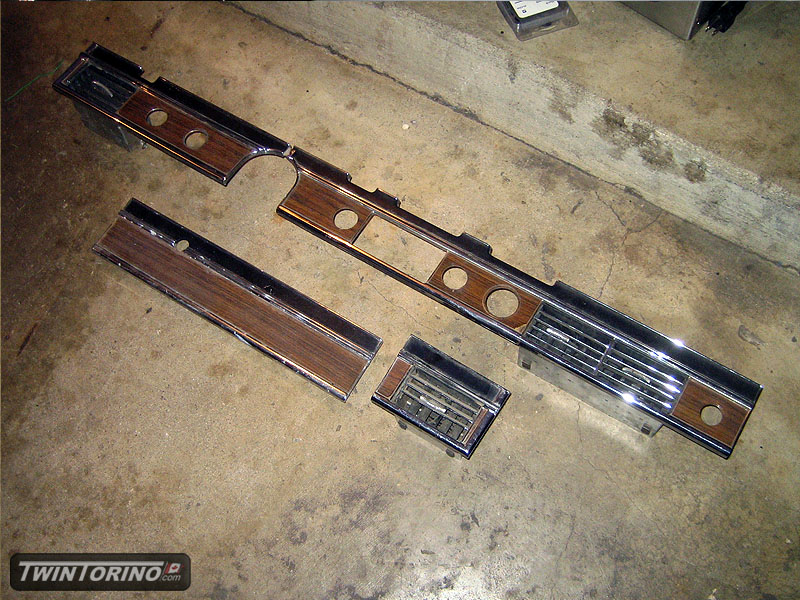
Decided to switch to a 1969 dash so it could be modernized a bit. We stripped off the old weatherend woodgrain, cleaned/polished everything up and added a carbon fiber accent to the dash. Came out better than I was expecting – not too over the top.
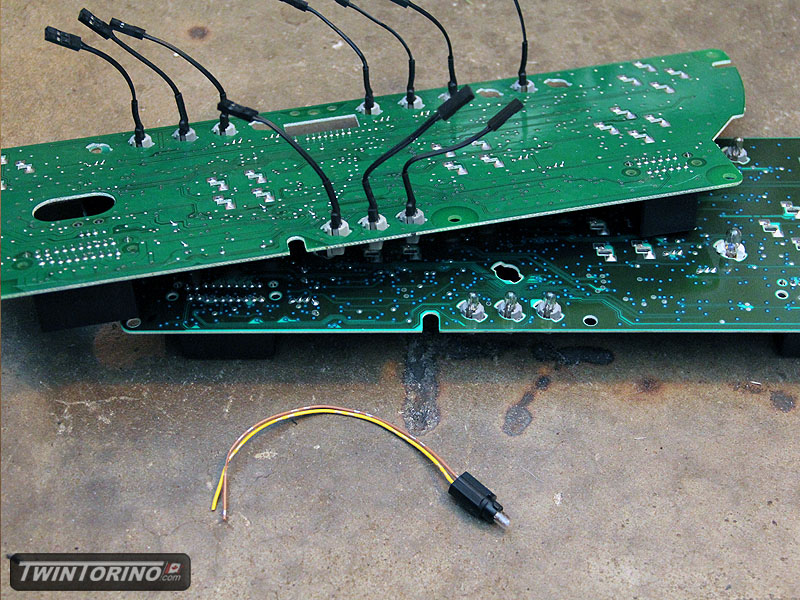
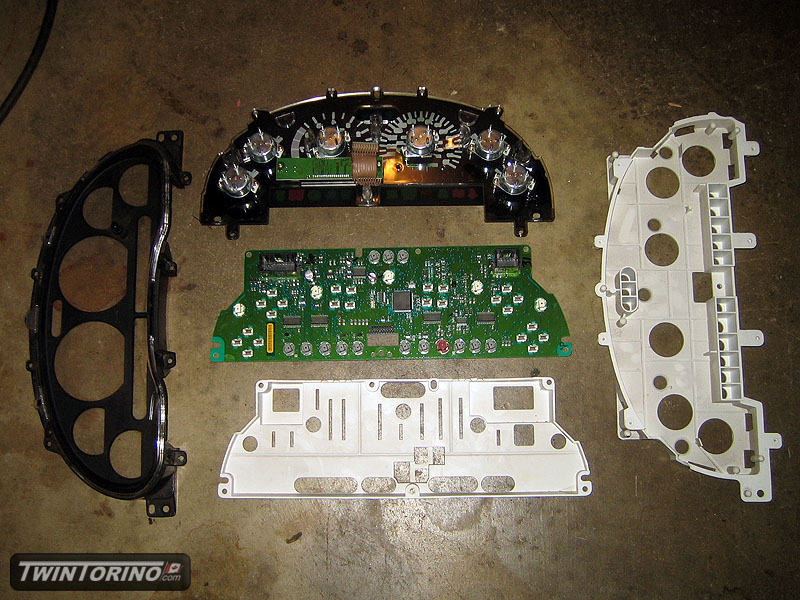
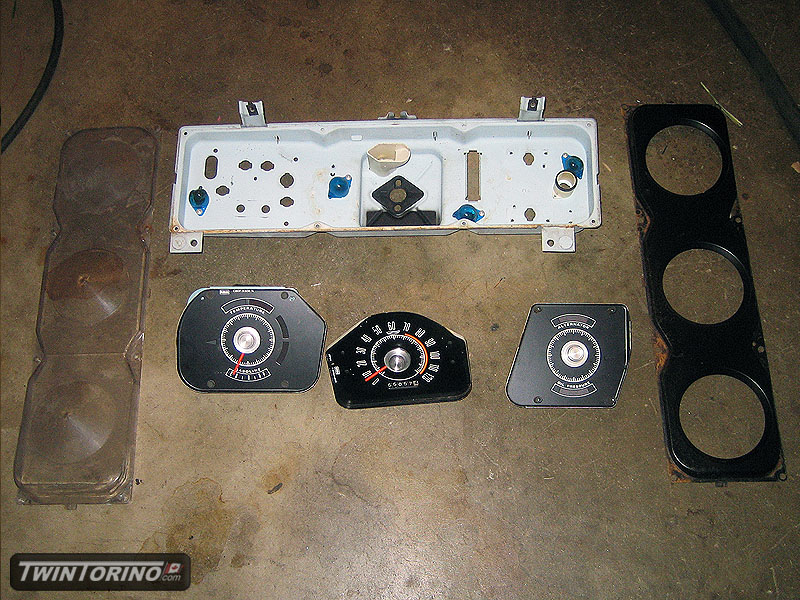
Instruement cluster design is basically complete – we ordered all the necessary parts and electrical pieces and are now ready to build everything up. This sure takes a lot more time than a person would think. Things like MIL lights, signal lights, backlighting should all make the cluster look like one from a brand new car when done. For the MIL lights, we found a harness than can be put in place of a std T5 dash bulb. By using another remote socket, we can put the light wherever we want.. in this case on the outer gauges. To mount everything, we are going to take 2 original clusters and merge them to get a setup with 4 gauges (originals had 3, and a 4th was screwed into the dash).
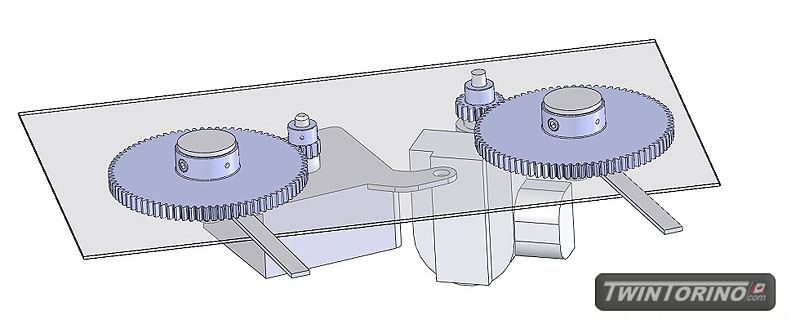
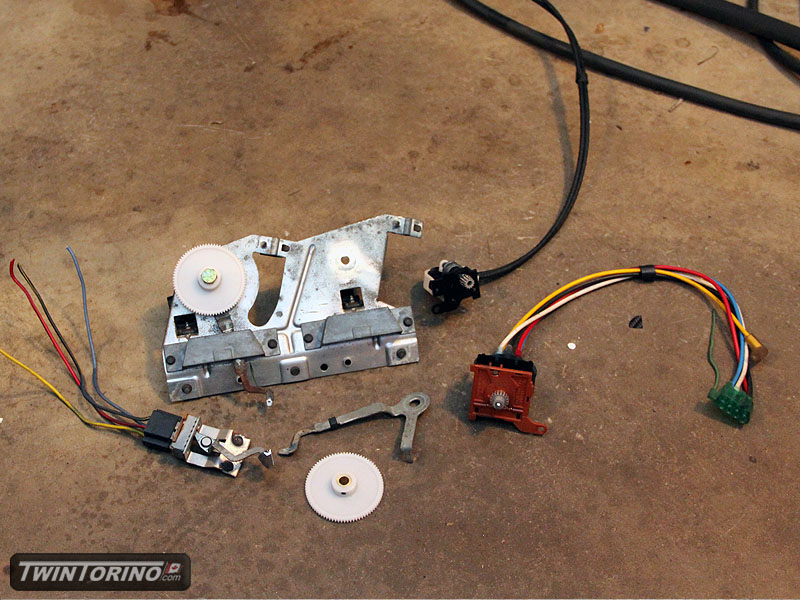
Heater controls are also a PITA – trying to convert linear motion to rotary motion so the original dash controls can operate the rotary dials from a new Mustang when done. Have ell the ratios figured out, ordered the parts and should have this done soon. With some rewiring, the original switch can be used to control the modern setup.

Sway bars done, cooling done..
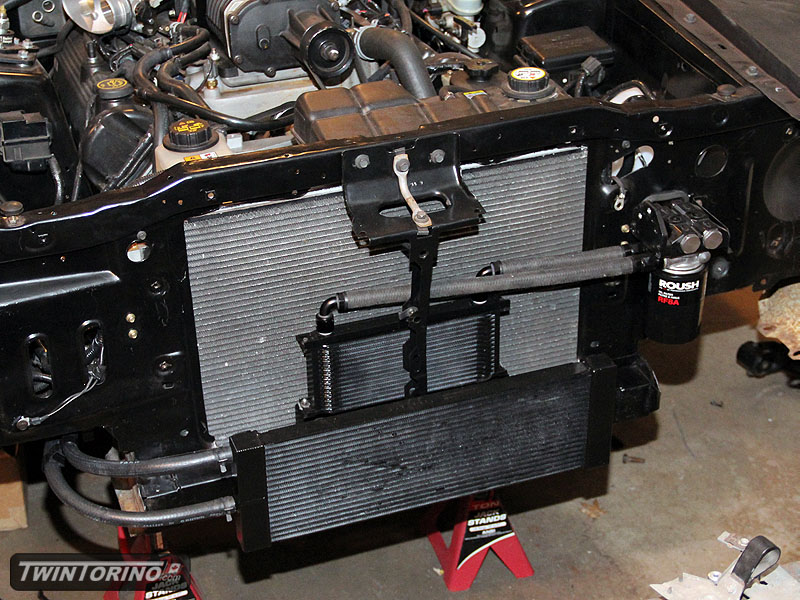
Been a while since I have had time to put together a post. We have been quite busy working on the car.. although most of the things like electrical etc don’t really provide for exciting progress pictures. Cooling system is basically wrapped up. Intercooler heat exchanger is in and ready to run, as is the oil cooler system.
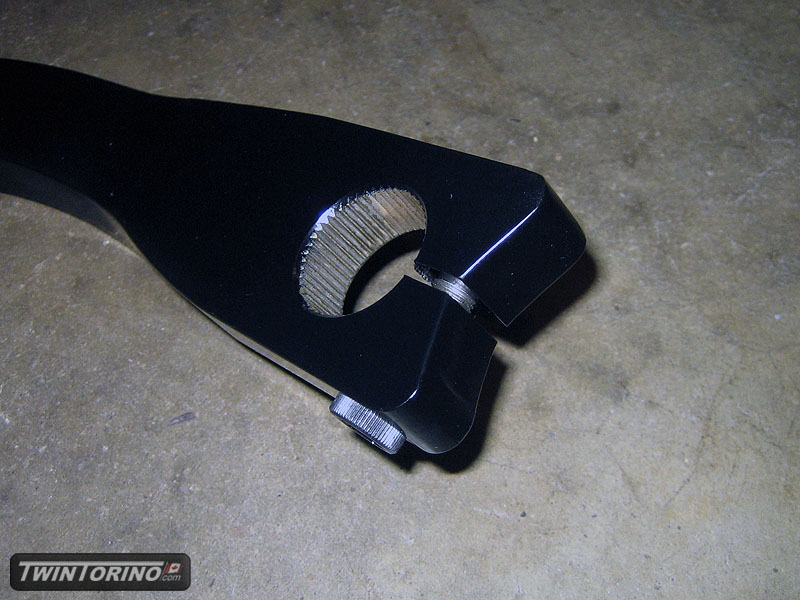
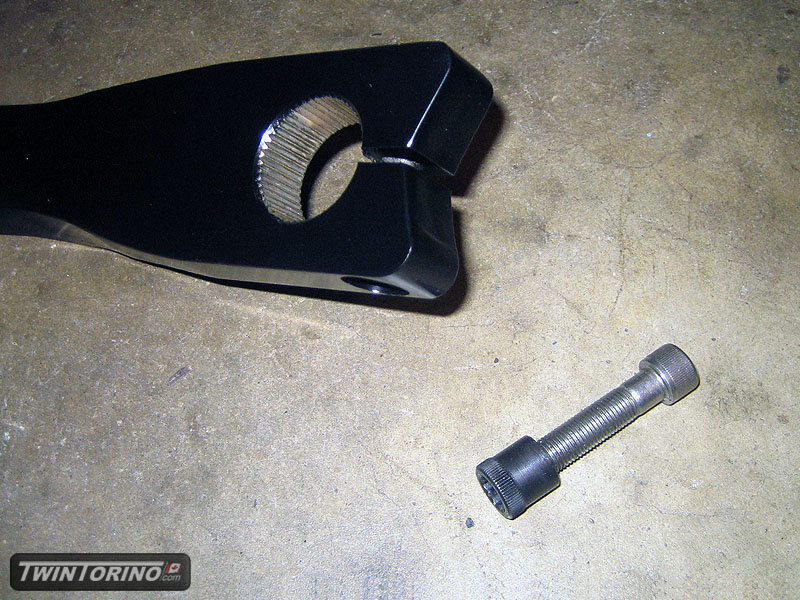
Sway bar is now in and complete. Did some machining on the arms to make them easier to assemble and to clean them up a bit. After that, powdercoated everything and installed. Can’t wait to actually try this thing out on a corner.

Sway Bars Continued..
Drivers side sway bar bend up and completed. Sway bar mounts attached, collars installed and ready to go.
With this.. front and rear suspension design and fabrication = DONE! Finally.
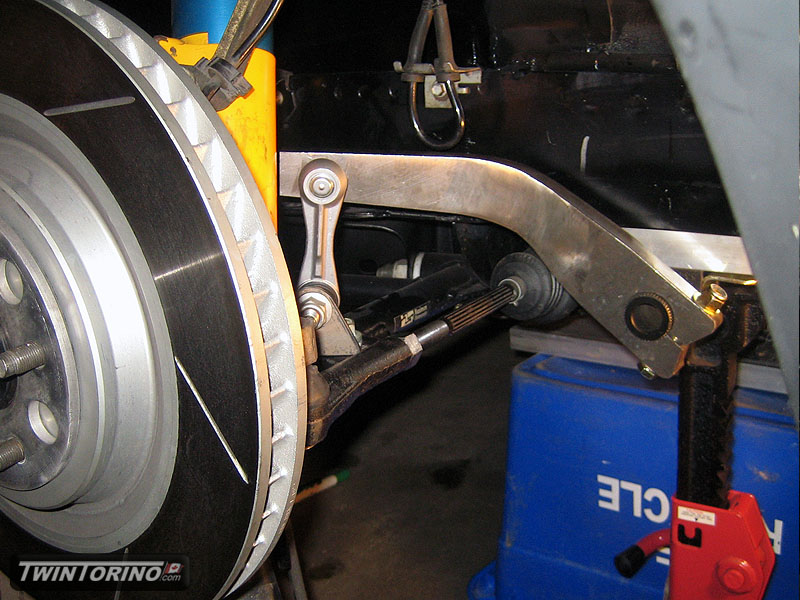
Front Sway Bars
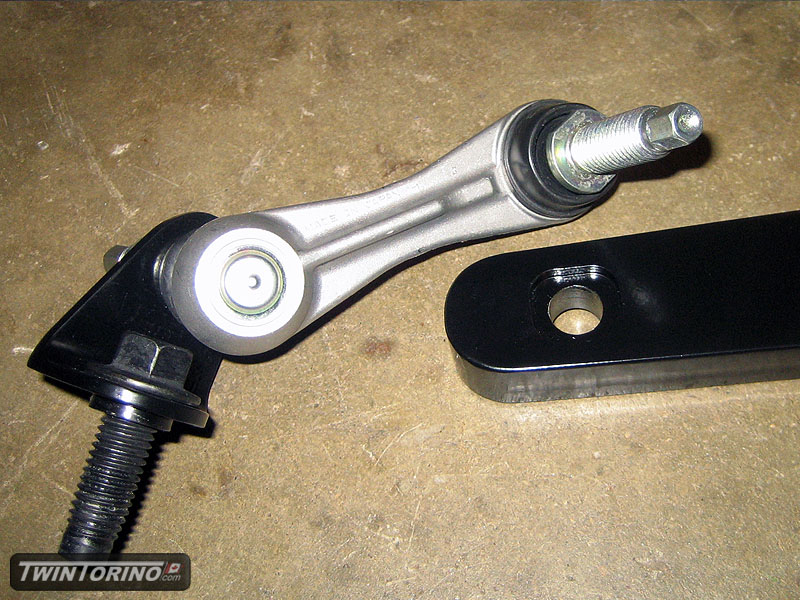
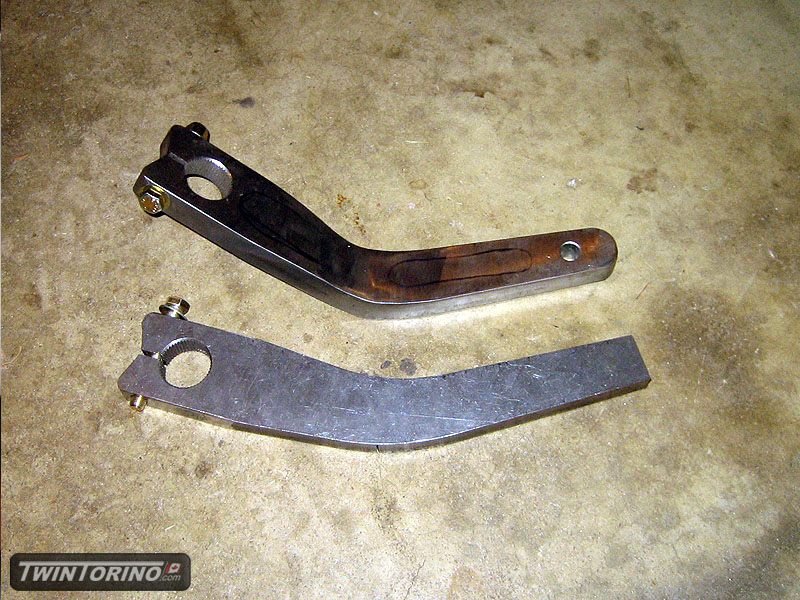
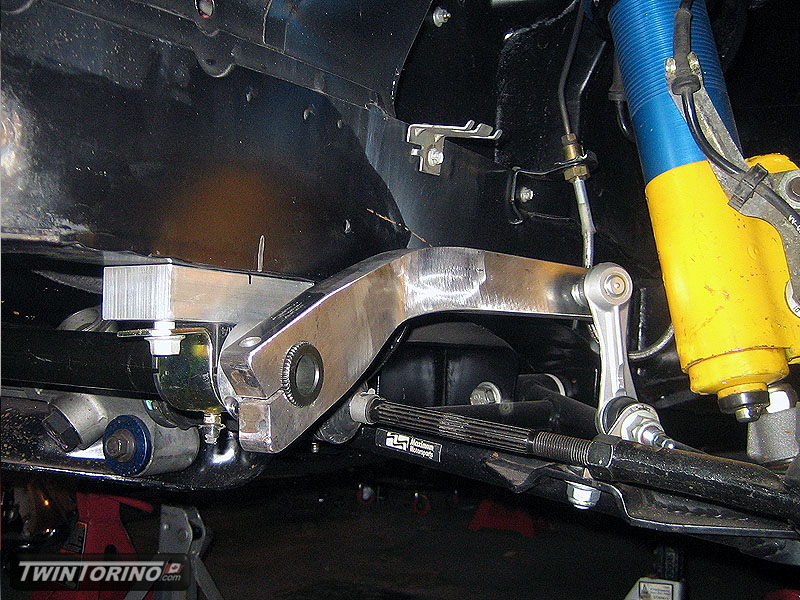
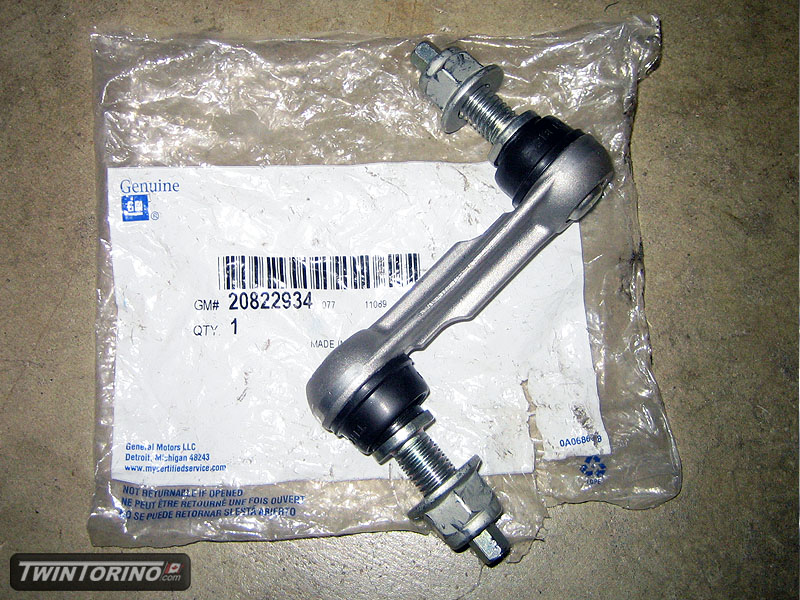
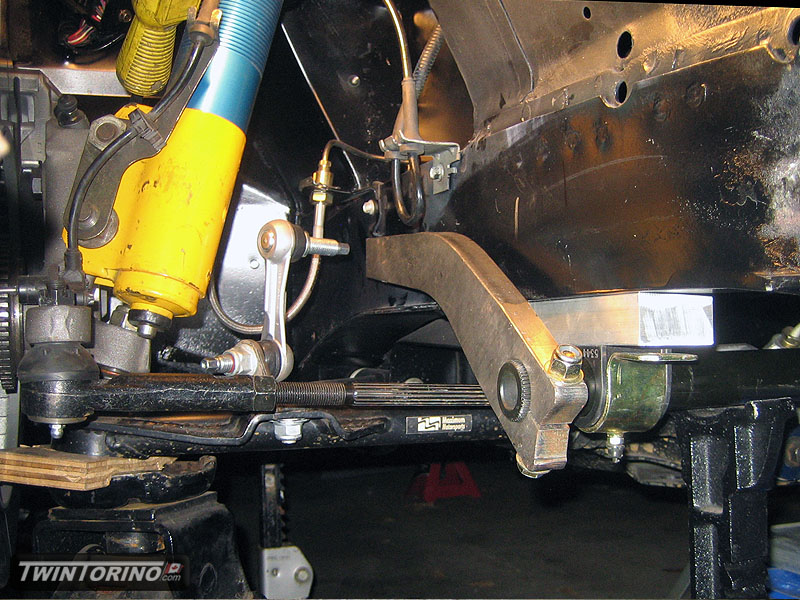
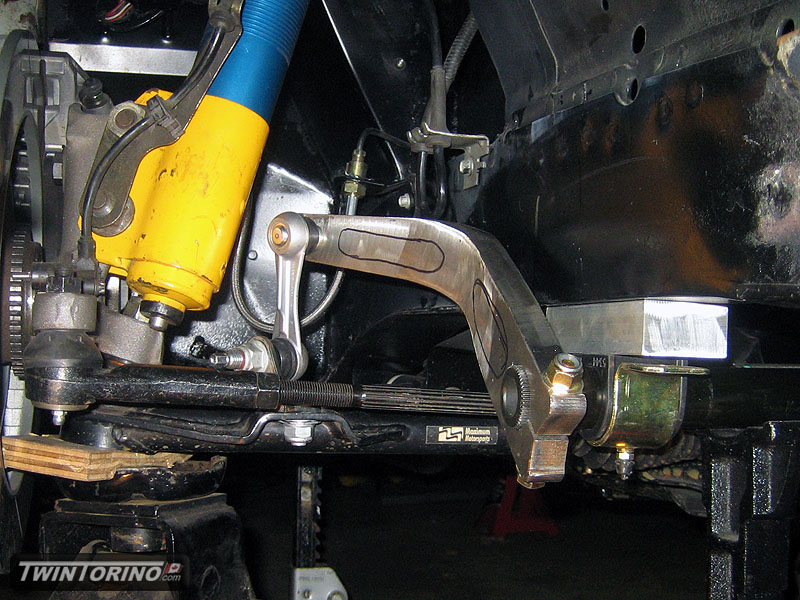
Back to the front suspension once again.. one last item to take care of – the sway bar. Since there is clearly nothing out there that would bolt right up.. we had to modify one to make it work. We are using a Speedway swaybar setup with 30deg steel arms. We have upgraded to using one of our first GM parts on this build. In this case, and aluminum C5/C6 Corvette end link. Since they do not bolt up directly to the control arms (of course not), we had to make up some interface brackets. The arms fit quite well, the only mod we really had to make is bending them 30deg to mate up with the end link. To clear the 275 tires up front, we had to notch the frame to be able to go full lock. After some cutting, v-notching, bending and welding, they kinda look like they came like that.
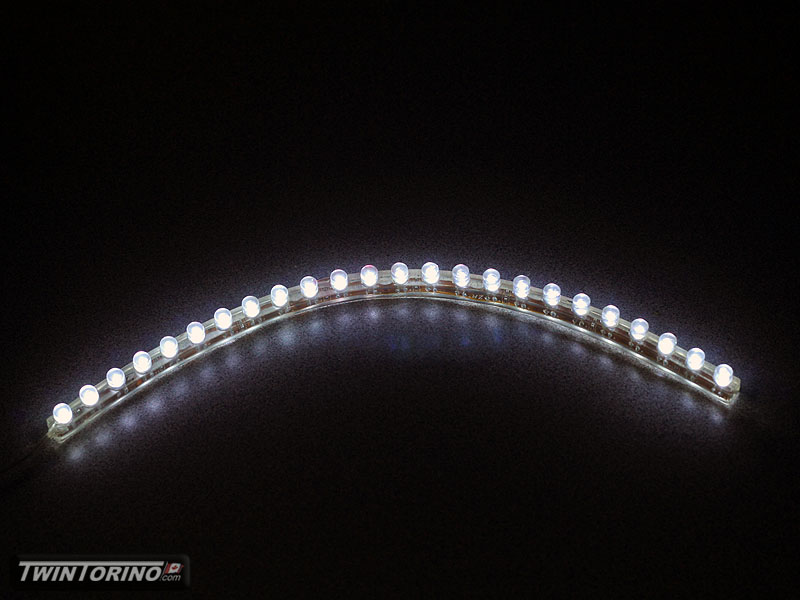
Also got in some LED’s for cluster backlighting. Will be interesting to see how they illunimate things.
Instrument Cluster – How to Make it Work
OK – this all sounds great in theory.. but how do we make it work?
Largest challenges include:
– Making up transparent faces with LED backlighting.. and on a budget
– Reversing the direction of the gas gauge and oil pressure gauge on the cluster so they follow a logic direction of rotation
– Packaging everything together
– Remotely connecting gauges and odometer to circuit board. This has to be done since the gauge spacing is different.
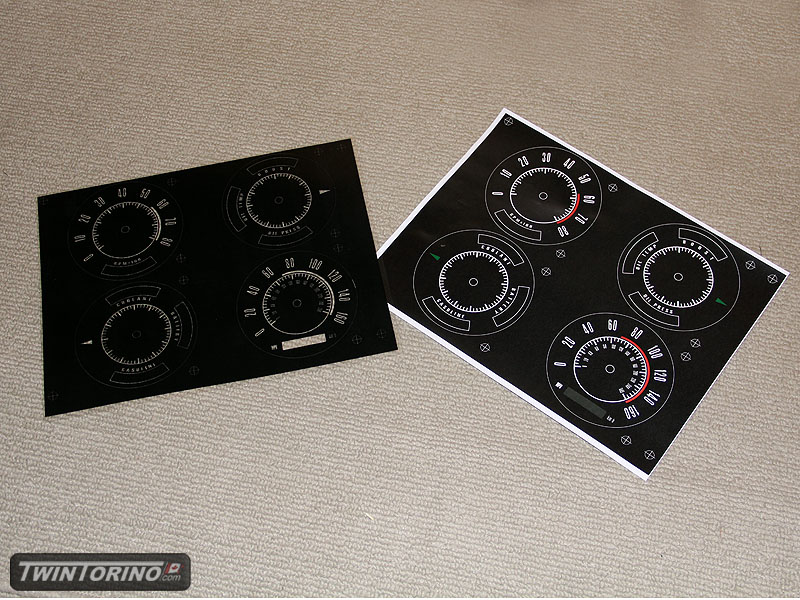
First task is working with gauge faces. After doing some extensive research on the web.. we came up with this solution. Since everything is done in Illustrator, it exists as a vector graphic. In a nutshell this means that you can increase the size of the images as large as you want an they will not distort (unlike normal rasterized images). In theory I could print this out large enough to put on the side of a building if I really wanted to  ). This provides for some very sharp images which is necessary for print out things like the text and tick marks.
By making up a set of layered images with a high res laser jet printer, we can get the transparent/opague effect. Top layer is a standard transparency sheet printed on the backside (image reversed). The bottom layer is a standard 20lb piece of white paper. Both of these sheets are bonded together to make one piece. Since I did not have the photo mount spray adhesive at the time of making these pictures up, you will have to use your imagination of what things will look like when they are perfectly aligned.
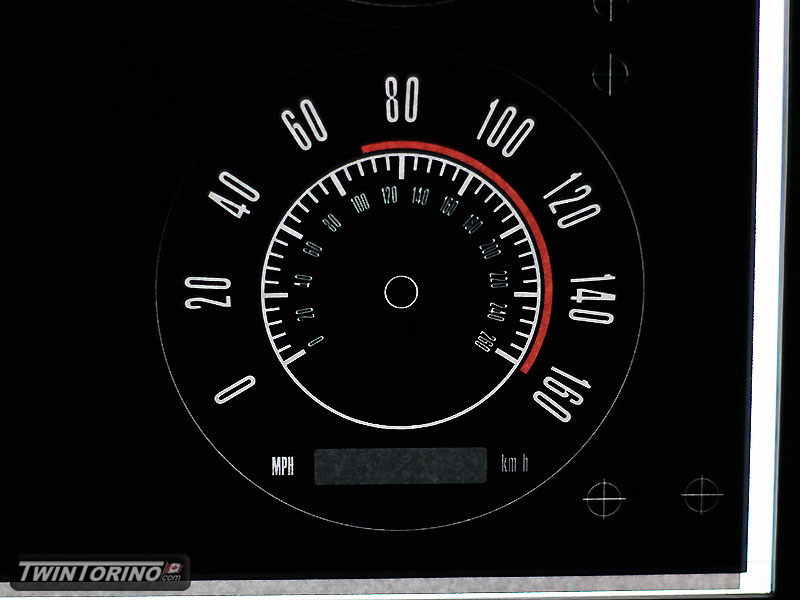
The final picture shows using an LCD computer monitor at night for backlighting. Little to no light passes through the black sections. Looks very similar to a modern cluster. This was relatively easy for the effect it gives. Ideally, we would silkscreen the parts on appropriate materials like auto manufacturers would.. but this will have to do for now until we lock in the design. For under $10, it sure does the trick.
For adding the check engine, ABS lights etc, we will simply add another transparency sheet and omit these images from the front layer. This way you will not be able to see them unless they are illuminated.
More to come as we progress.

Instrument Cluster Preview
Since winter is basically here.. time to move back into the interior and work on all of the electrical items that have been neglected. For the past while, we have been driving around with a new Mustang cluster buried behind the original dash. If the spacing between gauges were similar this would be OK for now, but they are far off which make seeing anything next to impossible. That brings back the dash design we started years ago.
Several goals with this design:
– Maintain overall original 1968 looking gauges – this was a one year only color
– Backlight with LED’s instead of the original front lighting (requires transparent faces)
– Integrate Mustang air core gauges into cluster so they can be hooked up to the Mustang cluster electronincs
– Use newer style Mustang digital odometer
– Add more real gauges instead of idiot lights
– Integrate all of the Mustang dash lights like ABS, check engine, traction control etc..
– House everything in a modified original Torino gauge cluster housing
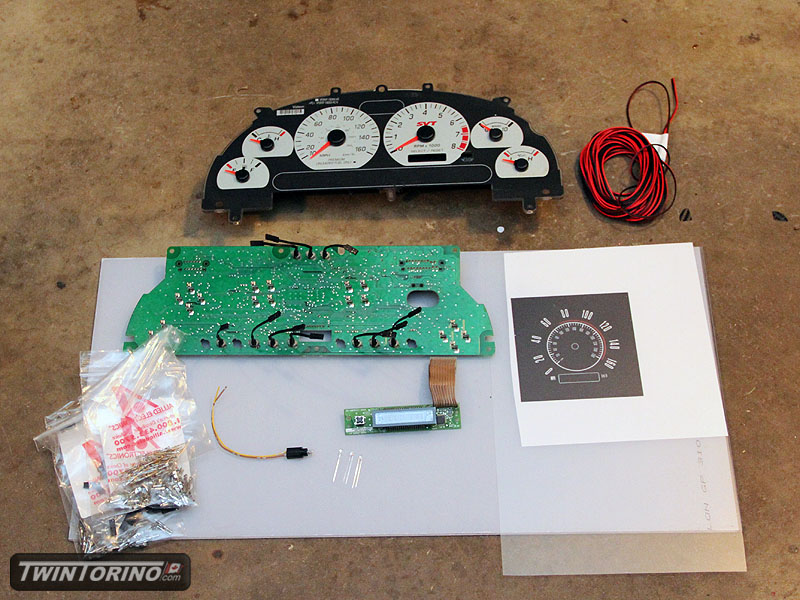
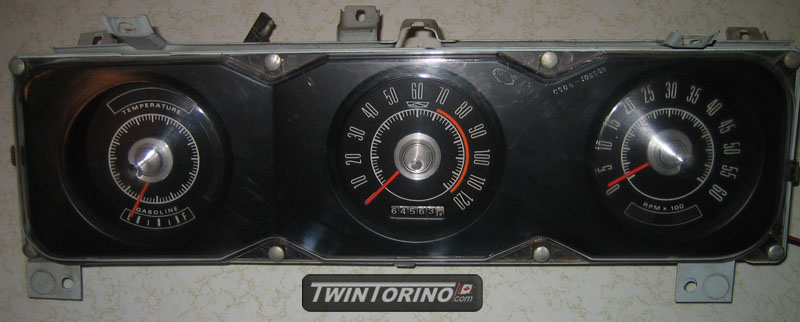
First a look at the oringal parts and pieces. Here are the references – an original 1968 cluster with the tach option, and the “donor” 2003/2004 Cobra cluster with a boost gauge. After that, some spare clusters we have for mock-up – a Mustang GT gauge cluster and a base 1968 Torino cluster.

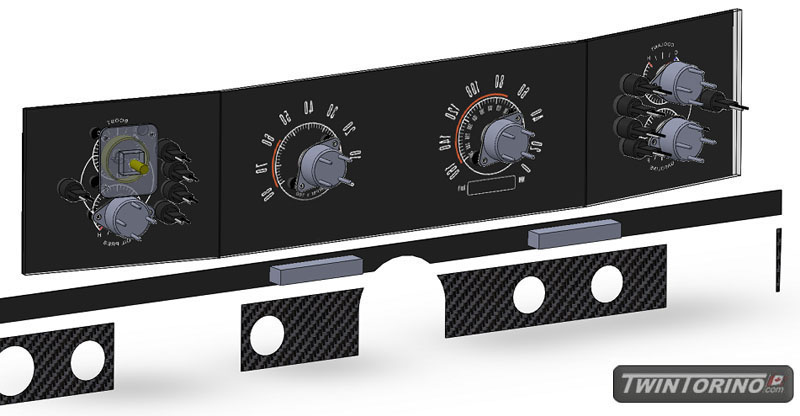
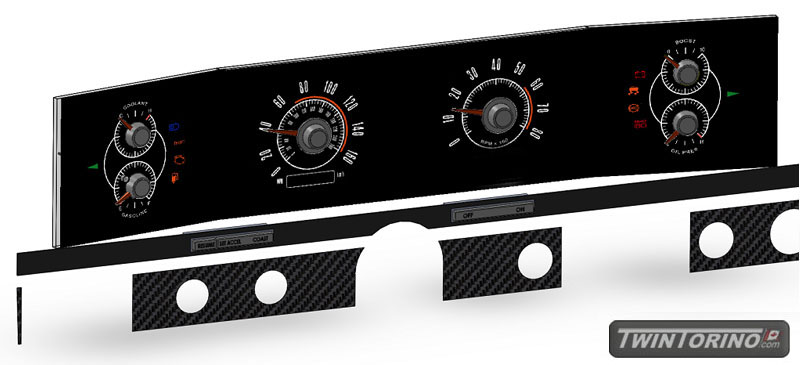
After countless hours of work using Adobe Illustrator, the first image is what we came up with in the beginning. After some more time and taking into consideration of how the Mustang gauges are set up and how they work, we came up with the last one which we will run with for the time being. The hardest part here was accomadating the Mustang smaller gauges into the package. The lower design also matches the dimensions of the original cluster exactly.