Category: Exterior
Detroit Train Station Pics..
Not a whole lot of obvious progress to report back although there have been lots of little things done. Have been having too much fun with the car having racked up well over 500km so far with no real issues. Car works great – especially after putting it on the alignment rack. Car is very well behaved and very responsive. I sure enjoy having 6th gear on the highway too. Going to put the smaller pulley on the supercharger this week to wake it up a bit more too.
Heading to an autocross next weekend and then the next big event will be Gingerman next month for the Motorstate Challenge.
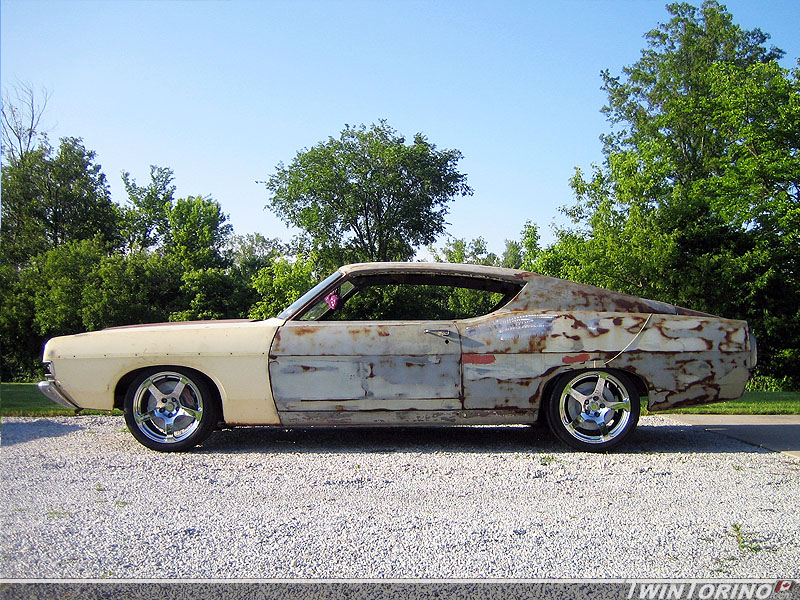
Car One Color Now!
Been a while since I have posted an update. Have been working on the cars a lot lately and finally have some time to post pics.
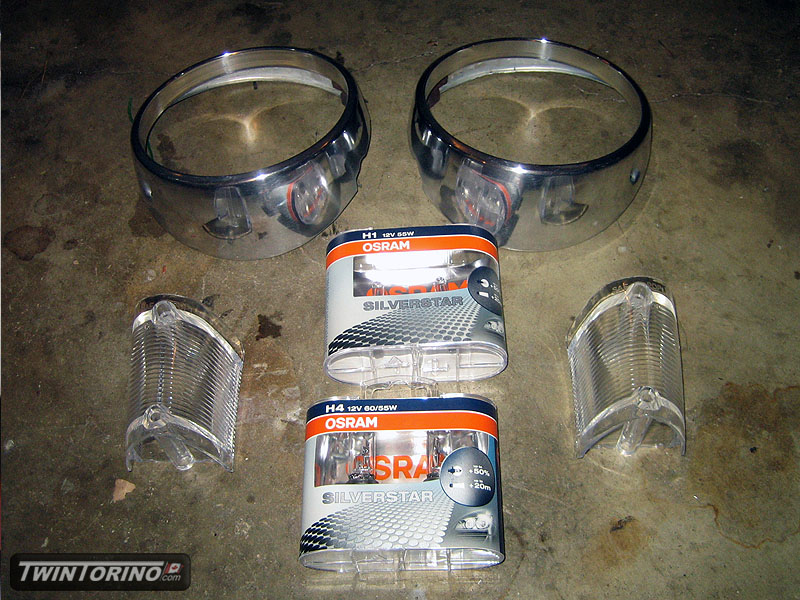
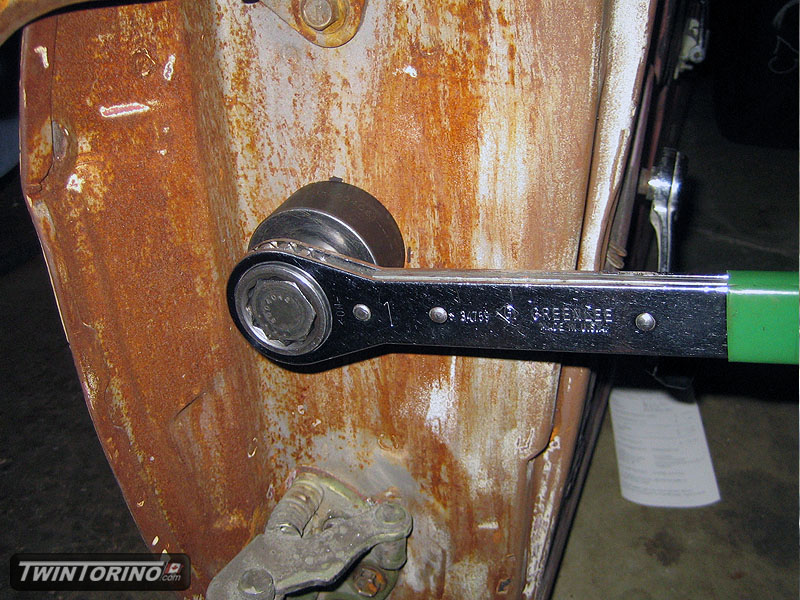
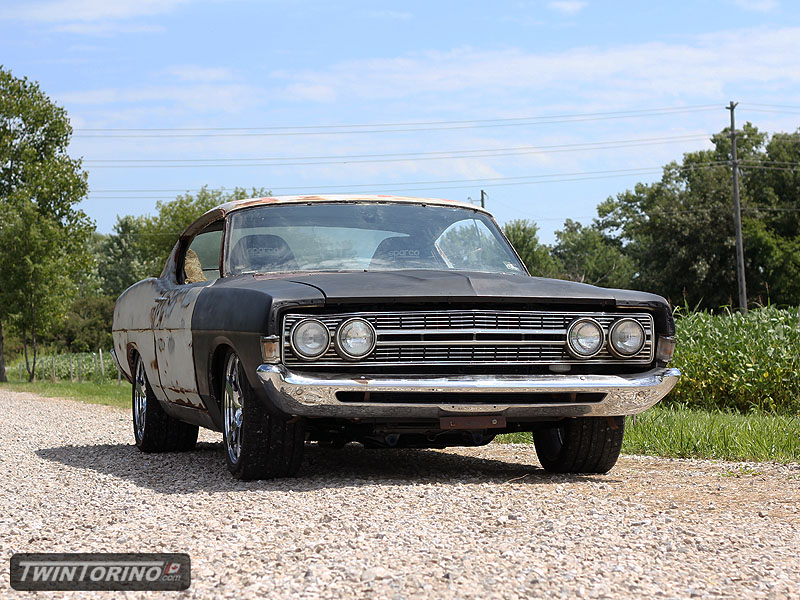
Wrapped up the front grille for the most part and got in bulbs (Osram Silverstars) from Europe. Also finished up the underbody and swapped out clutch discs (very long story while which would need to be told over drinks). Continued on finishing up most of the electrical in the interior and only need to get the cluster done and the will basically finish up the complicated part inside. Since the car had no power accesories in the doors, we had to add pass throughs. Tried using a Greenlee knock-out punch set this time and it worked perfect. Grommet is from a 1990’s Fox Body Mustang, but the part number actually traces back to the 70’s.
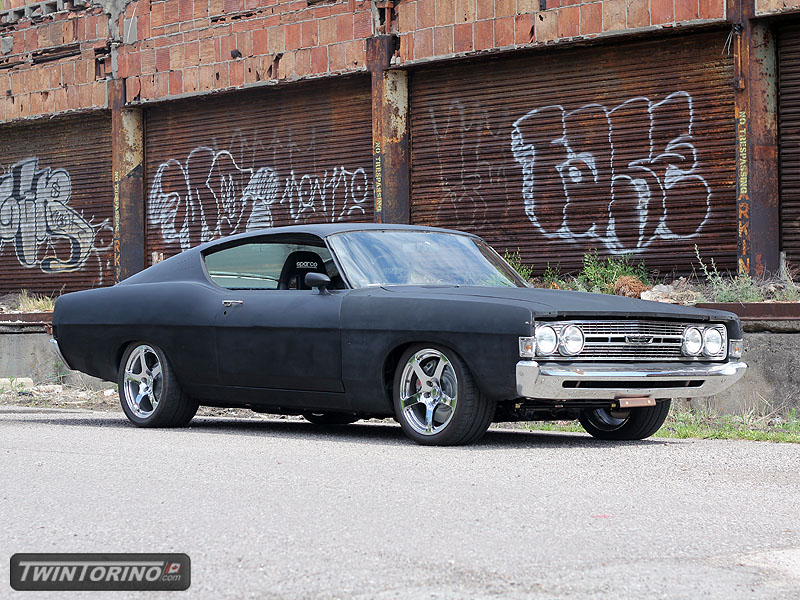
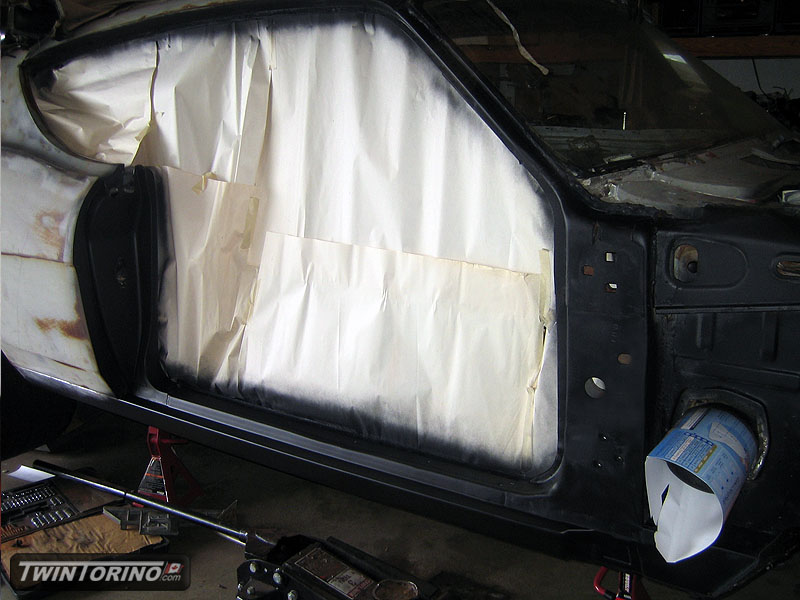
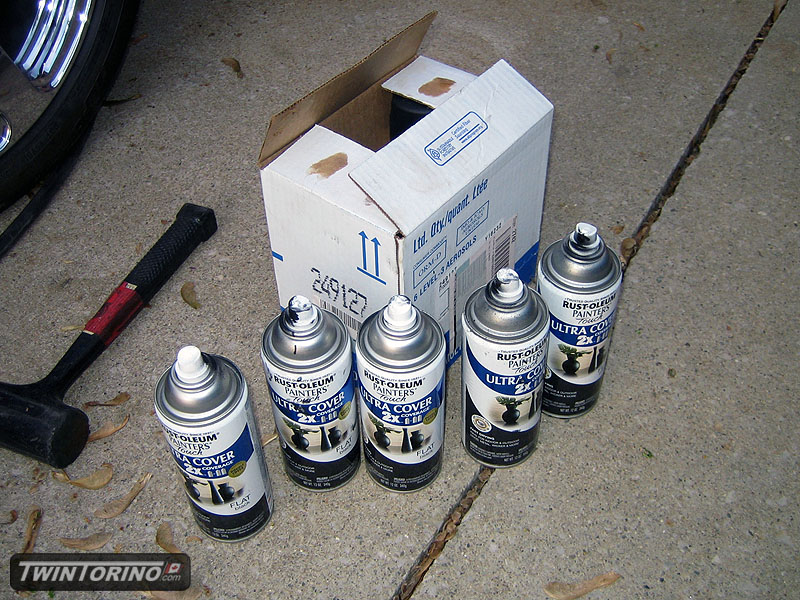
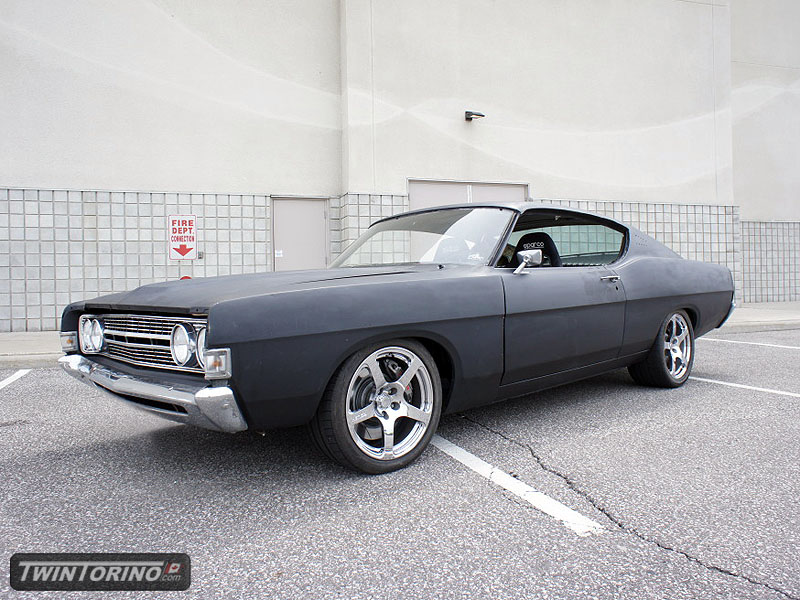
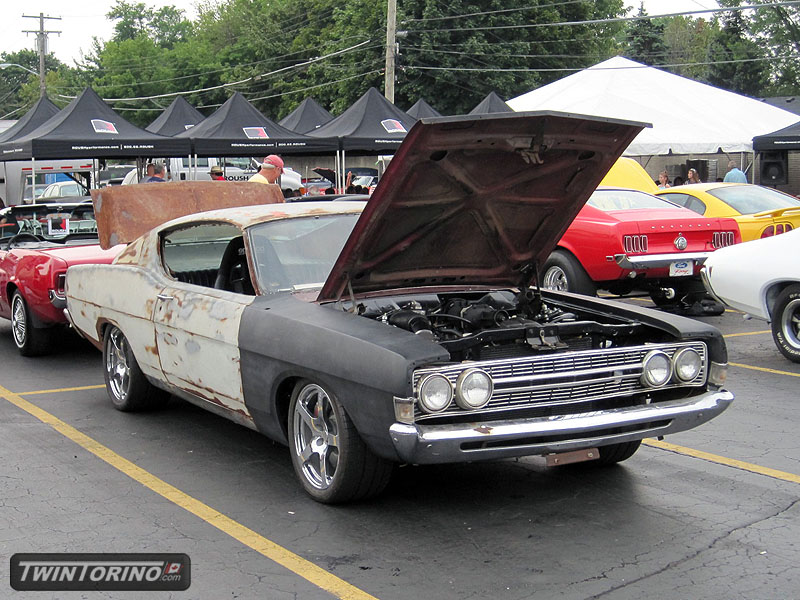
What next – time to put some paint on the car and make it one color. Paint of choice – Home Depot flat black of course. $50 of paint and a day of elbowgrease and it is now done for the time being. Paint booth was a morning in the garage followed by a nice hot sunny day outside :). We will finish up the trim etc of the coming months, but we wanted to make it at least road worthy again. We went to the first show of the weekend and put about 30 miles on the car. Works great. Time to get the car ready for Motorstate now.

Details and Lighting..
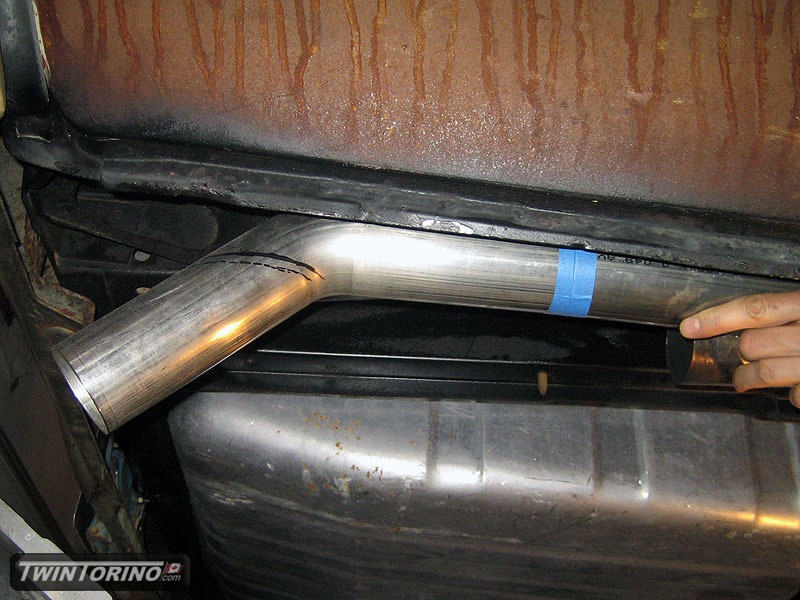
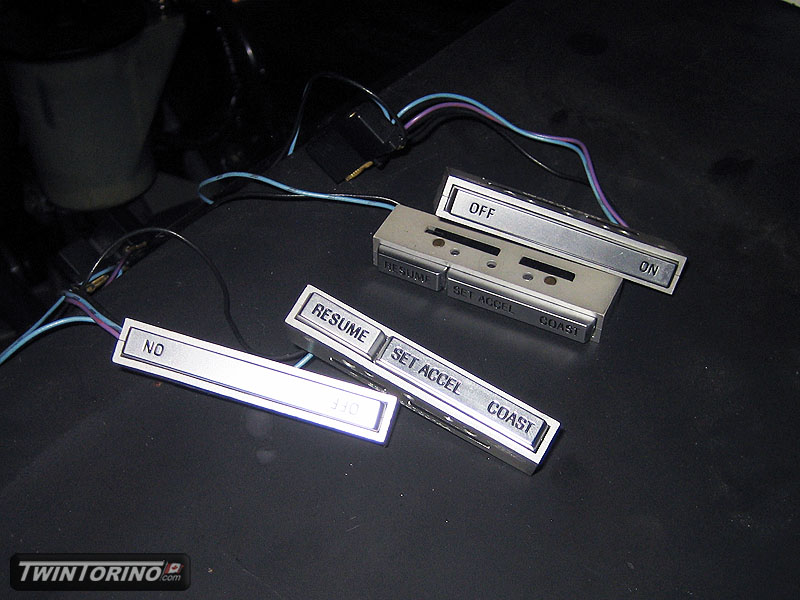
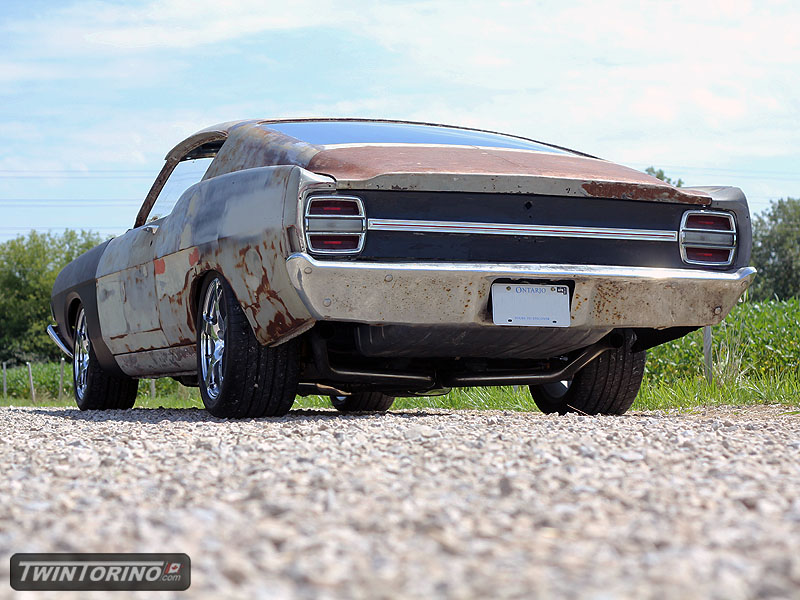
Moving right along.. time for the details now as we are slowly running out of things to do. Time to start making things look good. Have spent a lot of time sandblasting powdercoating brackets etc. Also decided to wrap up exhaust while we were at it. Going with the stealth tips for now and will be cut almost flush with the rear body line when done. Was not sure what to do about the cruise control as most steering wheel buttons don’t look right in an old car. Other issue is having the electronics on the buttons work with the modern electronics. Turns out a mid 80’s Crown Vic fits the bill here. They are metal looking buttons that do not look at all out of place on the Torino. They will likely make their way beneath the dash in custom housings.
Next was lightning. Lots of options here.. most of them are sub par. Seems most lights are looks over function. Several paths we can take here. Go out in left field and make a custom HID setup using the guts of a new Ford HID light (Mustang, Taurus, Explorer etc). That just screams $$ and time. We’ll revisit this later. Note that putting HID bulbs in a standard halogen based housing does not count. HID bulbs require their own custom projectors and provide horrible optics when placed in a non-HID designed housing, and will also blind oncoming traffic with even the low beams on. Not quite sure why this fad has taken off in the aftermarket. There is a reason why cheap HID kits are only $100, and high end ones with the correct housings are 10x as much.
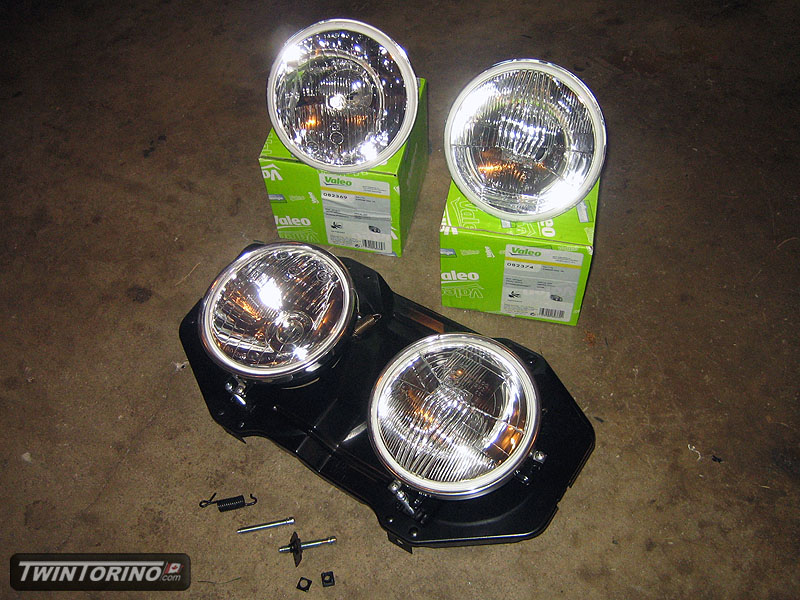
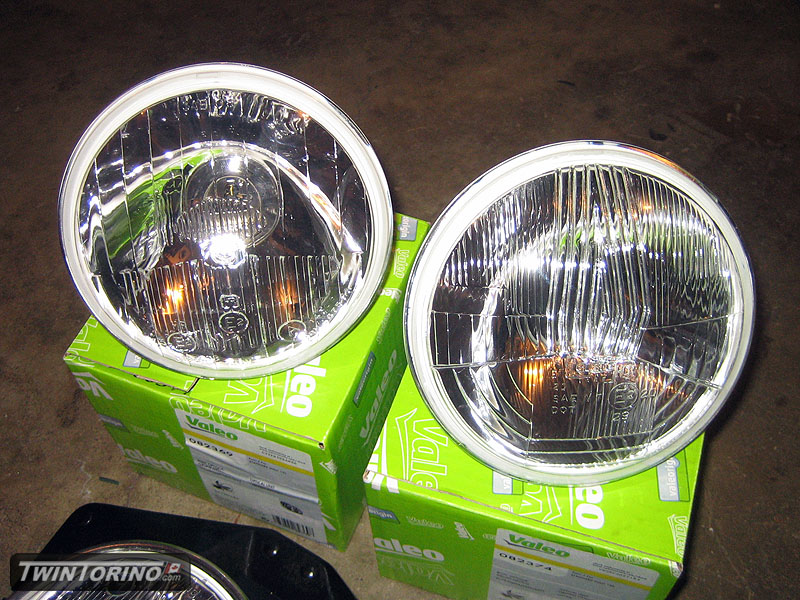
Ok.. back to the point here. Several options for Halogen based lighting. Goal was to run H4 for the outer bulbs and H1 for the inners. Main objective is to have a crisp lighting cut-off and glare free lightning. Basically be able run very bright lights without blinding oncoming traffic but still be able to see everything. Three obvious options in the order of increasing cost: Autopal, Bosch and Cibie. Pricing wise, one Cibie housing costs the same as a set of 4 Autopals. There are mixed reviews out there on the Autopals, plus they are not easily available with convex lenses – only flats here in North America. You can get the H4’s in convex (HL-103-H4), but no H1’s (HL-103-H1). I looked everywhere – only place you can get them is in Australia. Shipping cost rules out that option. Next is Bosch. Not a fan of the look of Bosch housings as they only come in flat lens, and they get mixed reviews. The last selection is Cibie lights. These rise above the rest and then some. They are pretty much the best you can buy as far as optics go. I was not really interested in paying the ridiculous prices they go for over here, so since we needed 8 total lights for both cars, I decided to order direct from the UK. Saved about $30/housing in the end with shipping included. I can’t wait to try these out. If they work as nice as they look, I will be all set. For now I will run the std 60/55W H4’s and 55W H1’s. Both with be Osram Silverstars which are on order from the UK. Note that since Torino parts are scarce, 1969 Mustang headlight kits were used and disassemled as used as donors. Since they rest of the car was built using the best of parts, the optics should be no exception.
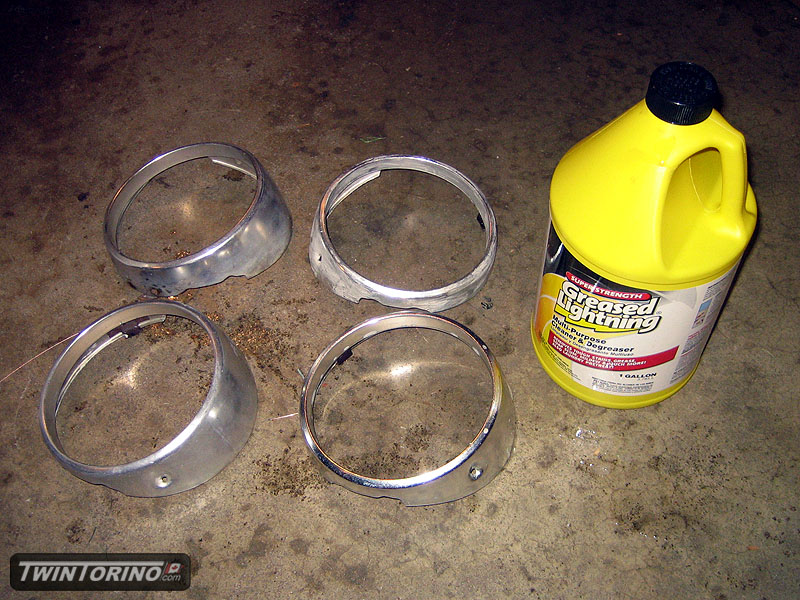
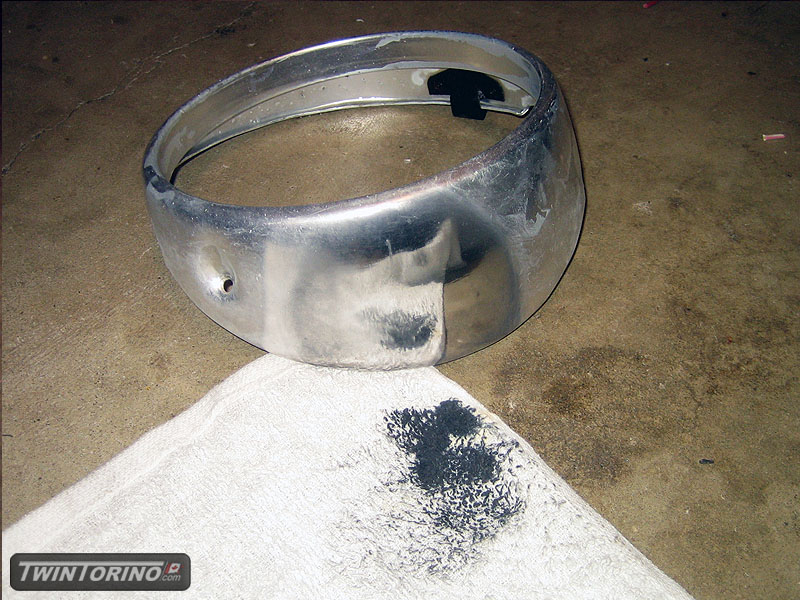
Next is the trim. Half the trim on this car is anodized aluminum. It may look nice new, but the years are not kind to this combo. Problem is the aluminum is anodized which means there is really nothing you can do to polish it up when it starts to dull. Solution here is to strip the anodize, re-polish and then re-seal, likely by powdercoating. After looking into this, I decided to give the cheap alternative a try first. This was Greased Lightning which I got from Home Depot for under $10. Did it work – sure did. The easy way to tell is to use std metal polish – if the rag turns black, you are in contact with bare aluminum. More to follow here, as well and getting started on stripping the grille.
Dream Cruise and First Drive!
Finally.. after all these all nighters we made it to the Woodward Dream Cruise, and managed to put some miles on the car. I am still in shock that this all panned out. Thanks to all the local gang for helping out – Iain, Luke, Mike, Matt, Rick, Larry.
We got so many parts and pieces on the car in the past 2-3 weeks, that I can’t list or document everything. I hope to at least get the car in one color for now.. and do the final paint next year sometime. I’ll let the pictures tell the rest of the story – interior shots and movie clips to follow shortly..
Wheels and Exterior Shots
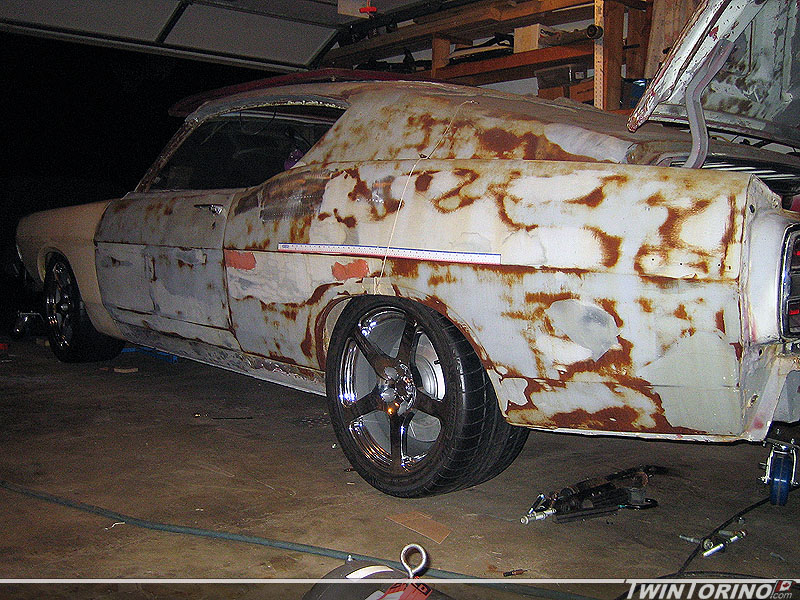
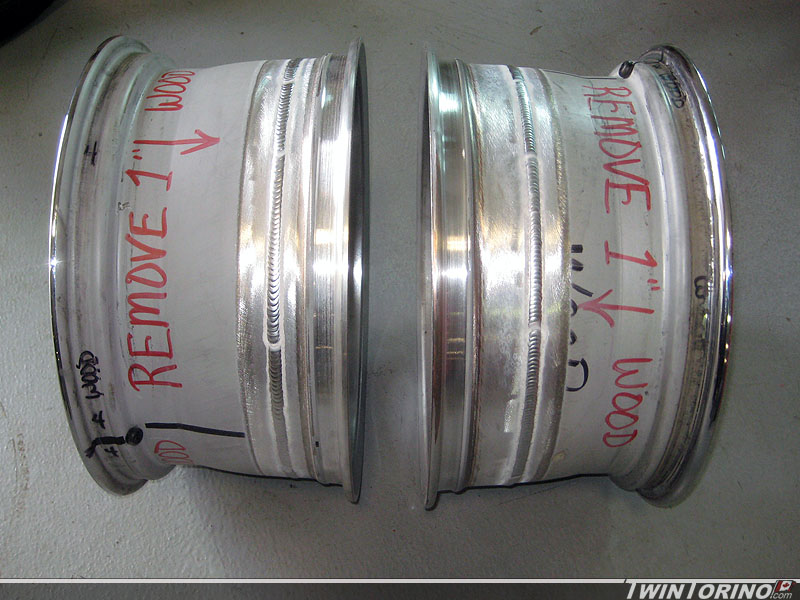
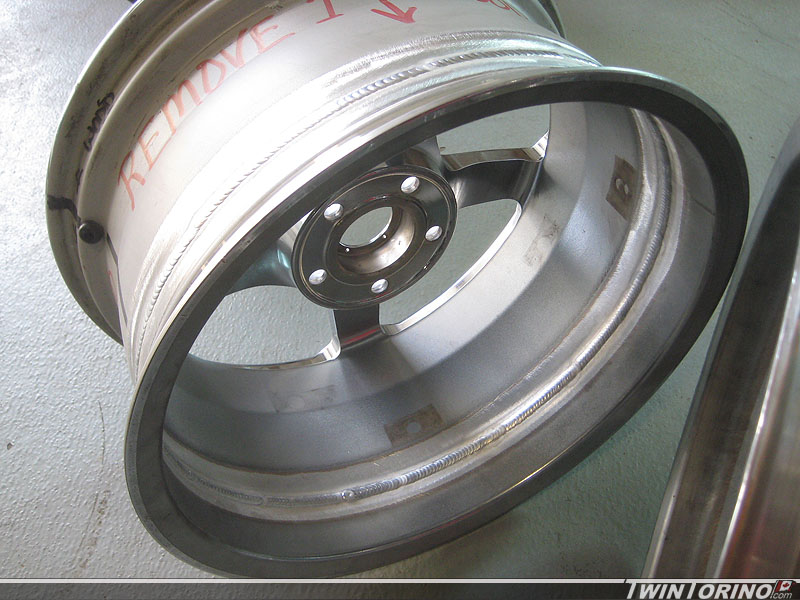
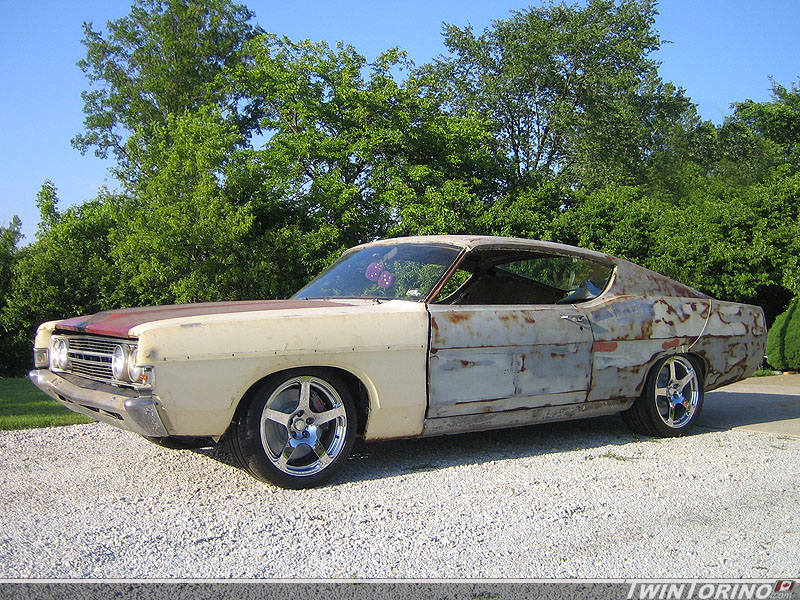
Finally time for some inspirationsal shots. Got the wheels back yesterday from Weldcraft – they did an excellent job. I measured run-out on the machine and they were near perfect. They also took very little weight to balance.
We mounted up the wheels yesterday and dropped the car on the ground and rolled it outside for the first time in years. Got the ride height pretty close to where it will be – looks pretty mean. Front suspension is riding on the coil-overs, and the rear is just blocked up using wood for now (waiting on springs).
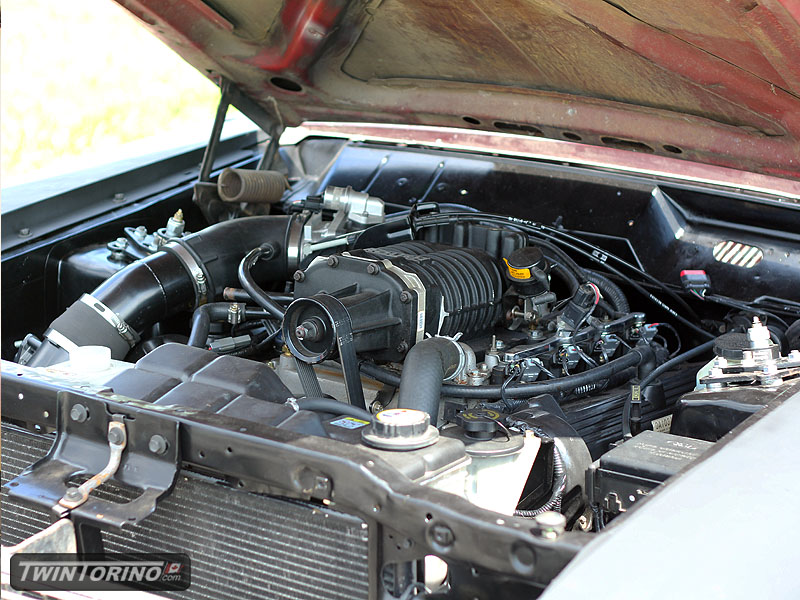
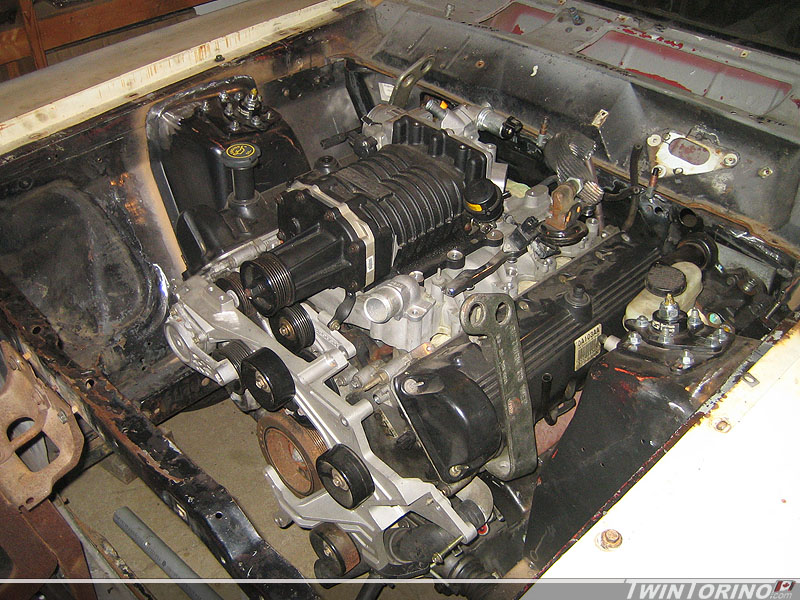
Figued we may as well try throwing one of the engines in to see how everything fits while we are at it. Everything fits surprisingly well. Just need to establish where to drill holes in the relocated motor mounts to get the engine as far back as possible. Big thing is the supercharger clears the hood with lots of room to spare. May not end up running the hood scoop in the to keep the stealth theme going :).
Car back on the ground..
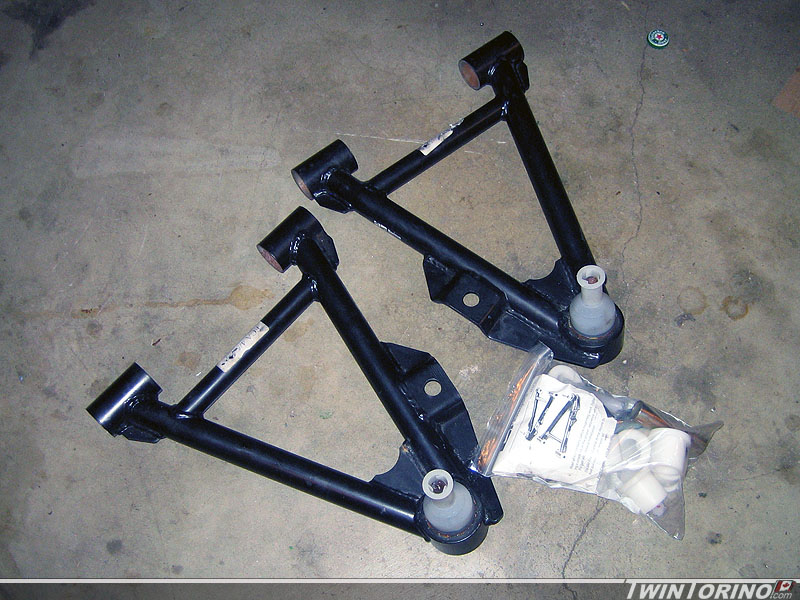
Since the other car is quickly approaching build time, we are finishing up finding all the odds and ends we need for it. Finally found a used set (although not really used) on Ebay from someone that bought the set and did not use. They are Maximum Motorsports Fox body Mustang forward offset control arms with Delrin bushings.
Finally after all this time, the car has been put back on the ground. It is still floating on the rotisserie for the time being. Just need to get springs on the car and it will roll around after that. The front wheels go in this week for narrowing to 18×9. To bad 315’s don’t work on the front – they sure make the car look mean. Will have roll the car outside soon and get some good pictures for a change.