Category: Tools
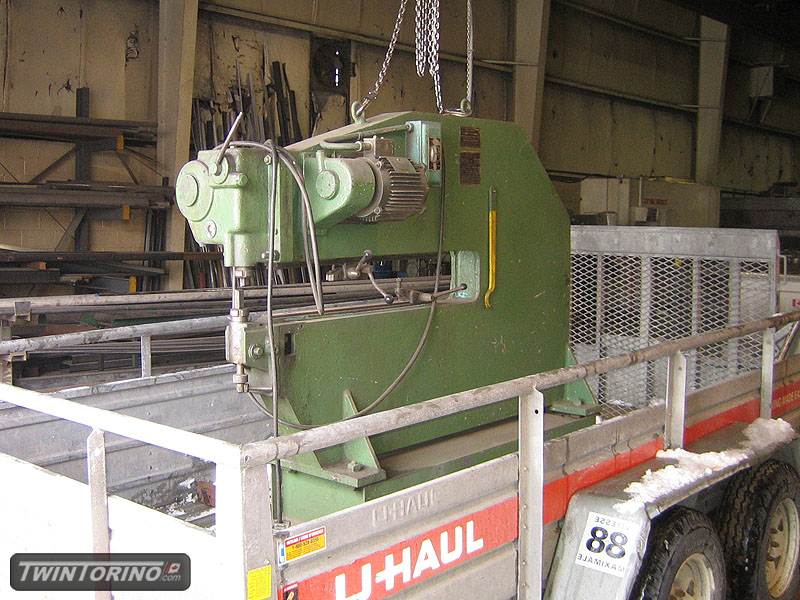
Pullmax..
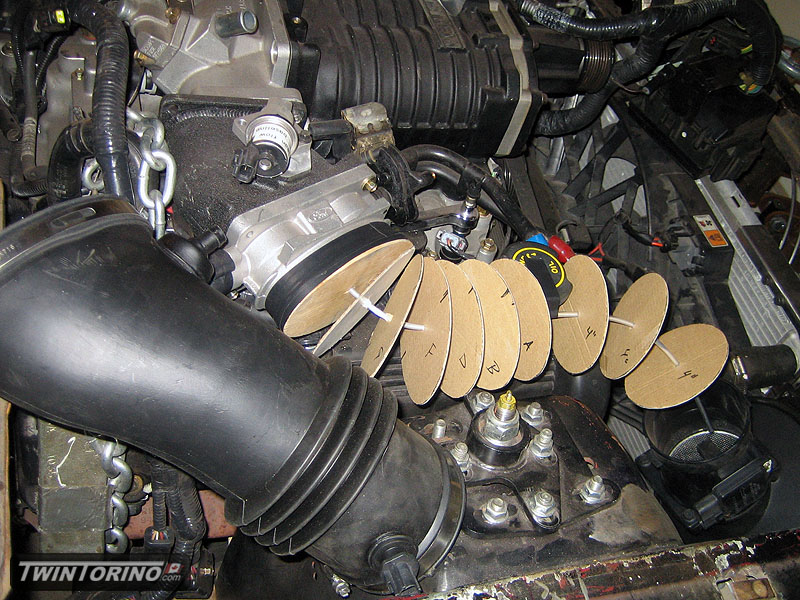
Moving right along on progress. Back to the engine – we are converting the engine to dual bore throttle body instead of single in attempt to get a bit more power out of it. It is a known issue with the M90 blower kits as the pressure drop across the throttle body is much higher with the single bore. This also means we now need to make up a custom clear air tube, which will either be carbon fiber or aluminum (see below for how).
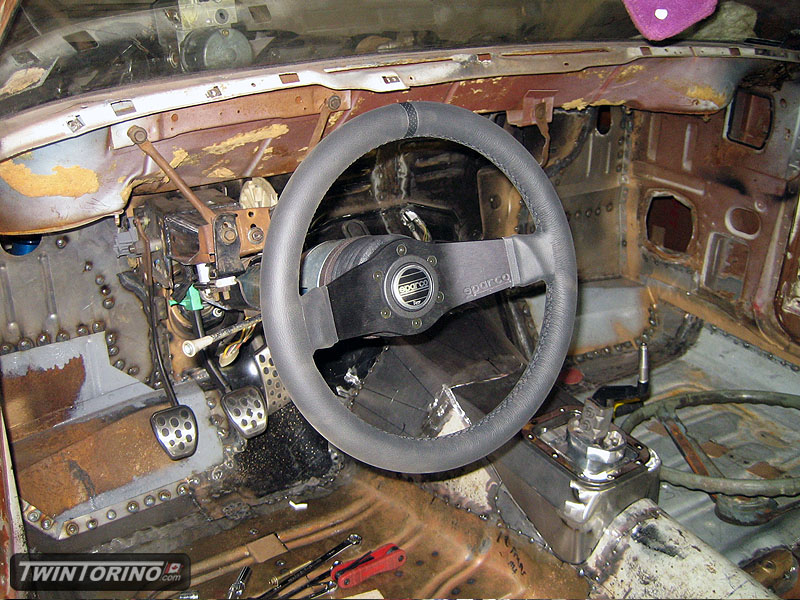
Got the steering column modified, and got a Momo Ford specific adapter for the steering wheel. Adapter/wheel takes some getting used to, but it is growing on me. For those of you running smaller OD steering wheels on these cars.. how the heck do you see the gauges??
We were not really sure how we were going tin integrate the Ford fuel pump into the tank. Then one day the lightbulb went off and I realised that we should likely get someone to cut the tank flange off at an wrecking yard. Taking that one step further, we called al late model Mustang wrecking yard and they helped us up with
Took a road trip this weekend to grab a new toy that was too good to pass up. It is a Pullmax model D3. We have been looking for years and years for one of these to show up close to home and for the right price. This was only slightly more than the price it would be worth if scrapping it. It works like a charm and we just need to make up some tooling before we can experiment with making parts for the Torino. We even broke out the custom trailer for the event :).
Rotisserie Continues
Been on vacation in LA for the past 2 weekends – so not much work done on the cars lately.
Did manage to get the phase convertor running and fired the ‘ol Bridgeport up. Sold a restored Torino console to get the Bridgeport (and still have money left over believe it or not). Sure is handy to have around. Got most of the machining done, so all that is really left now is welding an painting. Hope to have near functional this weekend. Torino is ready to drop on the ground now. Before I know it, there will be a real engine in it for a change.
Got the 315’s mounted on the rear rims and on the car. They actually fit quite nicely and won’t need any wheel spacers. Need to get the front wheels narrowed 1″ and those will be all set too.
[img]http://www.twintorino.com/images/rotisserie_008.jpg[/img]
[img]http://www.twintorino.com/images/rotisserie_009.jpg[/img]
More Rostisserie..
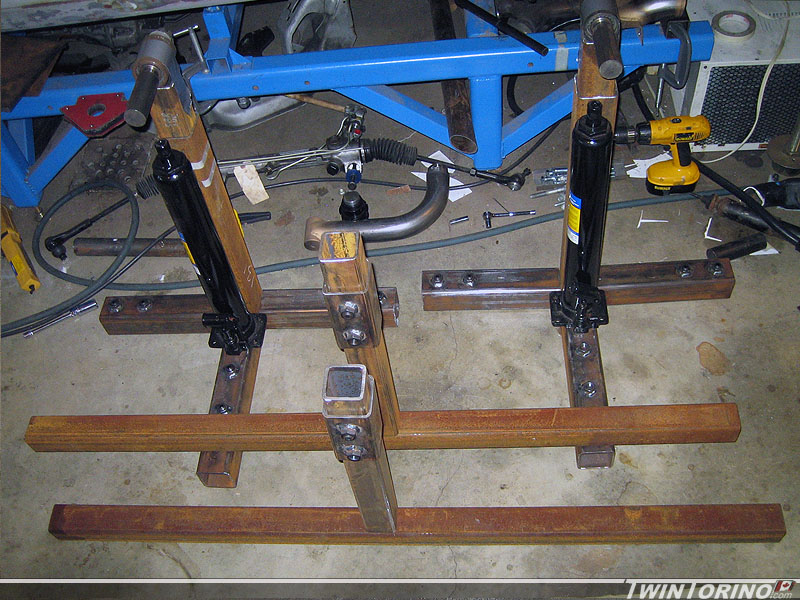
Made some progress on the rotisserie and the car. Most of the parts arrived for the rotisserie by the time Friday rolled around. Got a good portion of the cutting and drilling completed over the weekend and started into welding it together. Goes pretty fast once you get into the groove. Hope to have it up and functional by this weekend. Need to get the car back on the ground – it has been too long.
Rotisserie Begins..
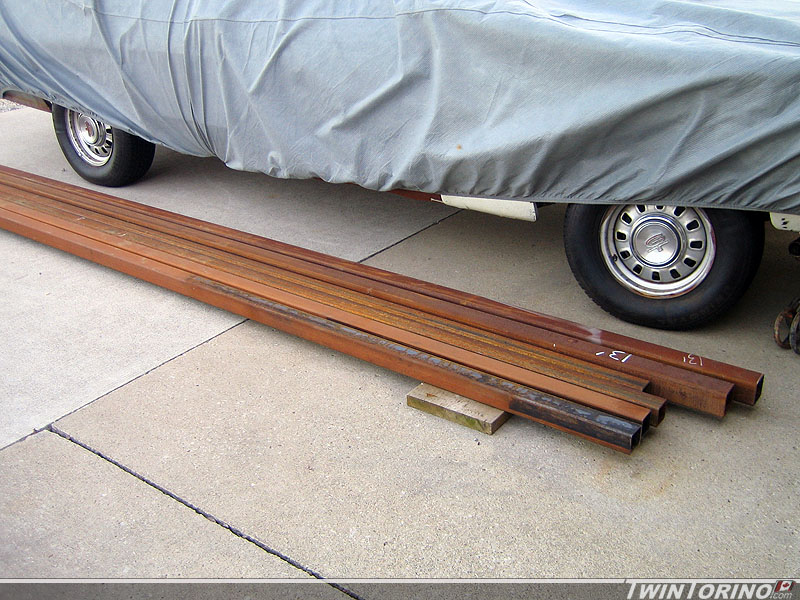
Hoping to build a majority of the rotisserie this weekend. Picked up the steel last Friday, and the rest of the parts and pieces should be here by this Friday. Managed to find an auto supplier that had excess steel from jobs that had been cancelled so got it for a good price. Got some 3″x3″x3/16″, 2.5″x2.5″x3/16″, and some 2.5″x2.5″x1/8″. I already had the 2″x2″x1/8″, and that covers everything besides the plate.
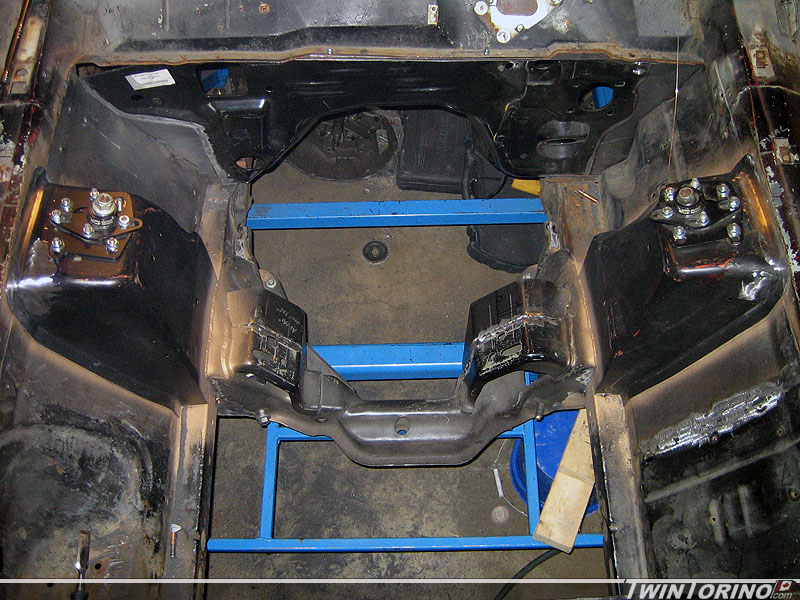
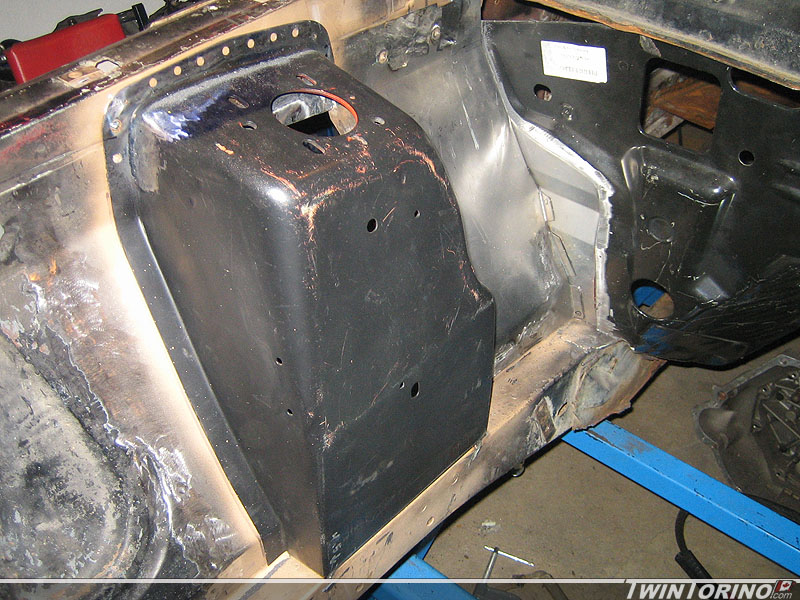
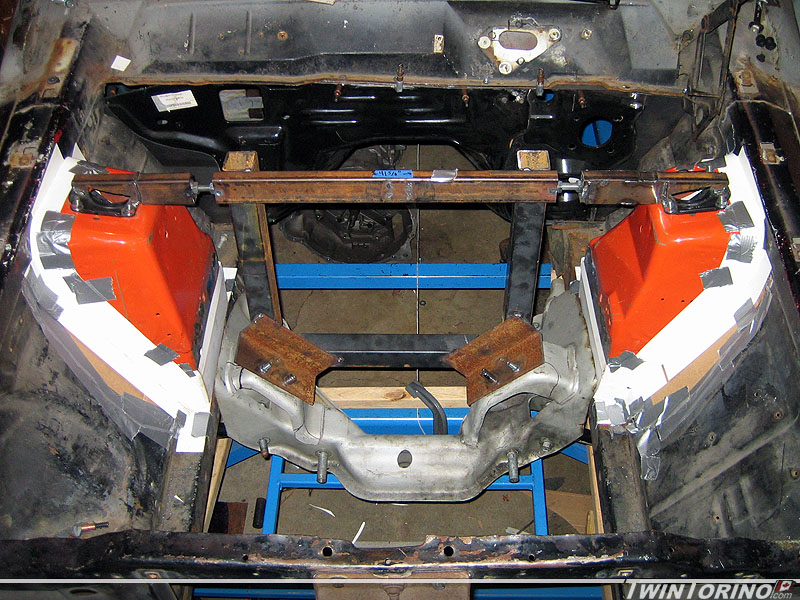
Hit a major milestone over the weeked – front k-member is now welded in and the strut towers have both been finished off. We verified the caster and camber settings, and once we established they were correct, it was welded in for good. Front suspension is now ready to go on the ground! Just have to weld up some of the seams once on the rotisserie and it will be a done deal on the front.
Sway bar is the only thing left. Will be using a straight splined bar from Speedway Engineering with offset sway bar arms. Will use a PVC pipe to package one in for now until the bar rates are selected. To select those, final springs rates need to be selected, which is waiting on the overall corner weights of the car. Won’t have those for a while.
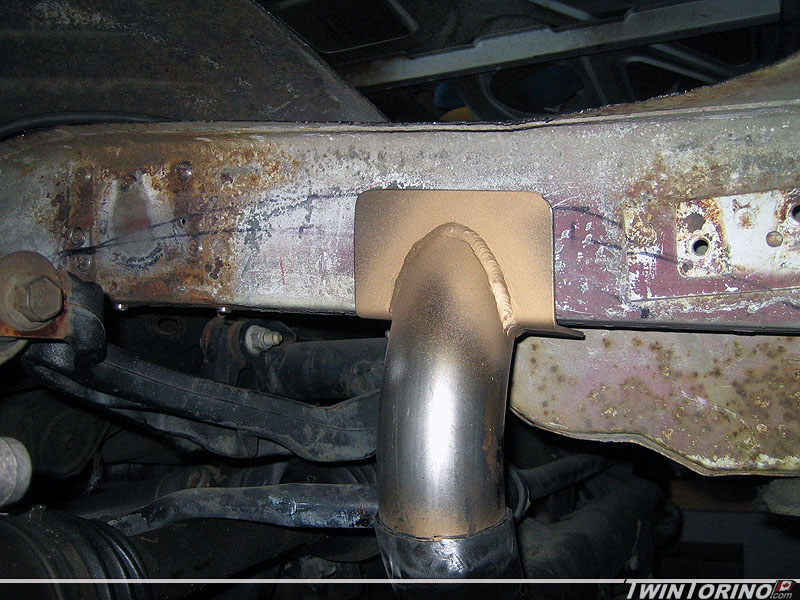
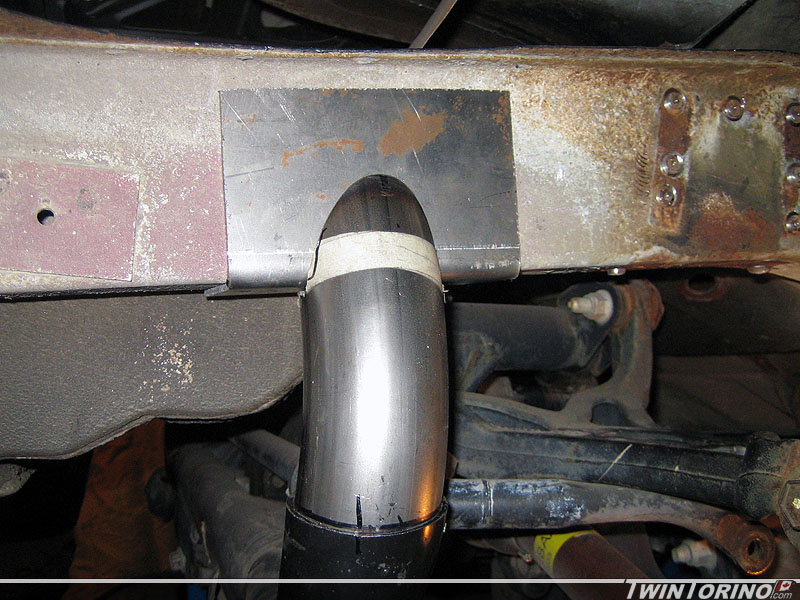
The push is now on to get the rear on the ground. We cut the rear mount to size and welded the tube to it. Just need to drill holes through bracket and frame rails, weld in crush sleeves and weld the tube to the IRS cradle. The front mounts are also done and just need to be welded to the IRS cradle. After that it will bolts right up to the frame in the rear. That leaves the shock mounts and springs mounts which are also nearing completion. Looks like we will be on the ground soon. Just need the rotisserie done so we can pick it up of the chassis jig and put it back down on the ground.
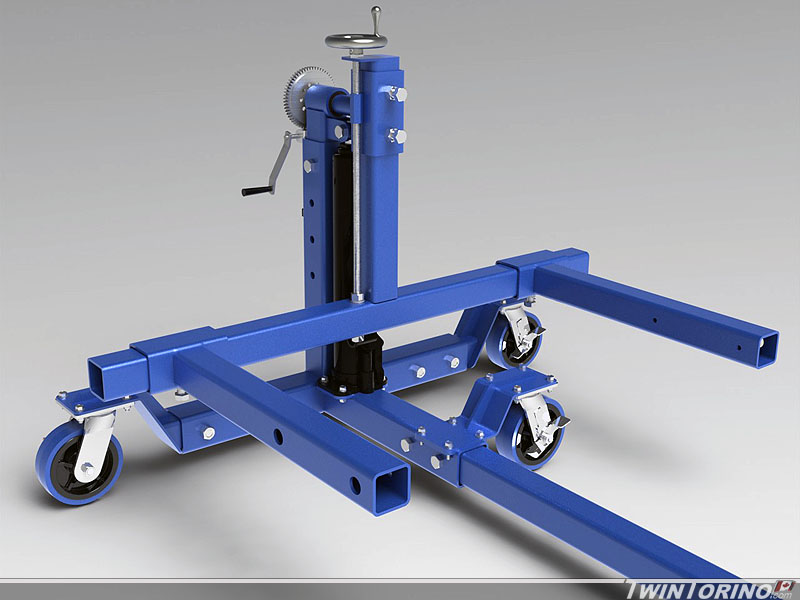
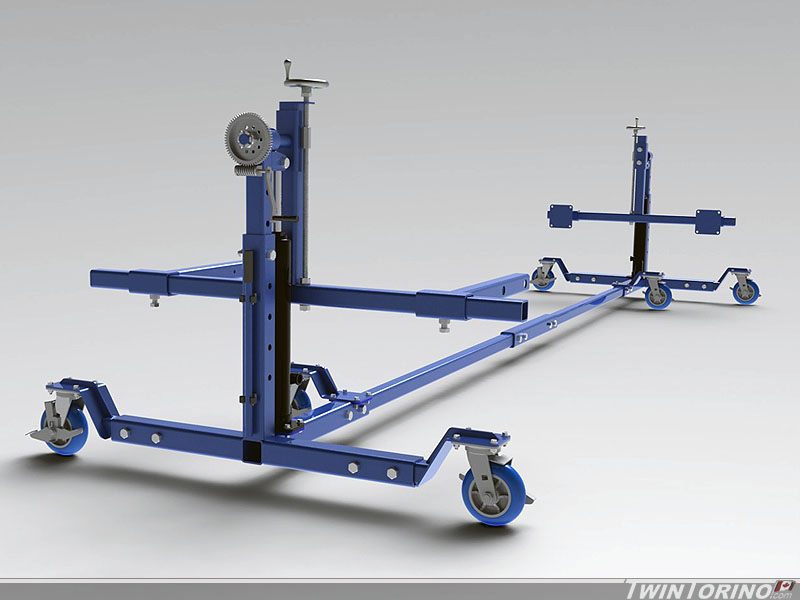
Final rotisserie rendering..
Hand crank will easily rotate the car once you get the cg positioned in the correct place (that’s what the hand wheels at the top do). Otherwise you would just rotate it manually by hand with little effort. Worm gear drive is nice because you can’t backdrive a worm gear. Adds another element of safety.
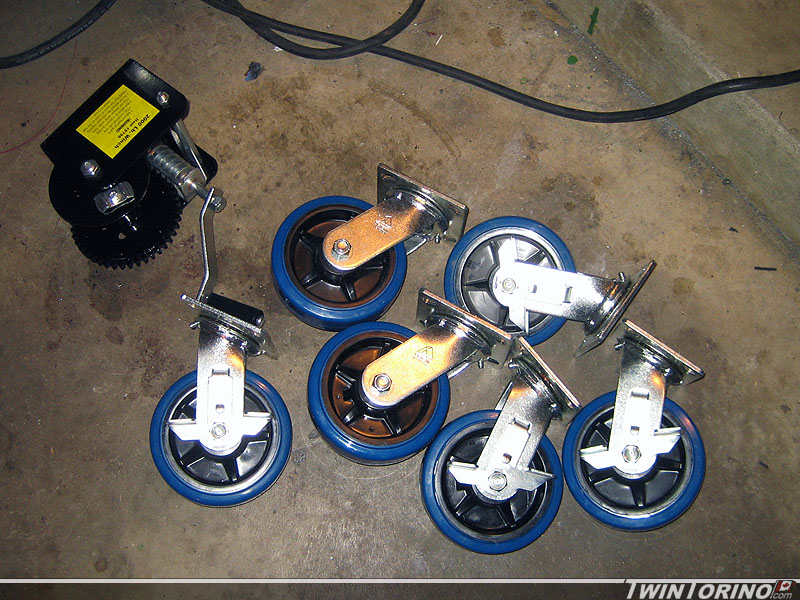
I am hoping to have it up and running within the next 2 weeks. Going to grab all the steel on Friday. Casters showed up today, and found the worm gear winch I need locally on Craigslist. Just need to order up the misc fasteners etc. Still lots of cutting and bending to go first.
Decided to increase the tube size since the initial design as I noticed almost every other rotisserie on the market uses 3″ tube. Just need to tweak the bolting set-up slightly to make it easier to set up. Also narrowed things a bit so it will easily fit into a 4′ wide pickup truck bed. When I got the casters – I looked up the manufacturer and they had the CAD model on their site so I stuck those in the model too see see how much clearance I need for them to be able to rotate.
Rotisserie ready to build
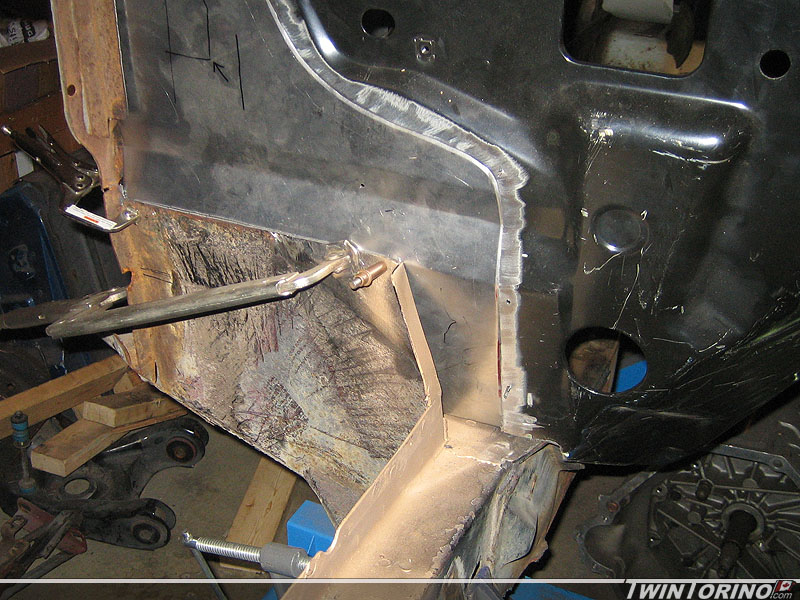
Made some more progress on the front suspension/firewall. Pass side firewall is now near completion and mates up nicely with the torque boxes (easier said that done). After that, the rear closeout was welded in for good, and then the strut tower was tacked in too. Will finish welding up the tower and then weld in the k-member this week. After that – front suspension is basically done except for the swaybar setup which should be fairly easy anyway. It will be based off a Mustang one.
Moving on the rear IRS once again, we bent up some 1/8″ brackets for the rear mounts. Have the pass side mount almost ready to go. Just need to get some crush sleeves made up for the frame and these will be ready to weld in for good. May be hoping in getting the car back onto the ground for the end of the month. This means car #2 can begin. This also leads to the next step which you can see below.
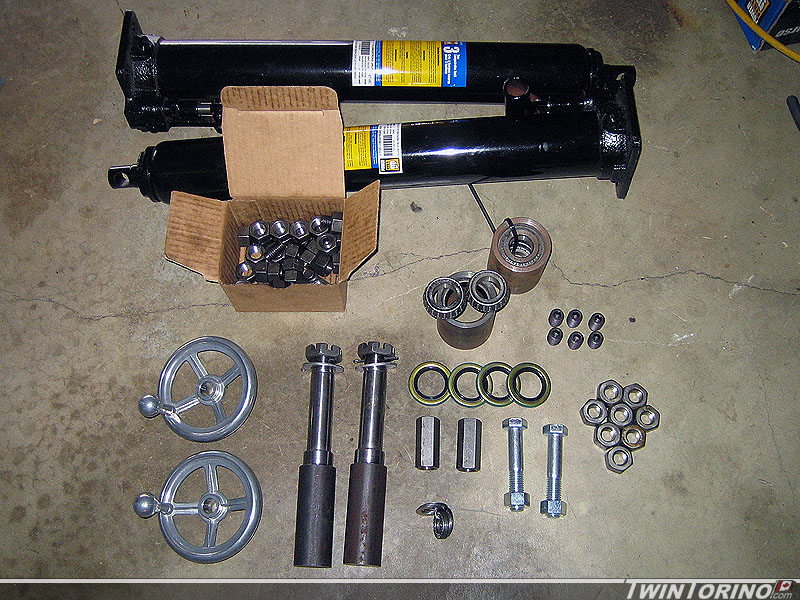
Almost ready to build the rotisserie. Finally have the design near complete. Casters are ordered, I have the hydraulic jacks from when they went on sale last week, and also have a bearing/housing setup that I found kicking around. Just need to grab the steel. Rotating part is based on a std. trailer spindle which make things cheap and easy to find parts for. Also makes it easy to seal things up for bringing near the sandblaster etc. We will just run dynamic trailer seals on both side of the bearing. Worm gear setup on the end is from a Harbor Freight winch. Made this up in Solidworks 2010 – CAD sure has come a long way. Have this designed so it will pick the car up off the chassis fixture (remove the center section and add the 3rd set of wheels).
Towers, Slicks and Scales
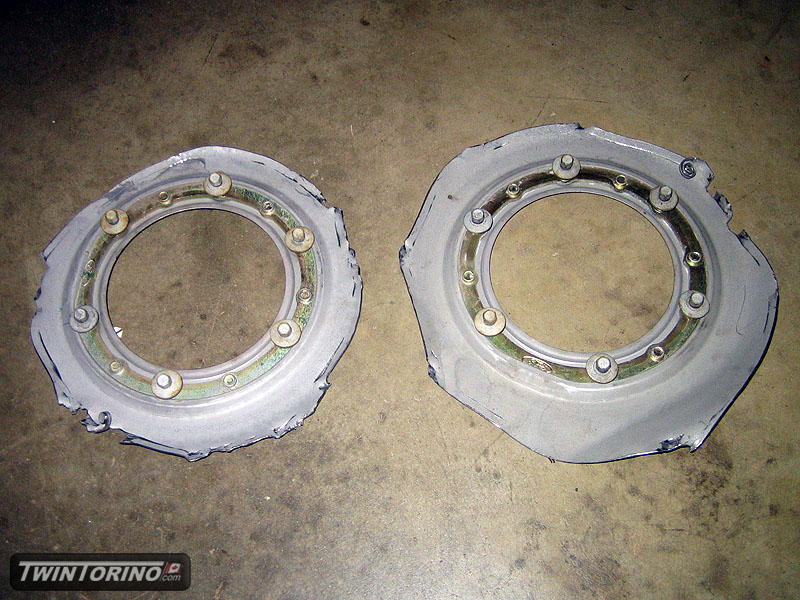
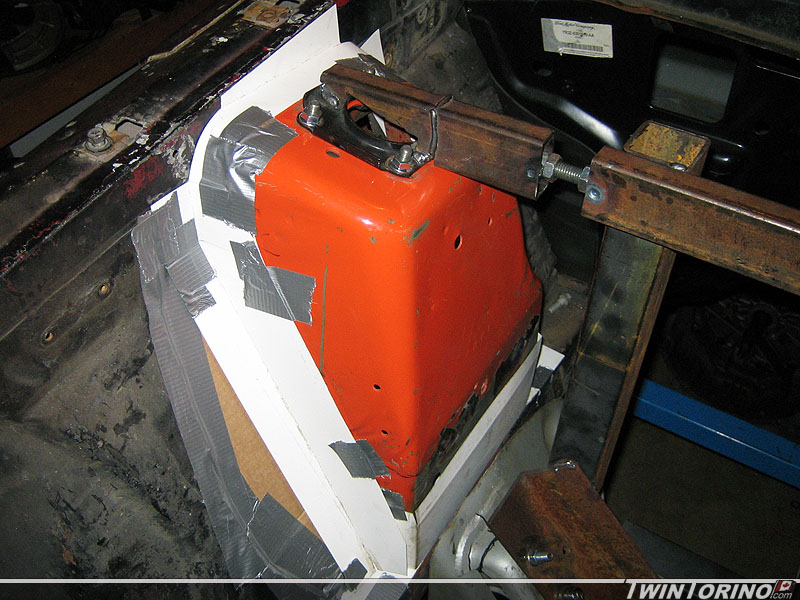
Got the point where we finalized the front strut mounts and achieved the desired caster and camber targets (took a lot more time than planned to manipulate everything to get it perfect). Now it is time to bridge the gap between the Mustang strut towers and the Torino. Went out and bought half a sheet of 16 gauge steel (same as the Mustang towers) and made up templates using cardboard. Just need to bend these up in steel, cut and weld into position.
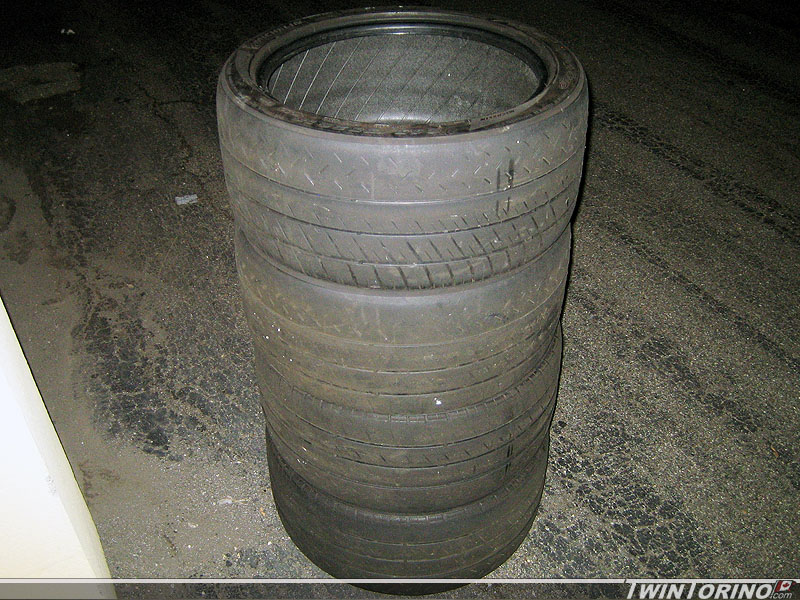
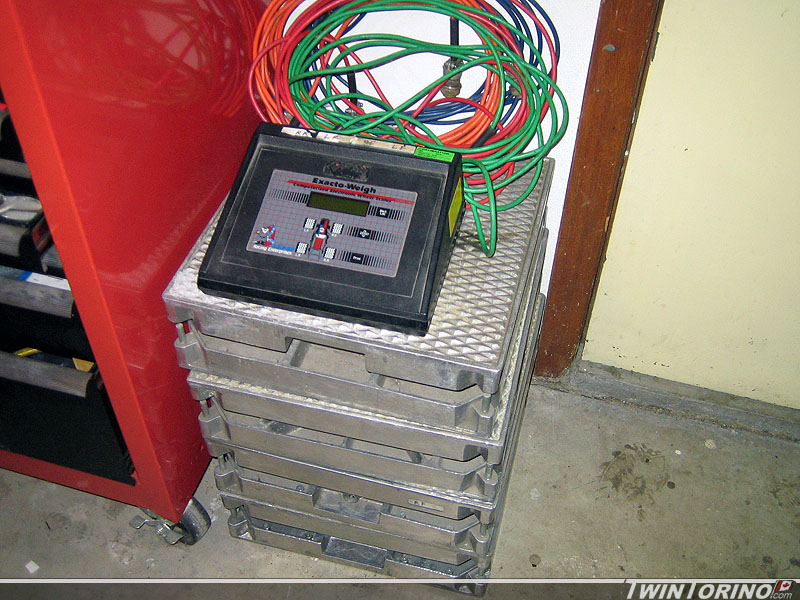
Also landed a couple of good deals in the past week or two. Bought a set of tires for the track for $100 – Michelin Pilot Sport Cups. These come new on the Porsche GT3 and the Viper ACR. They are basically street legal slicks. These ones are 265/35 18’s and have lots of life left on them. Also picked up a set of Rebco corner weight scales for setting up and weighing the cars. I bought them as non-functional for only $25. After and hour of troubleshooting and fixing as issue with the circuit board, I had them up and running. I always wanted a set, but could never justify the $1500 cost. Now I can weigh anything and everything on the car, and the car itself. Will be interesting to see the weight difference between the motors etc.