Category: Renderings
Seat mounts..
Lots on the go.. although not much to see quite yet. Car now sits at the perfect ride height and is on the center of the adjusters. The ride height can easily be tuned up or down an inch or so. We have the floors/seating on the go and also starting to work on the fuel system.
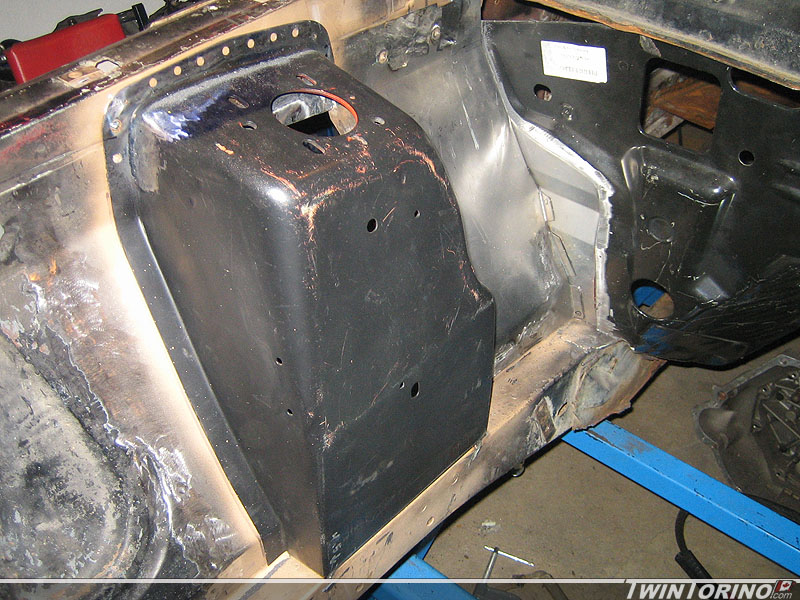
Here’s the concept for reinforcing the floors. This will allow stock buckets to be bolted into the car – and the brackets shown will allow the Sparcos to be bolted in at the correct height. Have most of the parts made – now working on getting them in the car. Figured this would work much better than the after thought that was used to accomadate buckets on a stock vehicle.
Final rotisserie rendering..
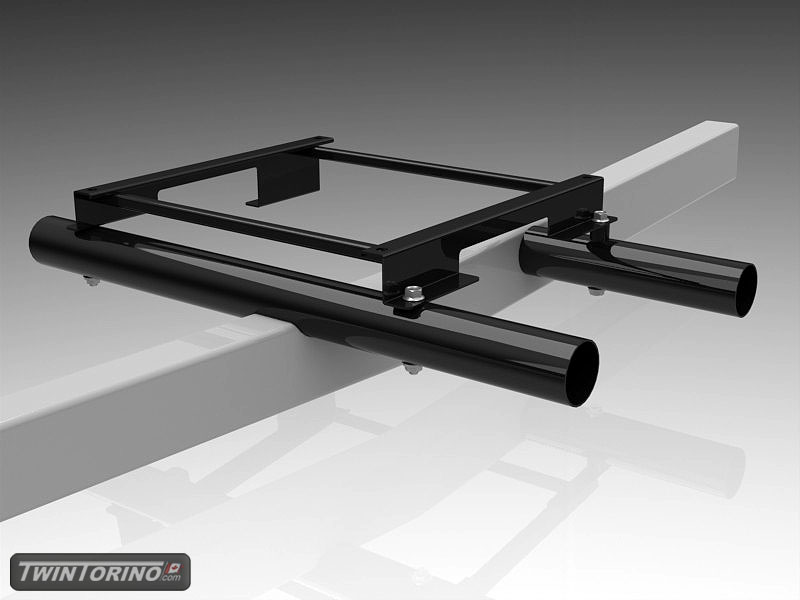
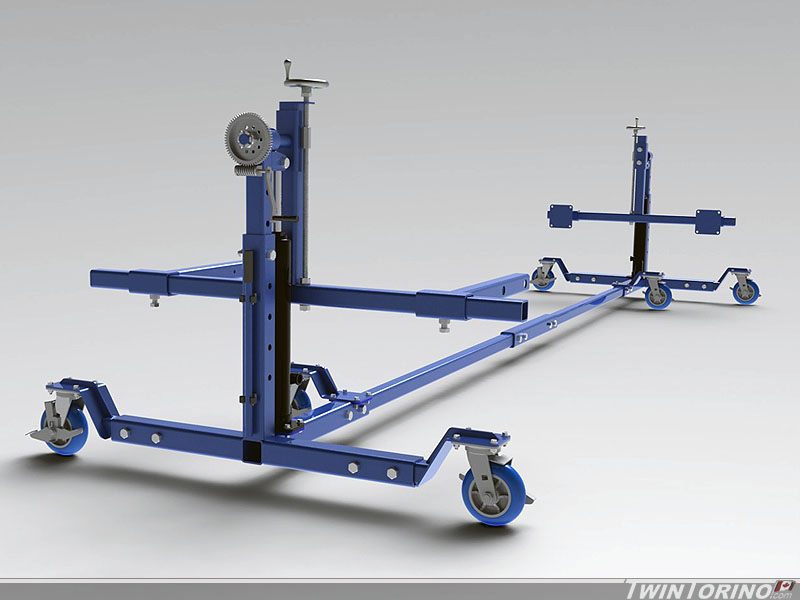
Hand crank will easily rotate the car once you get the cg positioned in the correct place (that’s what the hand wheels at the top do). Otherwise you would just rotate it manually by hand with little effort. Worm gear drive is nice because you can’t backdrive a worm gear. Adds another element of safety.
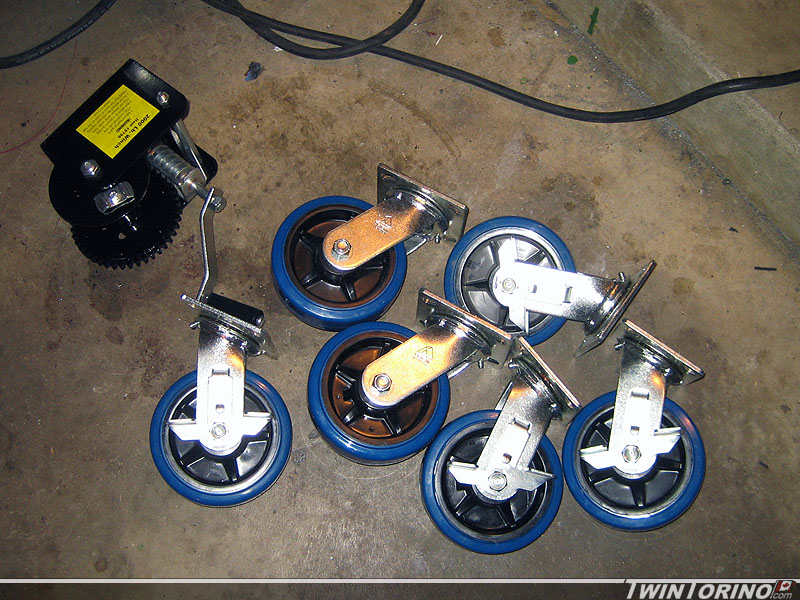
I am hoping to have it up and running within the next 2 weeks. Going to grab all the steel on Friday. Casters showed up today, and found the worm gear winch I need locally on Craigslist. Just need to order up the misc fasteners etc. Still lots of cutting and bending to go first.
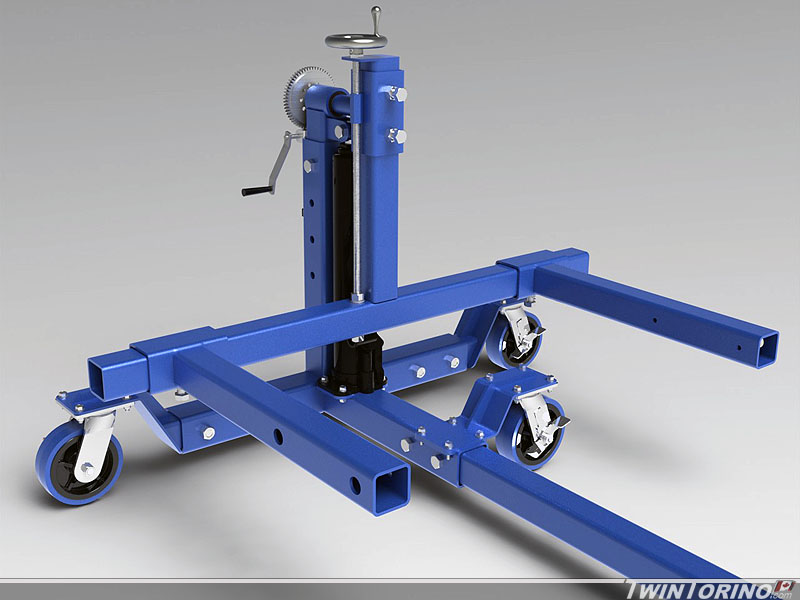
Decided to increase the tube size since the initial design as I noticed almost every other rotisserie on the market uses 3″ tube. Just need to tweak the bolting set-up slightly to make it easier to set up. Also narrowed things a bit so it will easily fit into a 4′ wide pickup truck bed. When I got the casters – I looked up the manufacturer and they had the CAD model on their site so I stuck those in the model too see see how much clearance I need for them to be able to rotate.
Rotisserie ready to build
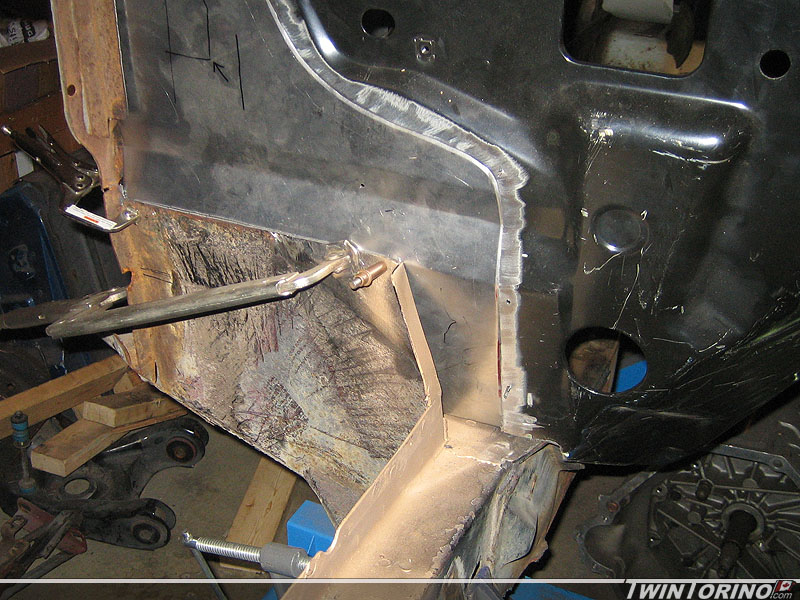
Made some more progress on the front suspension/firewall. Pass side firewall is now near completion and mates up nicely with the torque boxes (easier said that done). After that, the rear closeout was welded in for good, and then the strut tower was tacked in too. Will finish welding up the tower and then weld in the k-member this week. After that – front suspension is basically done except for the swaybar setup which should be fairly easy anyway. It will be based off a Mustang one.
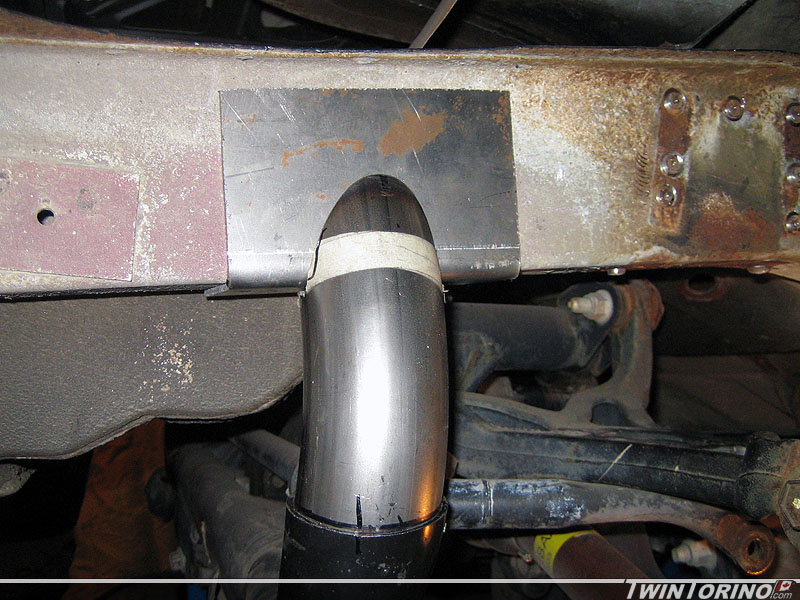
Moving on the rear IRS once again, we bent up some 1/8″ brackets for the rear mounts. Have the pass side mount almost ready to go. Just need to get some crush sleeves made up for the frame and these will be ready to weld in for good. May be hoping in getting the car back onto the ground for the end of the month. This means car #2 can begin. This also leads to the next step which you can see below.
Almost ready to build the rotisserie. Finally have the design near complete. Casters are ordered, I have the hydraulic jacks from when they went on sale last week, and also have a bearing/housing setup that I found kicking around. Just need to grab the steel. Rotating part is based on a std. trailer spindle which make things cheap and easy to find parts for. Also makes it easy to seal things up for bringing near the sandblaster etc. We will just run dynamic trailer seals on both side of the bearing. Worm gear setup on the end is from a Harbor Freight winch. Made this up in Solidworks 2010 – CAD sure has come a long way. Have this designed so it will pick the car up off the chassis fixture (remove the center section and add the 3rd set of wheels).
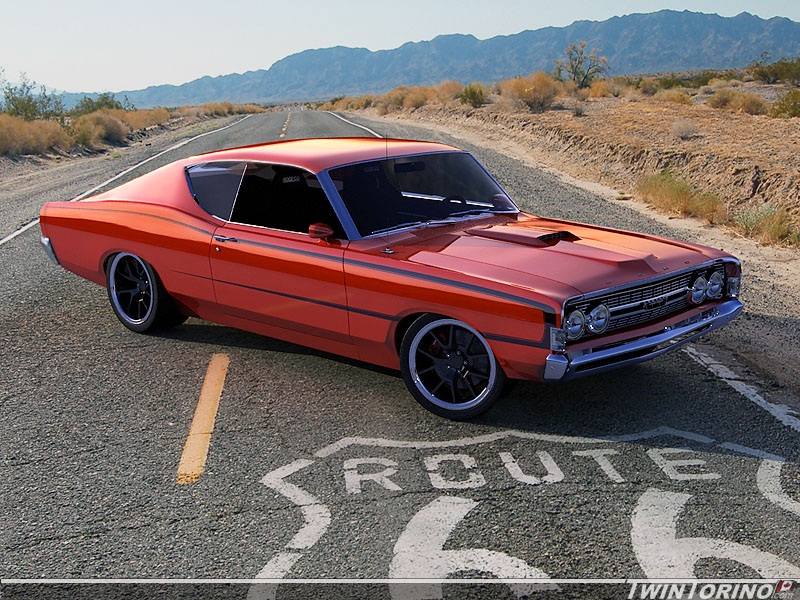
Final Renderings Complete
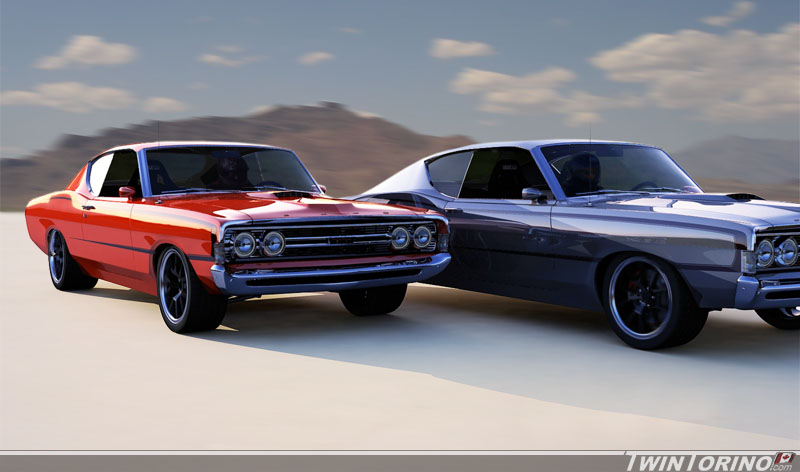
Also finished up close to a final rendering of the car. Just need to add a couple things like the hash marks etc and update the brakes. I like the stock looking C stripe the more I look at it.. glad I pryed myself away from the 2-tone. The background is in Arizona and was taken by a friend of mine.
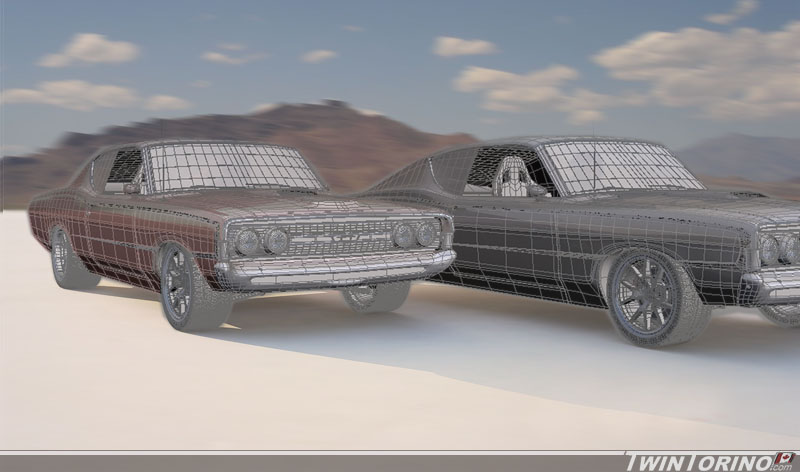
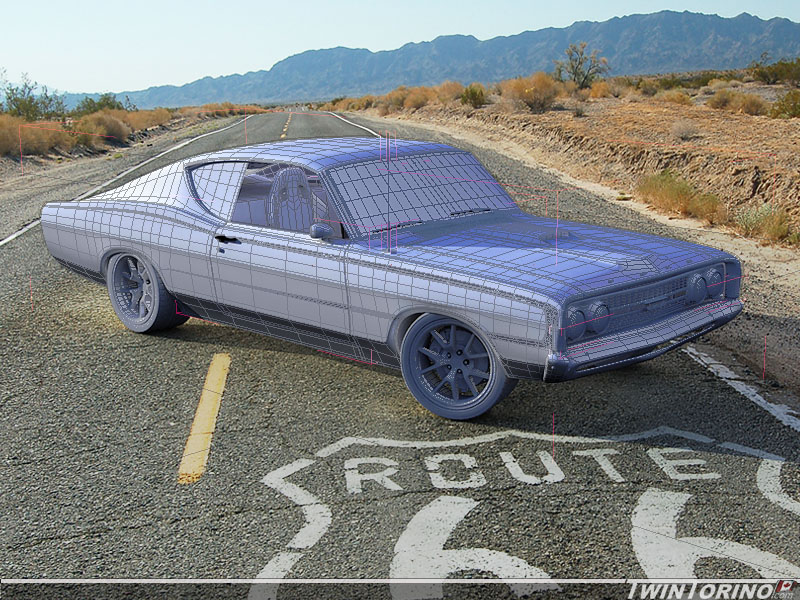
Program used is 3D Studio Max. It was definitely not the most pleasant program to learn, but is very powerful once you get the hang of it. The car is in 3 dimensions so you can rotate it. It is actually made up of a mesh of small rectangular elements which are all smoothed together to produce the surfaces you see. Each one of the elements is assigned a texture, refectiveness, transparency etc. This is what it looks like before texturing.
Also finished up close to a final rendering of the car. Just need to add a couple things like the hash marks etc and update the brakes. I like the stock looking C stripe the more I look at it.. glad I pryed myself away from the 2-tone. The background is in Arizona and was taken by a friend of mine.
Full Car Renderings…
Finally have something together that is worth showing. These models are done in 3D, so there will be many more to come now as the models progress. These models will be used to chose colors, add body pieces like lower fascias etc and whatever else happens to come up. After doing to first render – I was definitely sold on the original style c-stripe instead of the 2 tone that was originally planned. This was my first go at 3D rendering, so much more to come..