Category: Front Suspension
Lower Control Arm Changeout..
Finally making some more progress..
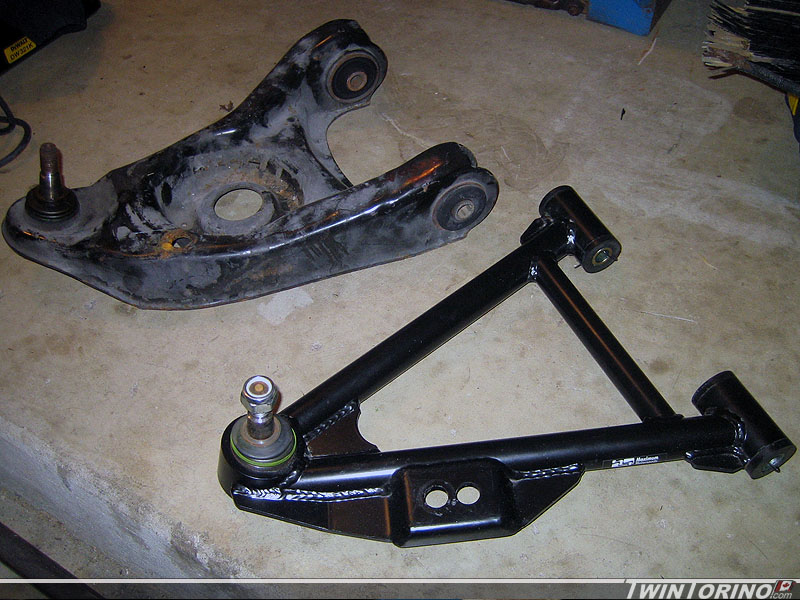
Had my first issue with Ebay.. thankfully it turned out OK in the end. I bought a set of Fox body tubular front control arms which I thought were made by Maximumum Motorsports (one of the highest quality Mustang tubular control arms you can buy). Got them in and they did not look right or fit right. Sitting 5 feet away they looked like the real deal. Turns out in the end they were knock-offs from another company. Once I convinced the seller they were not legit (he was not aware either), I got my money back and send them back. In the meantime I was able to convince someone to trade me straight up for the ones I had already. As you can see, they are much shorter which works out perfect. I now have lots of tire clearance and should be able to fit 275’s up front which was the original goal (2004 Cobra used this size).

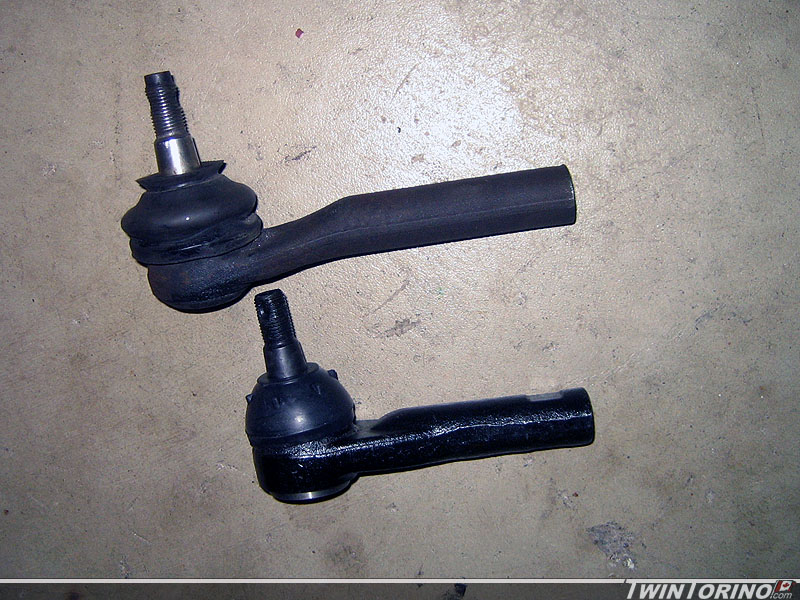
First problem after installing new arms – tire rods are too long. Solution – 1993 Taurus outer rod ends. Works great now.
Also aborted mission for now on the tubular k-member. Too much time and money for the time being. The stock k-member is likely stronger regardless. In that case – started to work on getting the motor mount brackets modified to get the engine shifted back as far as possible.
Front Tubular K-Member Design
Been working away at the front suspension a lot lately.. although it does not feel like I am getting anywhere. Decided that using the stock k-member will be almost as complicated in the end as just building one from scratch. Making brackets to mate up to the Torino frame and also shifting the engine back 3.25″ relative to where it would be on a Mustang have been the biggest headaches.
We decided to switch to shorter control arms to be able to fit larger tires up front (265’s or 275’s). This has been a pain because the fender lip is low and covers the top outside edge of the tire, and also the tire hits the coil-over spring on the inside. While the outer lip is fine if you chose to only drive straight – as soon as you turn the tires would scrap on the fender. Four options to get out of this one. 1) Accept a tire size of 245 or less. 2) Add flares to the sheetmetal 3) Move strut inboard via shorter control arms. 4) Bail out on the suspension package and try another one. 1 and 2 we were not willing to accept, and 4 was too expensive and we didn’t want to have to work with a mystery suspension design. Turns out option 3 was easier than we thought as we can just use 79-93 Fox body Mustang tubular control arms which are .9″ shorter.
We ended up finding a used set of Maximum Motorsports Fox body tubular control arms used online. These actually have a forward offset of .75″ in addition (ball joint moves ahead, pivot points stay in the same place) meaning we could squeeze a bit more caster out of them. The only reason these work for us is because we can put the shock towers anywhere we want them and can achieve the camber we need. This would not be the case if you were to start with a 94-04 Mustang and add 79-93 control arms.
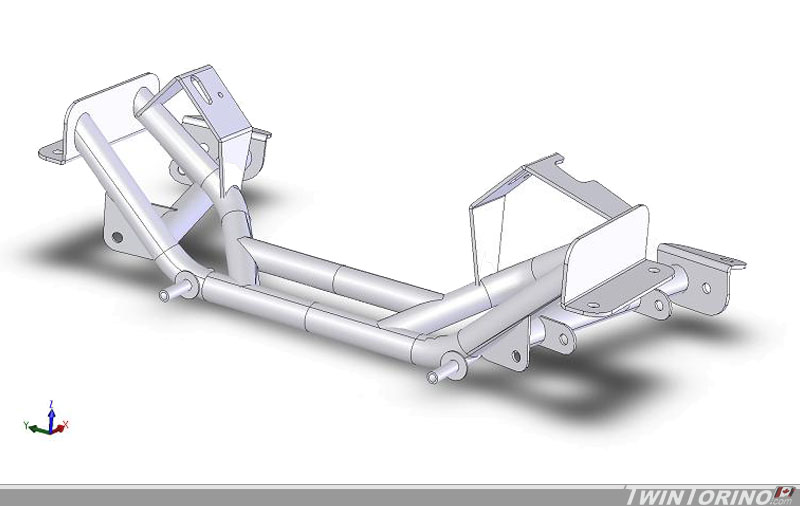
After doing lots of measuring and thinking.. I almost have a design that is ready to build. This will bolt into the stock Torino frame rails in the front. Just need to weld in sleeves into the frame. This will clear the oilpan, headers, steering linkage and move the engine back 3.25″ and allow all the suspension to bolt up where it needs to go. It will also clear the alternator (which is low on the Roush kit), oil filter, lower rad hose and A/C compressor. Once we build a jig for this – we should be able to make copies pretty easily for future projects.
Front Suspension Layout
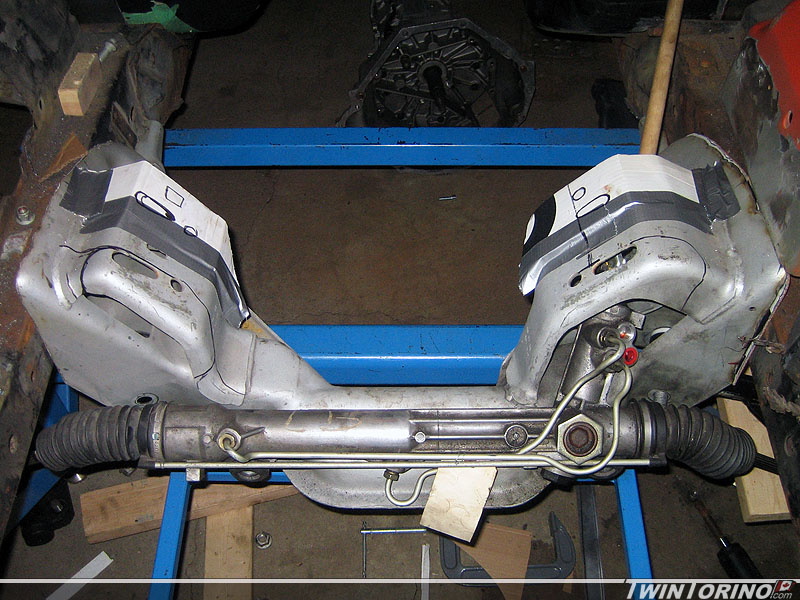
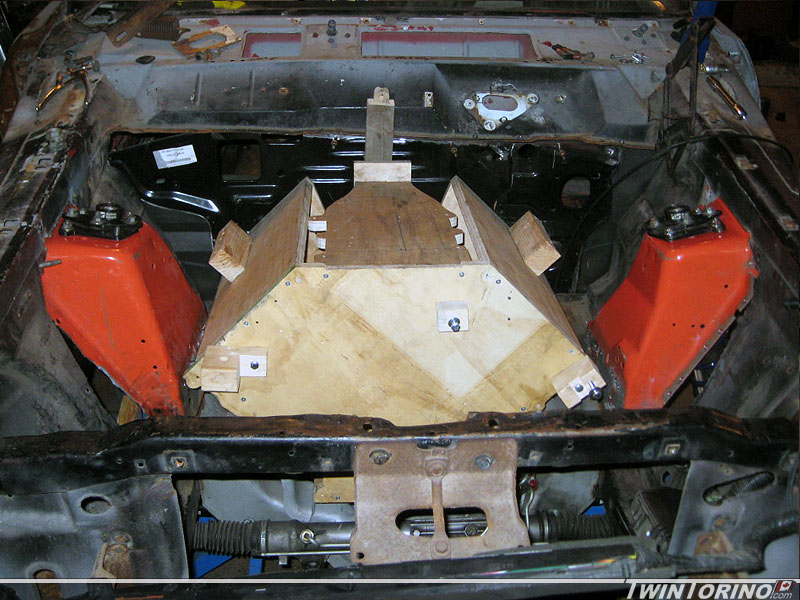
Moved back to the suspension side of things. Making some good progress up front. The main thing with the suspension was making sure the upper strut mount point on the Torino is the same relative to the lower control arms points as the Mustang. This way the geometry is retained, and the strut travel is maintained for both jounce and rebound. We went back and forth on this one and figured since we have a Mustang front clip, we may as well put it to good use. We made up a jig using some extra material we had, and also used the stock strut retainer braces from the Mustang for positioning the towers. We used sockets as dowel pins to line the jig up with the motor mount plates. Worked like a charm. Once we got this in.. we realized we had some issues with front tire clearance as we new we would. The suspension needs to be adjusted down an inch relative to the body and things should work out great. This will also buy us some much needed hood clearance for the supercharger. Shock towers will look nice and clean by the time we are done with everything.
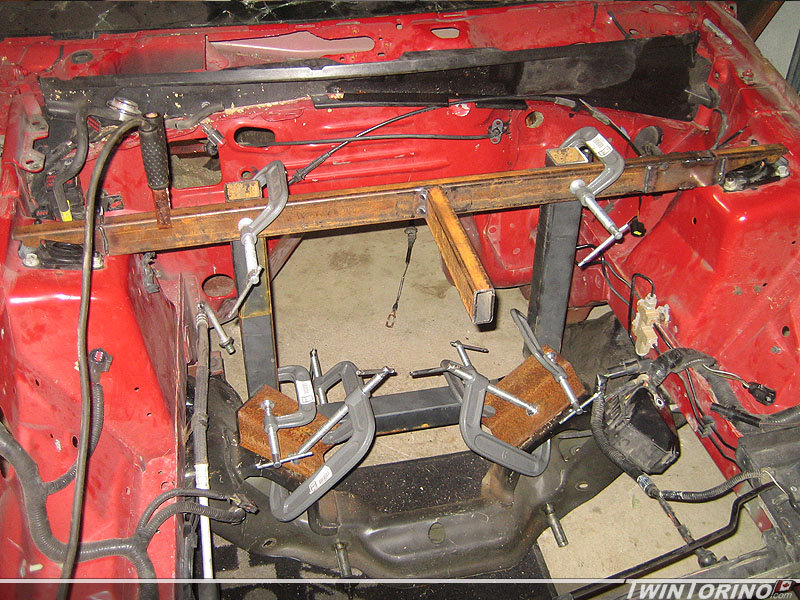
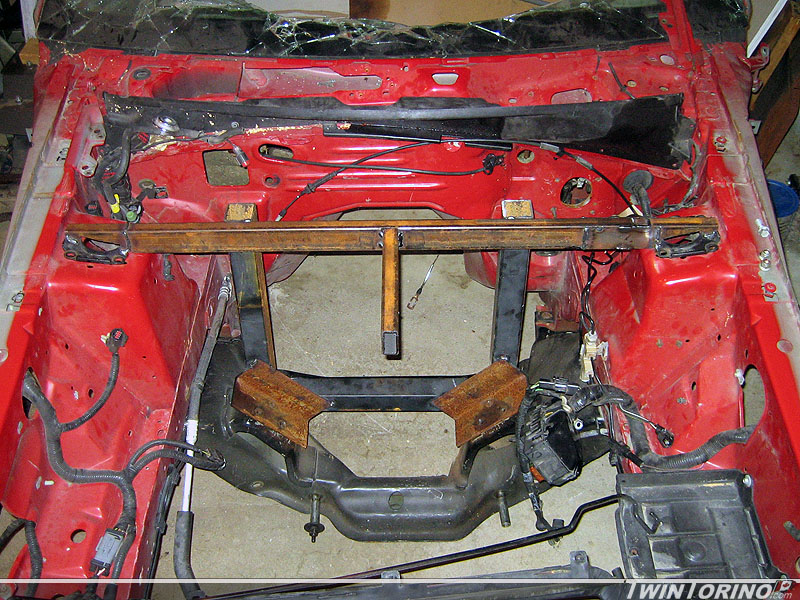
Cut out strut towers..
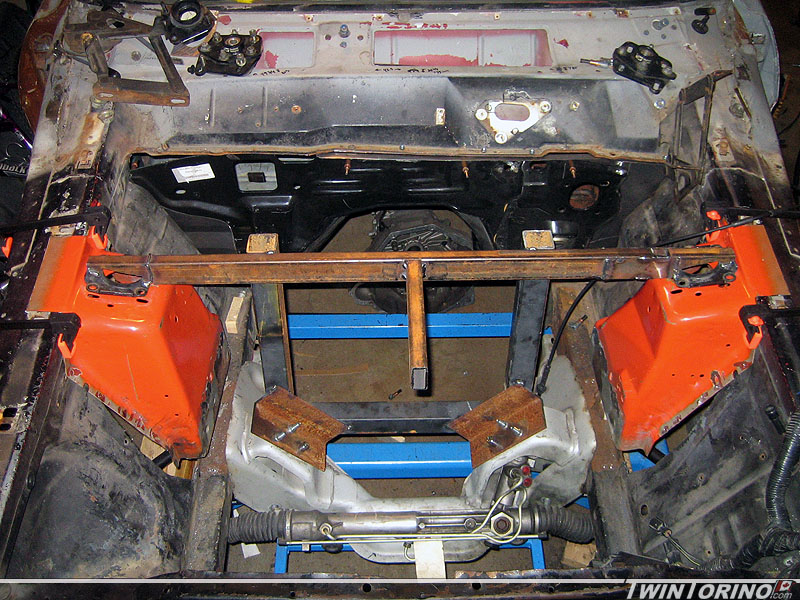
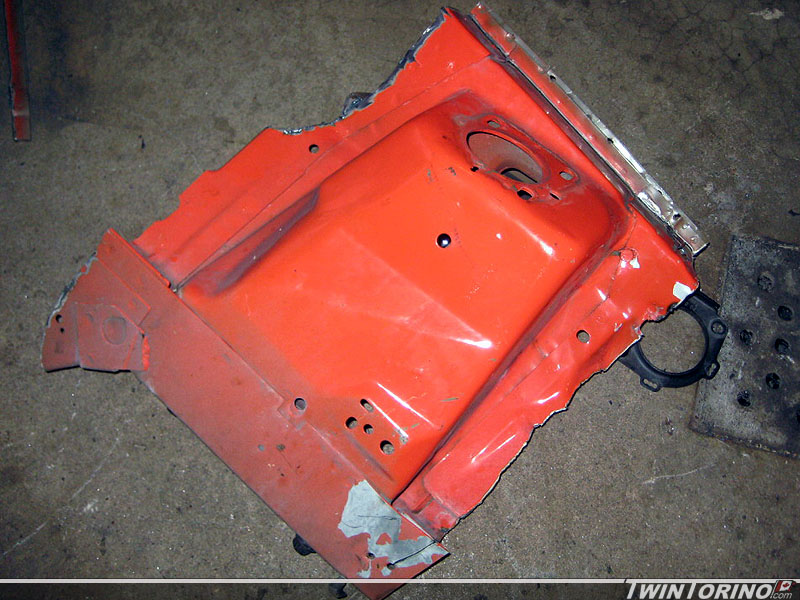
Finally got back to the project again now that the new Torino and parts are sorted out.
Cut the front strut towers out of the ’04 Mustang (definitely not up there with the most fun activities to date). After they were out, we needed to drill out spot welds and cut off what we don’t need to fit in the Torino. We also cut out the remaining pieces of the stock shock tower in the Torino. The last picture shows a quick mockup. Still need to trim off some material and determine where they have to go exactly. Very pleased with initial fitting – they actually look like they are supposed to be there. Believe it or not, the Torino and Mustang engine compartments are the exact same width (to an 1/8″), and the angle of the sheetmetal in the Torino in front of the strut tower exactly matches the Mustang so they should blend in nicely. The goal is to make it look like they were supposed to be there. Hope to get them fit in better tomorrow night.
Steering, Brakes and Suspension
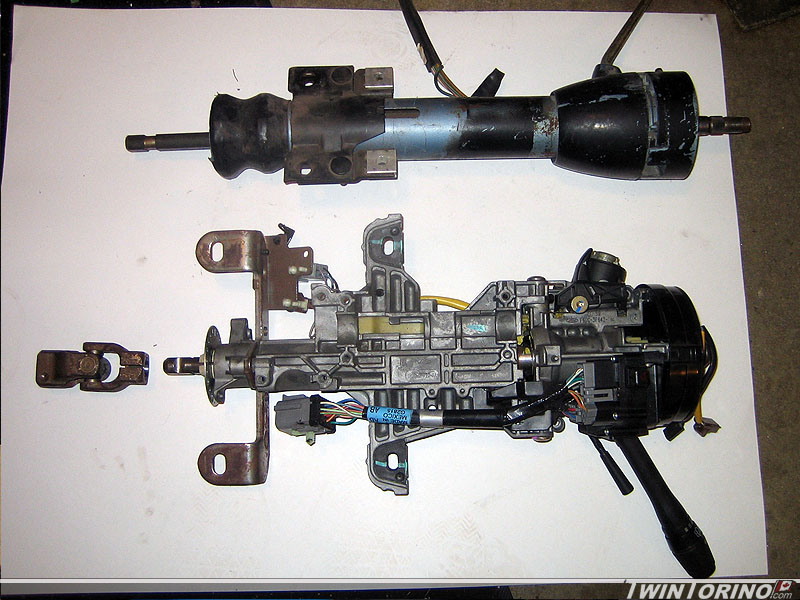
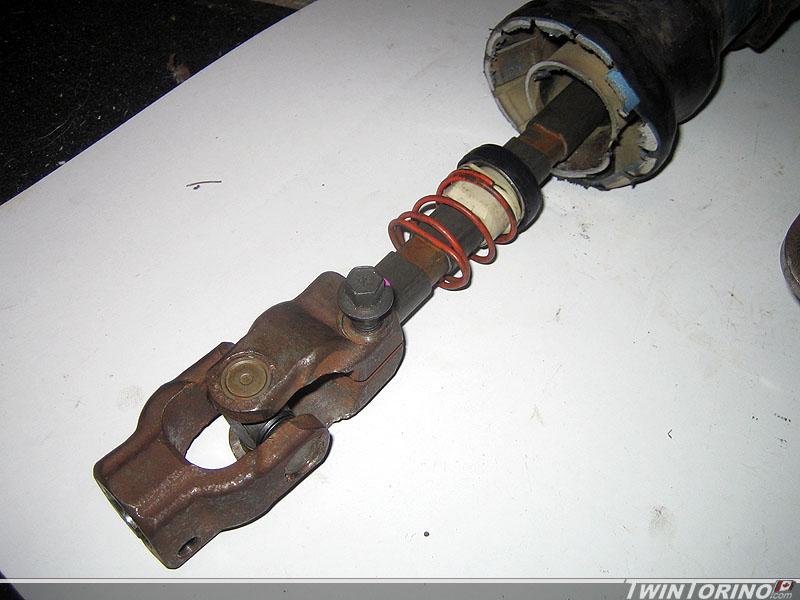
In the meantime – it was time to get going on the steering since this was somewhat of an unknown. The steering will be a cross between a 1968 column and 2004 Mustang. The column needs to be shortened to clear the pedels like on a Mustang, and also to line up with the rest of the system correctly and clear the headers. Beleive it or the column shaft on both are exactly the same. They use a 3/4 double d spec. This way it will require very little mods to get the universal joint to work with it. We will also use the steady bearing at the end like a Mustang. Just need to fab up a collar. I sacraficed the stock column shoft for now.. as I will eventually be using a floor shift column.
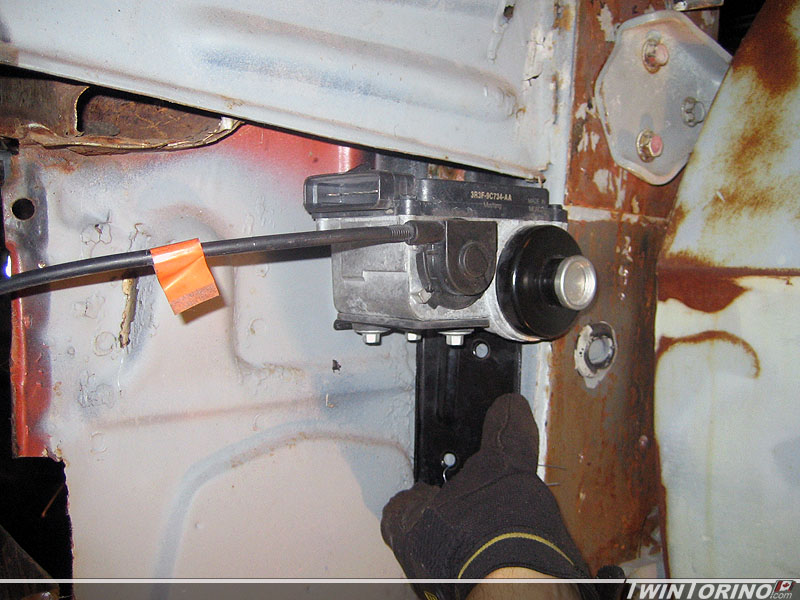
Found a home for the cruise control module behind the front wheel and inside the fender.
Getting ready to get the shock towers in too. Have all the suspension and tools needed now, so this will start shortly. Too bad 315’s won’t fit on the front of the car :). Need to find the exact position of the upper mount. To do this we will be building a jig off the front clip we have.
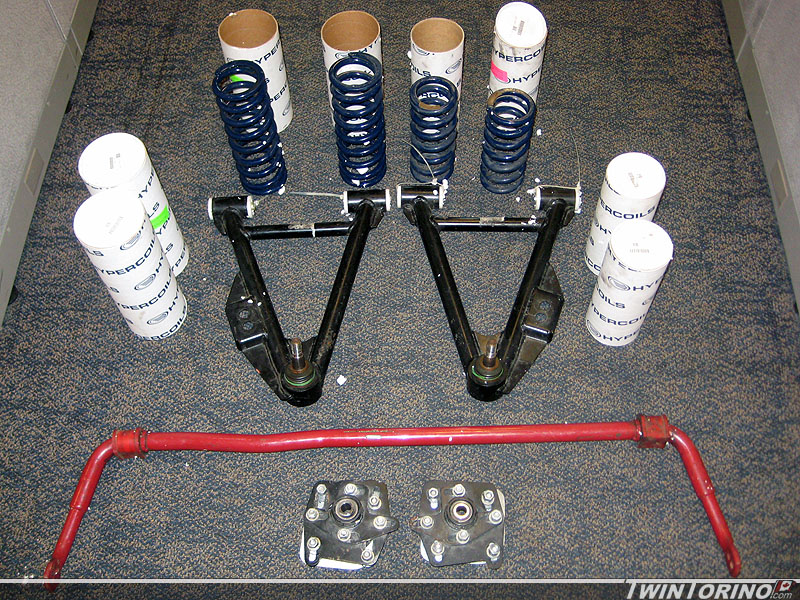
Mustang Suspension Parts Stash
Managed to find several more Mustang performance parts (used of course) from one person that almost completes the parts needed to finish the suspensions for both cars. This includes 4 sets of Hypercoil springs (2 1/2 ID front, 2 1/4 ID rear), Maximum Motorsports tubular lower control arms and caster camber plates, and rear Eibach IRS swaybar (29mm). Almost there – can’t wait to take the first lap around the track!
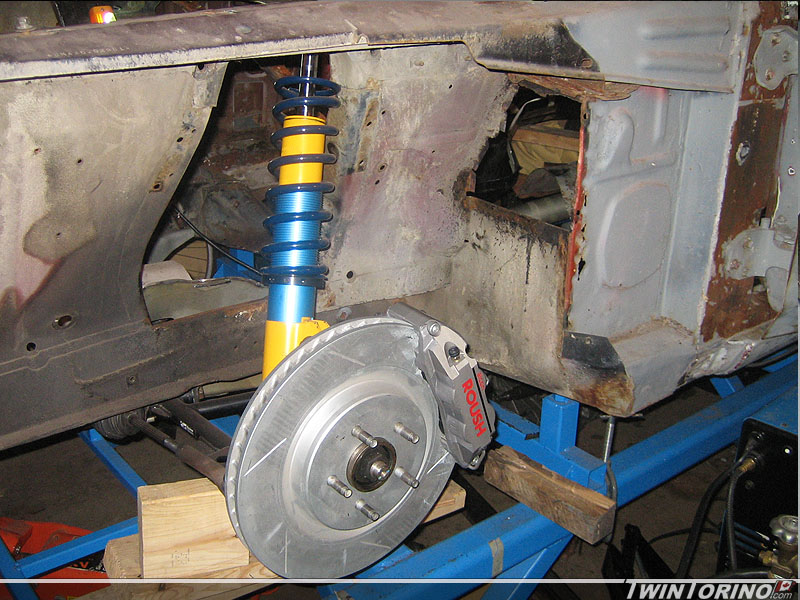
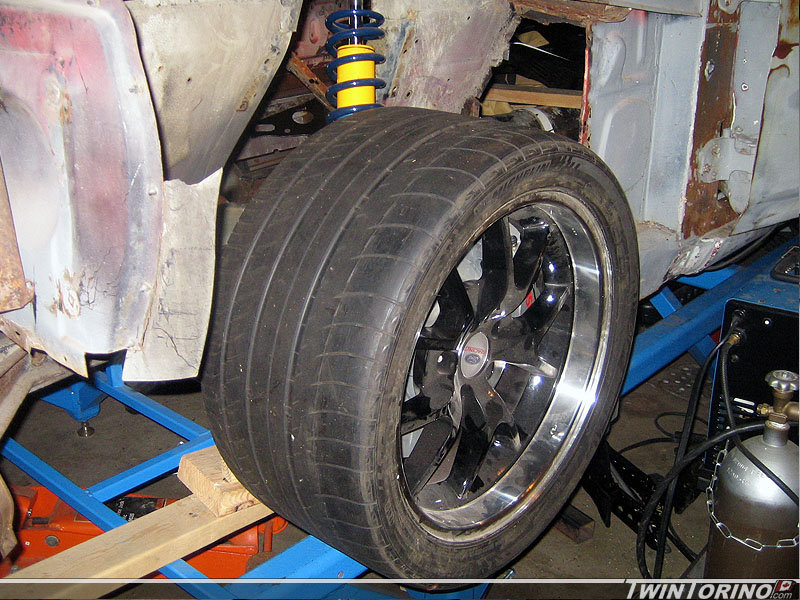
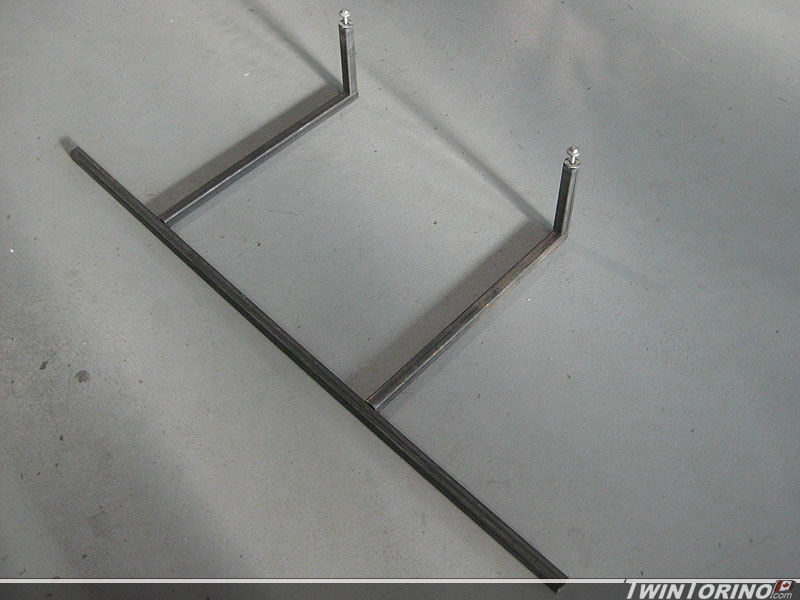
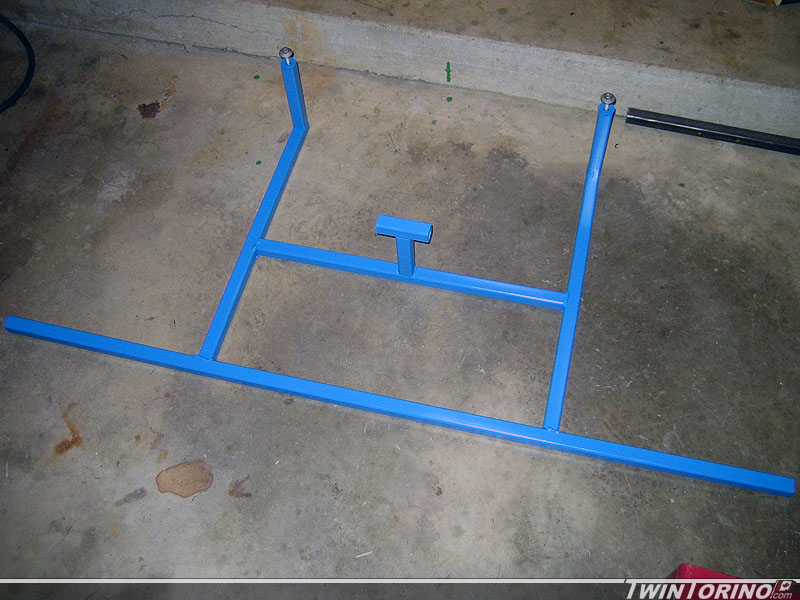
Front Suspension Layout..
In order to get the suspension in place and get the suspension in the correct vehicle position, we needed to build a fixture that would work with our chassis jig. The k-member was used as reference and mounting points were chosen and located. Once this was built, it was placed on the vehicle so a tire and wheel could now be put into place. Finally starting to look like a real front suspension. Lets just say that 18×10’s are a tight fit up front and will likely not fit. They will likely need to be narrowed as that is the only size they come in. They are Roush forged 18×10’s and will likely be the track trims. Lots of new clearance issues came up with this.. and we be datailed as the install continues. The coil overs are going to prove to make matters worse for clearances. More carnage to come tomorrow (Torino Tuesday) as we start hacking up the firewall to fit all the Mustang components. Stay tuned..


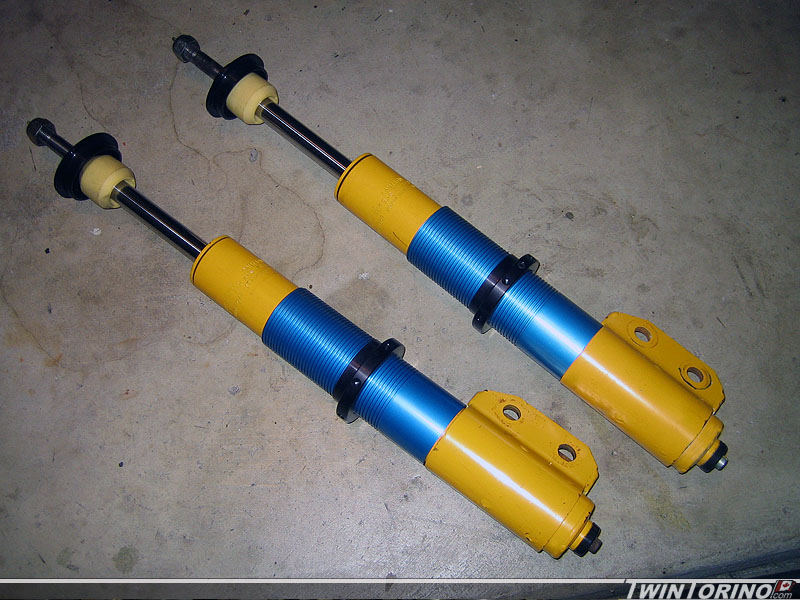
Koni DA’s
All the go fast parts are now starting to arrive as I find them on the net (used of course). These are the front struts for the car. They are dual adjustable (DA) Konis with adjustable rebound and compression settings to I can turn the fun on when I arrive at the track. I also added the Maximum Motorsports coil over kit. Kinda scary.. but this kit new would have cost me more than I paid for my complete Torino.
June is quicky approaching – need a running and driving car for the Hot Rod Power Tour and also for the Fairlane nationals in Dearborn. That is only 4 months away!!
Floors and Seating..
Three main things on the go right now – front suspension/steering/brakes, floor of car/subframe connectors and steering column/pedal setup and seat positioning. Rear suspension is on hold until custom bent tubes and rear coil overs arrive.
First the suspension. Have found most of the front suspension components online in the past month or so. Nice thing here is since I am running SN95 (1994-2004) Mustang based suspension – the sky is the limit with aftermarket parts.
Front suspension will consist of (parts are on the way or in hand now for one car):
Maximum Motorsports front tubular lower control arms
Koni dual adjustable (DA) front struts with adjustable rebound and compression damping
Maximum Motorsports coil over kit
Maximum Motorsports caster camber plates
Stock Mustang front spindles/hubs
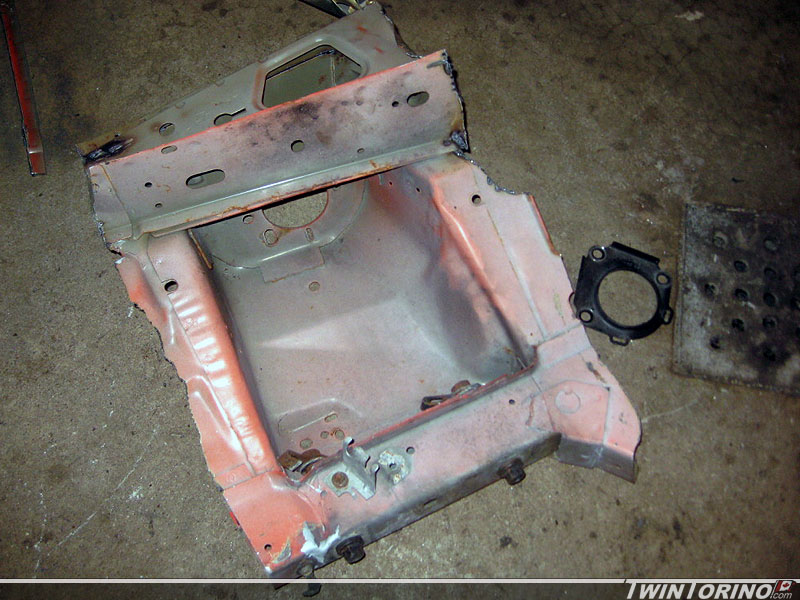
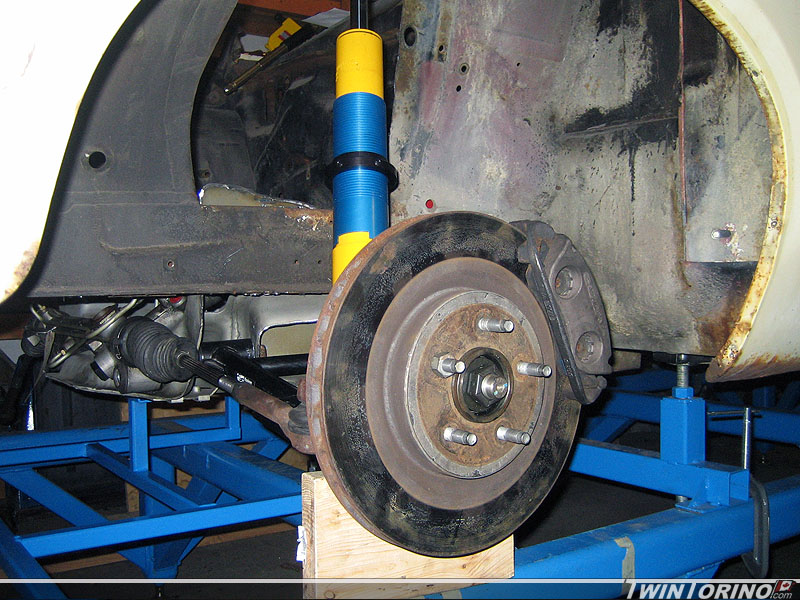
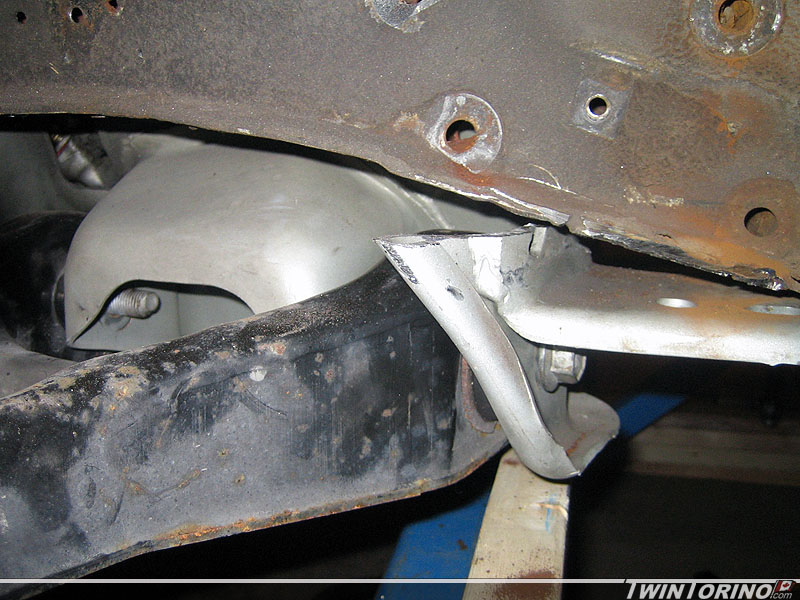
Since the strut rods are no longer needed, the brackets that house the bushings were removed. Custom brackets will be made up to stiffen the the area once again and also provide mounts for the radiator, A/C condensor and ABS unit.
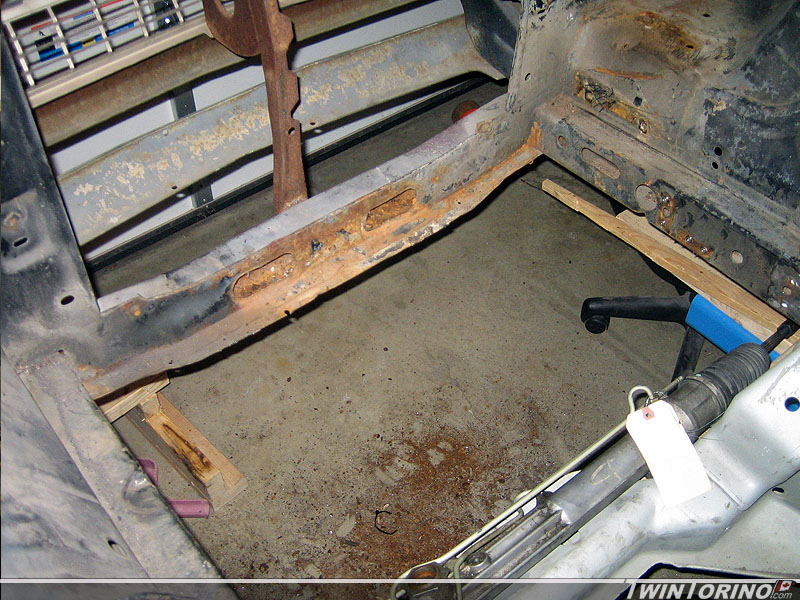
With the suspension almost in position, the stock control arms make contact with the frame. Tubular control arms correct this issue, although just barely. THe goal here is to get the suspension in the exact same position as in a stock Mustang to keep the suspension geometry the same (easier said than done as we are finding out)
Nearly new tubular control arms compared to the old ones. Since we are running coil overs, spring pockets are no longer needed. They are also lighter.
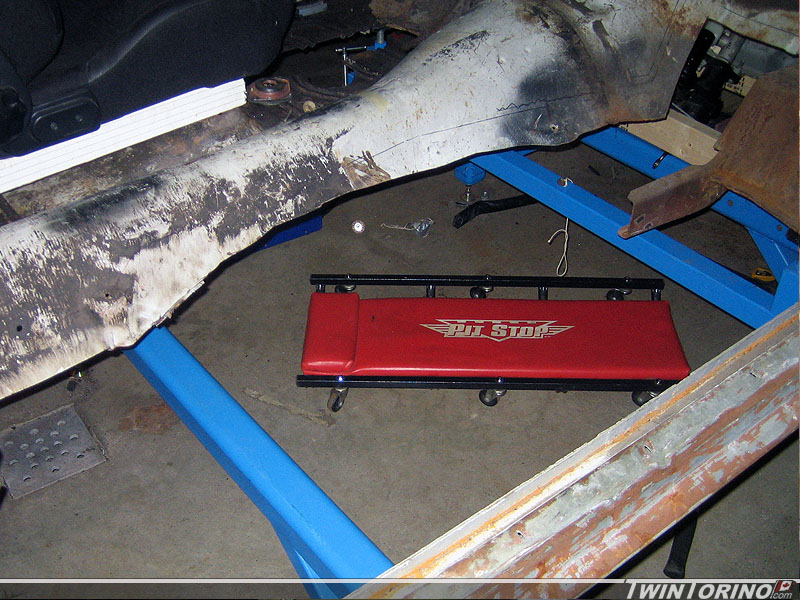
As for the subframe connectors – hoping to have them in within the next week or so. The passengers side is nearly ready to go in. Just have to jog the subframe connector 4″ as the front subframe is 4″ inboard of the rear (more to come on that shortly). As you can see, the front trans mount has been removed, and the remaining piece left will be used for welding to the connectors. A custom trans mount will need to be made for the 6-speed, and also a driveshaft loop needs to go in as well as seat mount supports. This will all make a bit more sense once they start going in.
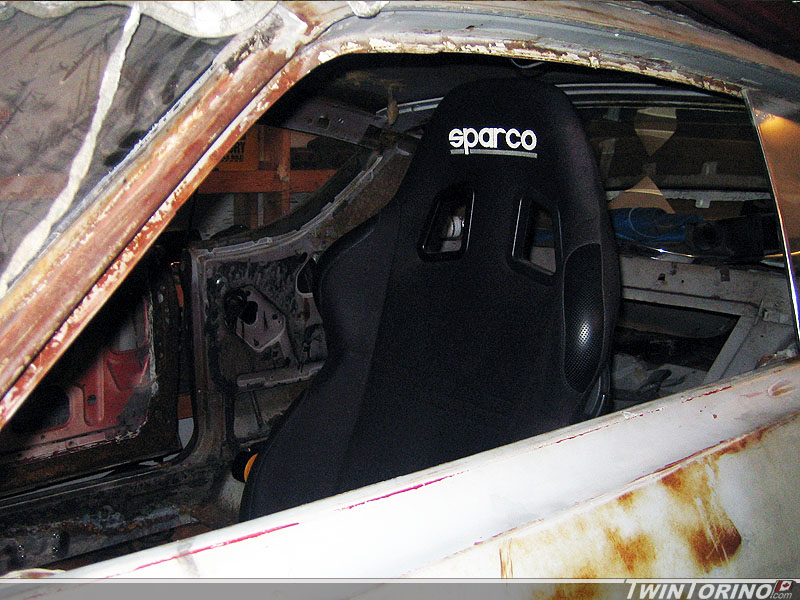
Got started on laying out the driving position this week as well.
Starting fitting the Sparco’s into the car. They are extremely comfortable and will help keep a person planted when on the road course. Stangely enough, sparco does not make seat adapters to bolt into a Torino, even though the model name is Sparco Torino :).
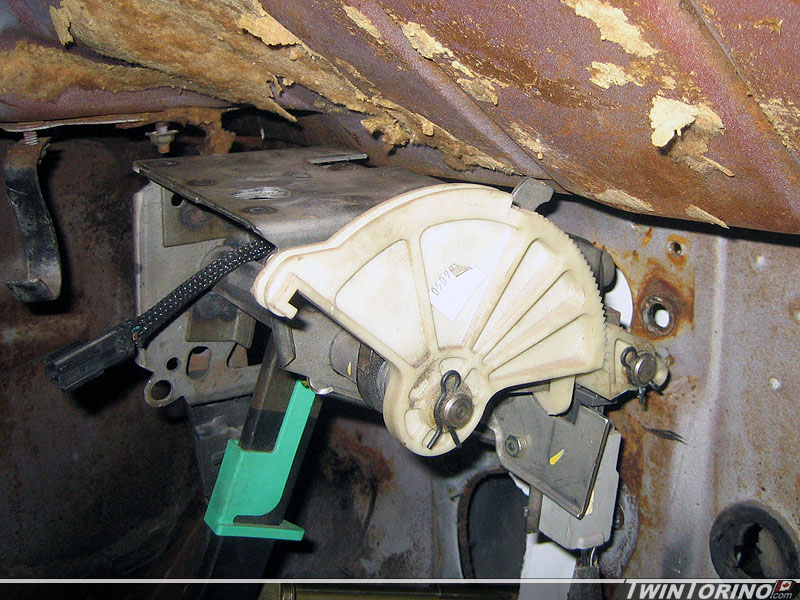
Started to fit the Mustang pedals into the car. Several reasons for using these instead of Torino ones. Mustang uses a cable clutch and Torino ones need significant mods to make work with the clutch quadrant. Want to be able to keep the stock Mustang pedal ratios going into the hydroboost. Want to be able to use the stock Mustang electronics since all the dash wiring is from a 2004 Mustang. Also like the pedal positions much more and they are much better for heel/toe driving on the track. Measurements were taken from a 2004 Mustang to be able to position the pedals the same distance from the firewall, height off the ground, and releationship to the steering wheel. The goal here is also to use a stock floor shift Torino column as I hate the look of a new column in an old car.

Well.. here is the first issue as we were expecting. The clutch quadrant hits the windshield wiper motor area. This area will need to be modified to make it work. It is looking like we will end up grafting a Mustang firewall onto the Torino. That way everything will bolt right up (including brake clutch and gas pedals, steering column, hydroboost unit, heater box and all wiring and cable pass throughs) and look much cleaner. Since we have 2 complete Mustang firewall assemblies and a plasma cutter.. this should not be a big deal.. famous last words I guess.
Stay tuned..
Suspension Simulation..
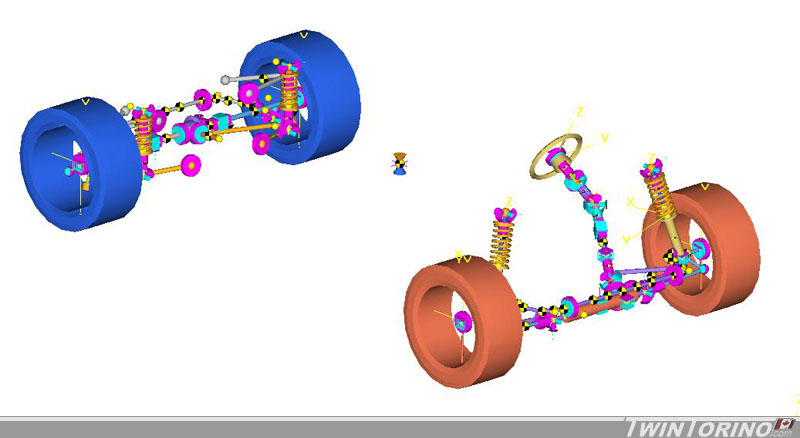
We have been spending some time lately figuring how we want to set the suspension up, and seeing what we want to run for hard points on the chassis etc. We also want to figure out how to set up the rear springs/shocks, since there is not a lot back there. We started to get the chassis points into the computer and figure out roughly how the car will behave when we set up the points the way we want to. The models is being created using program called Motionview (by Altair Engineering) which is for multibody dymanics. This is then sovled using a program called ADAMS.
Here is the model as it is today. The front and rear suspension have all the basics points in. Not much to see aside from the bare basics. You can clearly see all the main suspension parts for the front MacPherson strut suspension and SLA rear IRS. The key here is the info it spits out.. and not having detailed graphics. I will post some animations once they are up and running, as it makes more sense when you see things moving. Now it is time to determine the kinematic behavior of the car (camber/caster/toe curves) and them move onto the dynamic side of things (spring rates, shock rates etc). Also been spending some time with a complete 3D rendering of the car which should be ready to post in a week or two.
This is much easier to do now before everything is finished, and it is not really easy to guess how a car will behave by just looking at where points are. This will provide a starting point for setup, as it is much harder to move points when everything is welded in for good.