Articles Written By: Craig
Floors Continued..
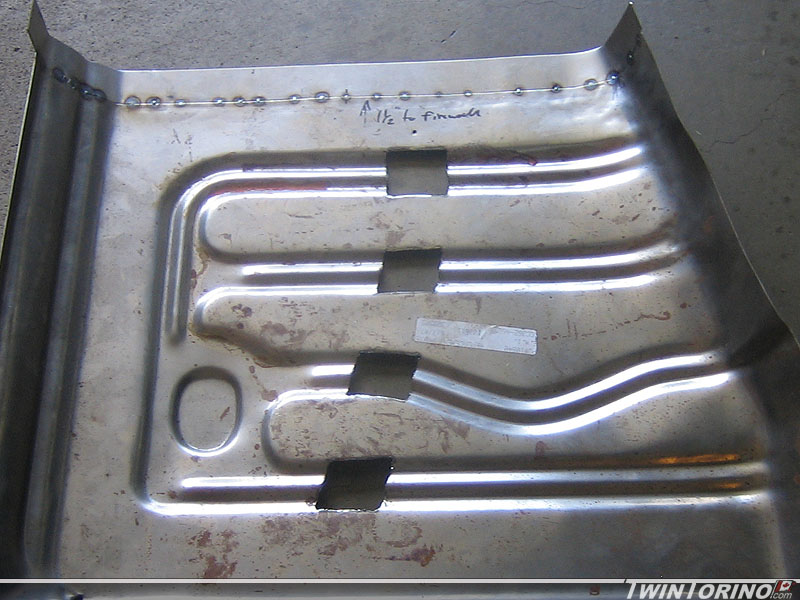
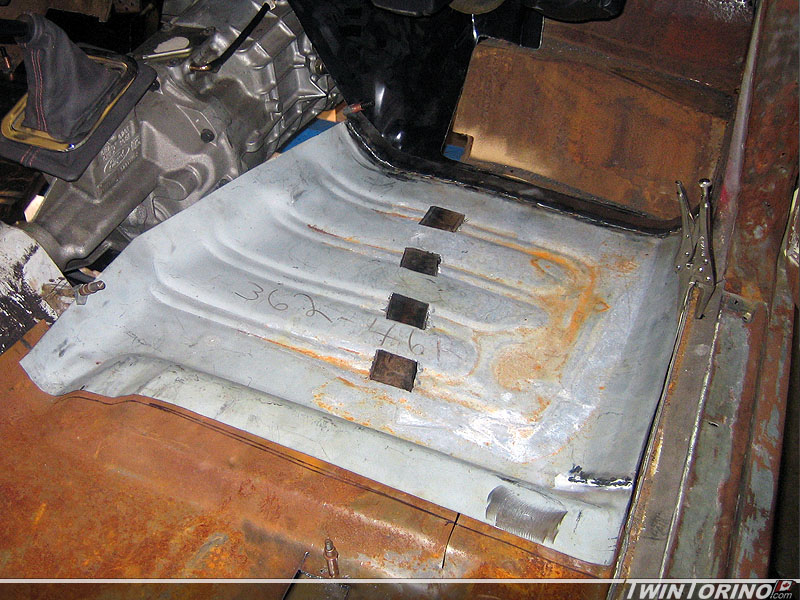
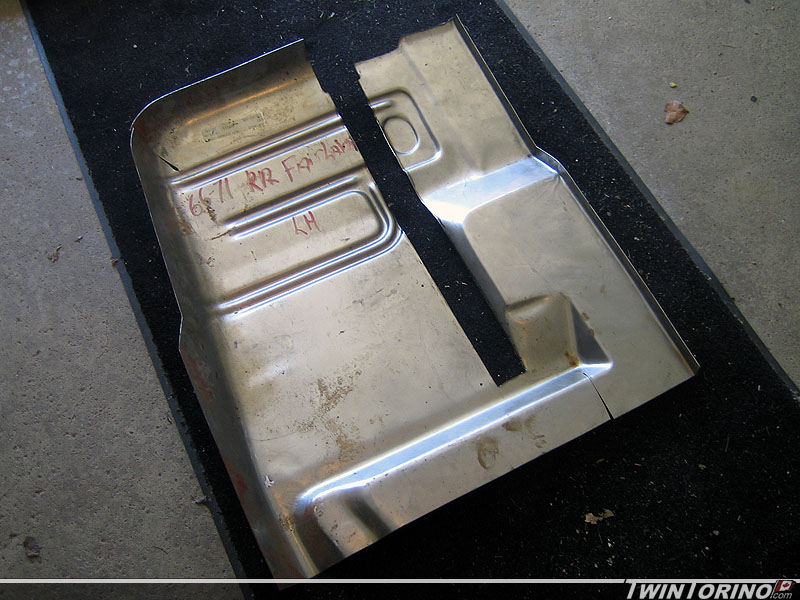
OK.. no more stalling with new tools :). Finally got back to the floors.
Put the cutouts in the pass side floors to mate up with the subframe connectors, and added and inch and a half to the front of each panel to meet up with the Mustang firewall. That way I no longer need to use Torino toe pans (unfortunately I bought them already). With the way the subframe connectors are set up in the car, the floors are lowered approx 3/4 in the front to get a bit more room up front for the pedals etc. I quickly put in the seats and dash and it feels perfect for driving.. can’t wait. Now onto the firewall and trans tunnel.

Bridgeport Purchase..
Getting lots more done on the car.. but most of it is behind the scenes sheetmetal work and nothing that is overly photogenic.
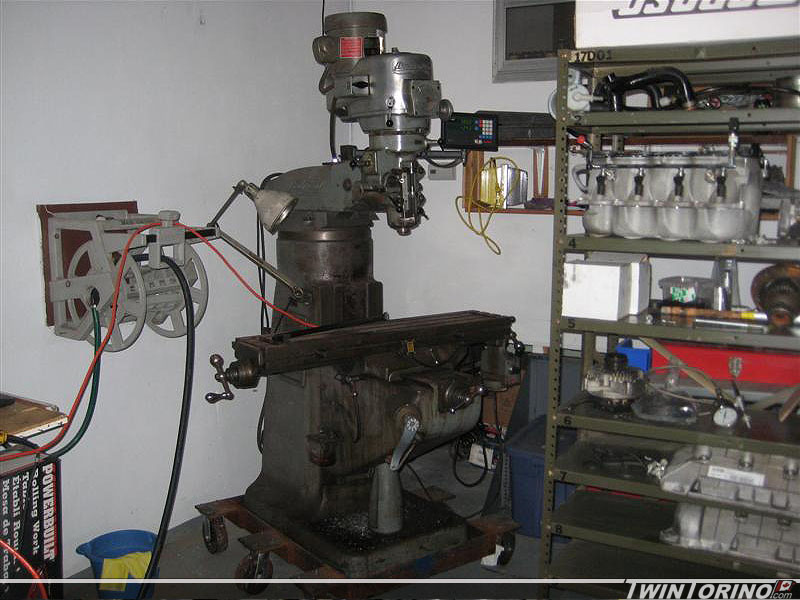
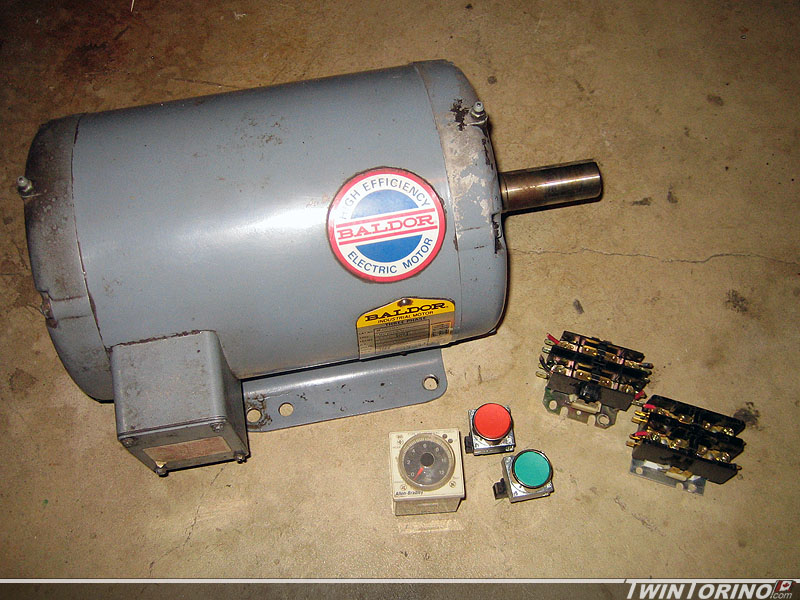
We did manage to stumble upon this beast which is a welcomed addition to the shop. Have been wanting one of these since I saw my first one in action. Did not really “need” it, but the price was waay lower than they usually are as the place was closing down. Needs a bit of work and a good cleaning but other than that should be productive in the coming weeks. It is a Bridgeport Series 1 mill (All 1800 lbs of it). Now just need to get the phase convertor up and running to get 3 phase in the garage. Have most of the parts and pieces to make a 5 hp rotary converter as I have been collecting off Ebay/Craiglist for a couple of weeks. I have a friend who got one of these machines last year and it came with a dolly.. he was about to send it to the scrapyard.. so I put it to good use.
Subframe Connector Clearance
I think we are going to end up making a custom hump – gives us an excuse to brush up on english wheel skills. I may try to use parts of the original – we’ll see. Mustang one won’t work that well as it is set up for a car with a complete console (as they all have consoles). It is somewhat square/box shaped and will not work well with stock carpet. That is my only concern at the moment is fitting carpet over this as I am not using a console. Want to make the front of the interior very simple. Stock dash, Sparco seats, somewhat period looking shifter/handle and that is it.
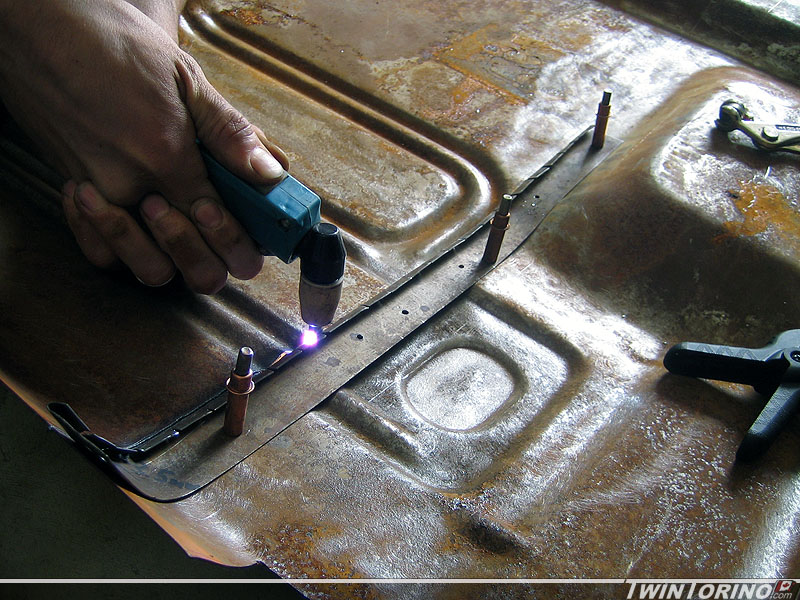
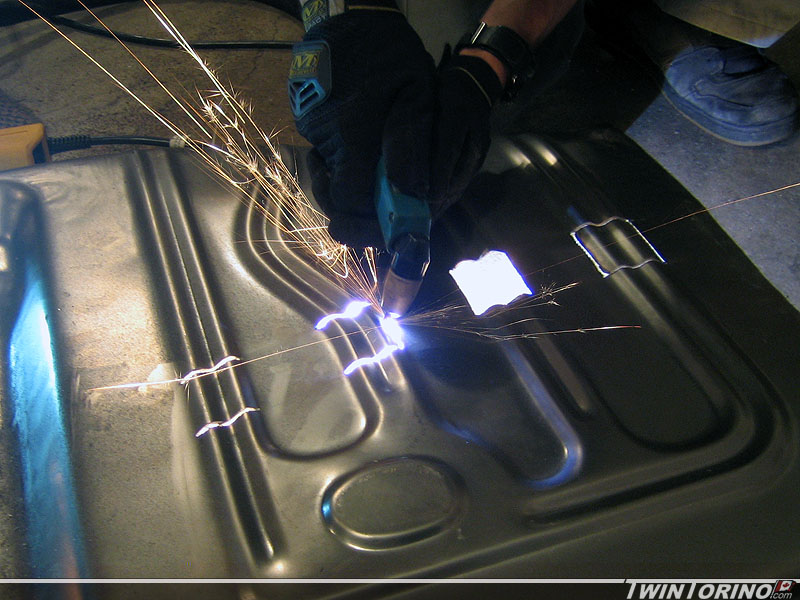
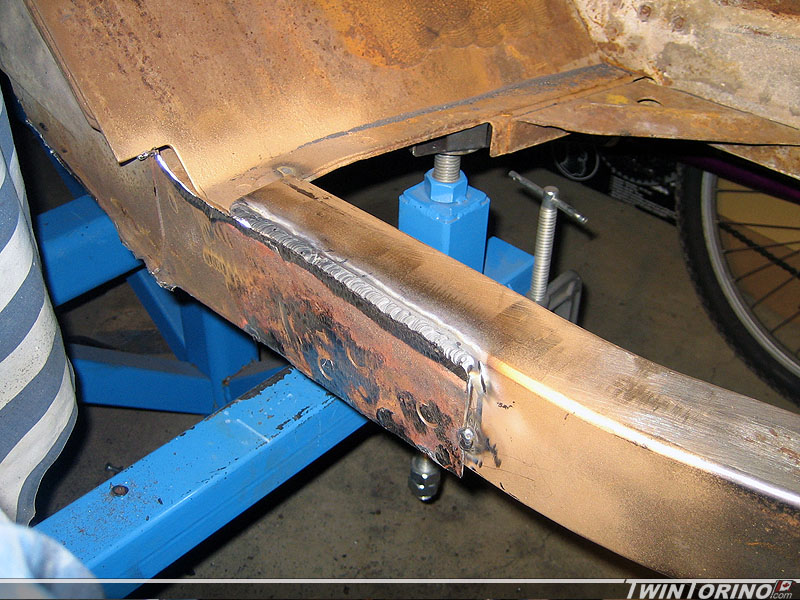
In order to get the lines perfectly straight – we ended up making a custom guide on the sheet metal brake and cut reliefs in it to go up and down contours. Worked like a charm. You just rest the tip of the plasma cutter against the guides and cut away. There is now very little gap on both sides. Took more time that I had wanted to get right.. but it was worth it.
Floors and Frame Connectors Continued
Finally located the parts that were missing from the second transmission. Someone decided to take it apart and just slap things back together when they realized it had issues. We fixed all the issues and everything is as good as new again. Trans #2 is now complete and ready to install.
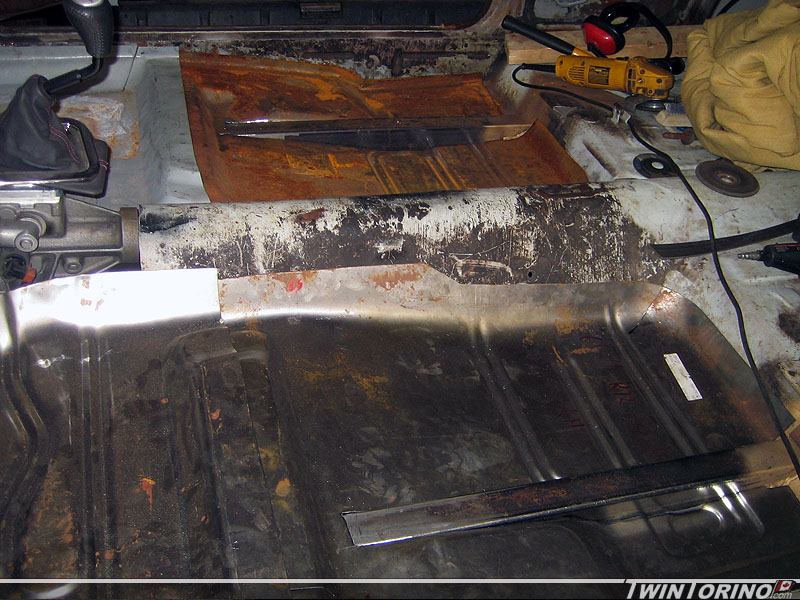
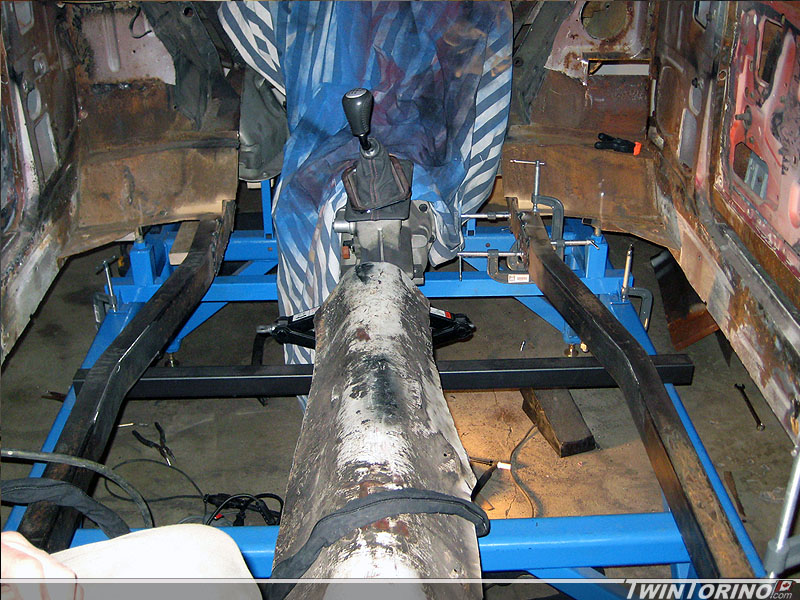
Now back to the interior once again. The top portions of the subframe connectors are now completely welded in, so it is time to finish up the firewall and the floors. The firewall was trimmed to fit around the torque box and was adjusted to the final position both side to side and up and down. The floor needed to be slotted to clear the subframe connectors both front and back. We ended up lowering the floor 3/4″ to get everything where we wanted it. Just need to add an inch or two to the front pan so it will mate up with the firewall. This works out great and will no longer require toe pans. I had to pull out the hammer and dolly set to get the profile of the front of the floor pan to match the firewall – worked out quite well in the end.
Just need to make up extensions for both sides of the firewall and make up a tranmission hump, then everything can be welded in for good. Finally starting to feel like we are getting somewhere. Hopes of being ready to drive for the Power Tour is out the door – but the Bash at the Beach is still in within reason.
T56 #2 Nears Completion
Almost have transmission #2 done. Not much new as far as pictures go.. as the trans is exactly the same as the other.
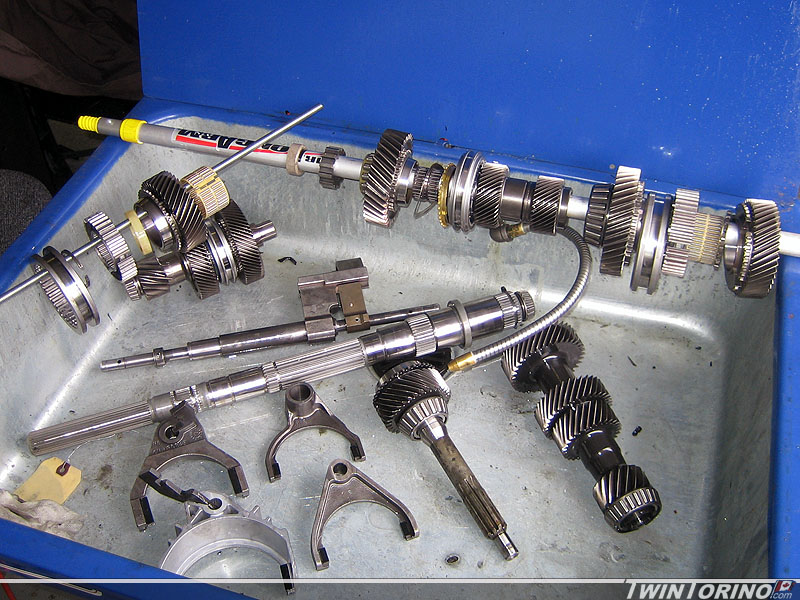
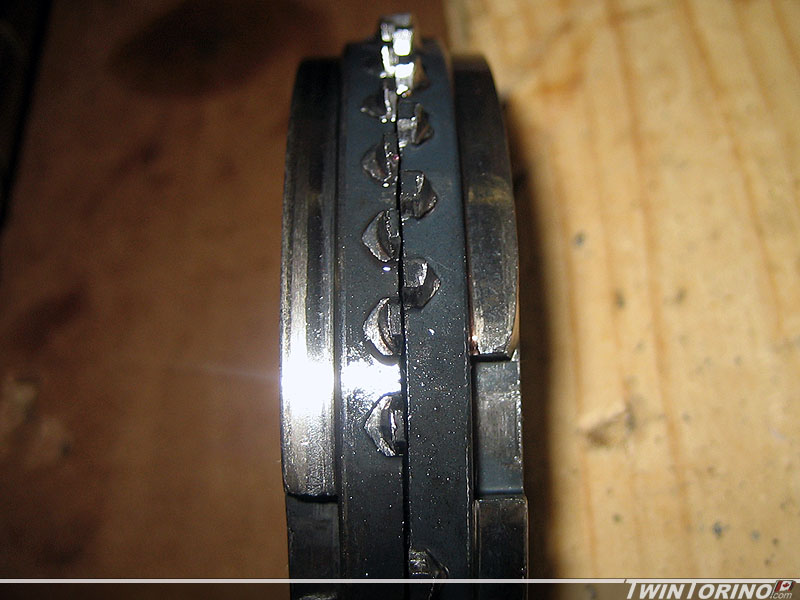
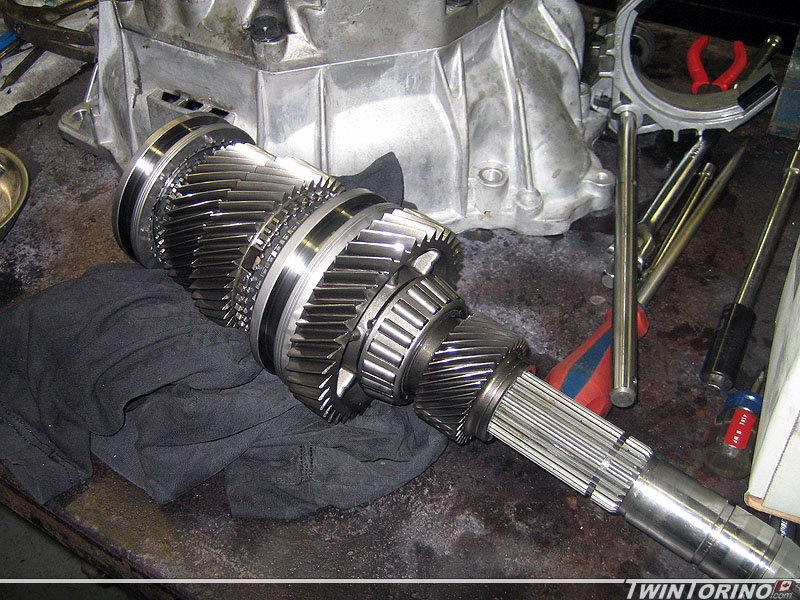
I bought this one from a guy in Ohio for very cheap.. he was fed up with the way it shifted and had brought it into the dealer to take a look. The dealer pulled it apart and found the stamped keys destroyed and pieces were all over the magnets (just like the other one we have). The blocker rings (shown below) were warn out and then some. Thankfully they did not wear down more or my gears would have been chewed up. At this point – I am guessing the dealer found it would be cheaper to just replace it, so they did. They quickly pieced it back together (leaving several key pieces out) and that is how I bought it.
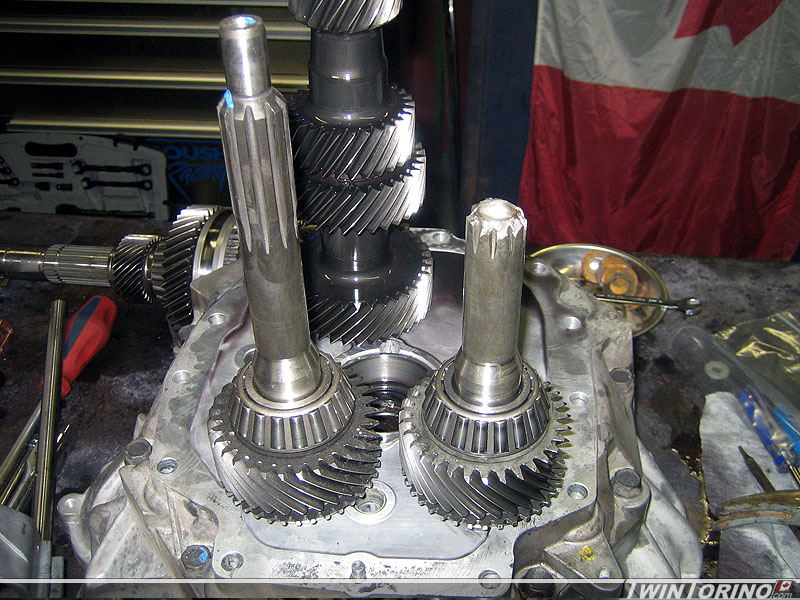
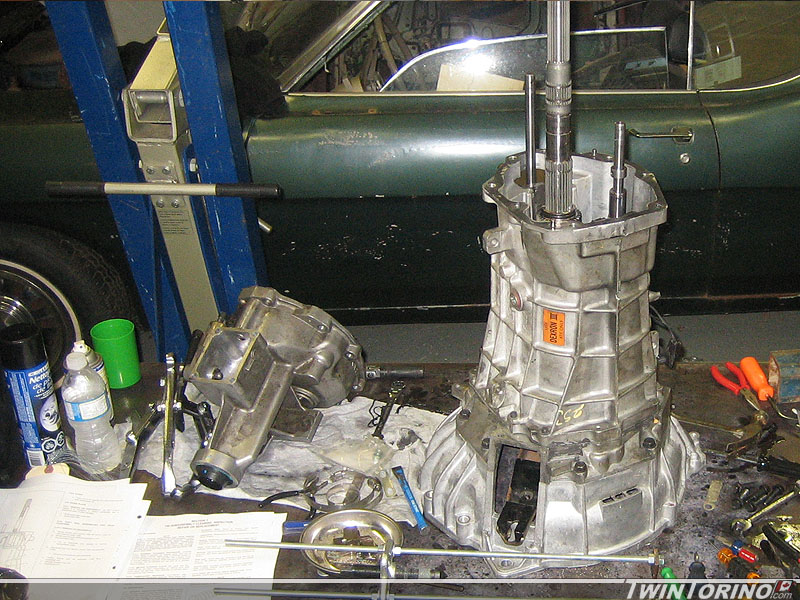
Here is a pic of everything disassembled and in the parts washer. Still amazed they can actually make these thing work.
T56 #1 Complete
Finished transmission #1 this evening.. and #2 is ready to tear down. Finally getting to the fun stuff. Process was quite straightforward being the first time we had done a modern trans.
Car was not going anywhere with this shaft. Ebay $13 replacement will do the trick. I will not be running enough power to replicate this failure.
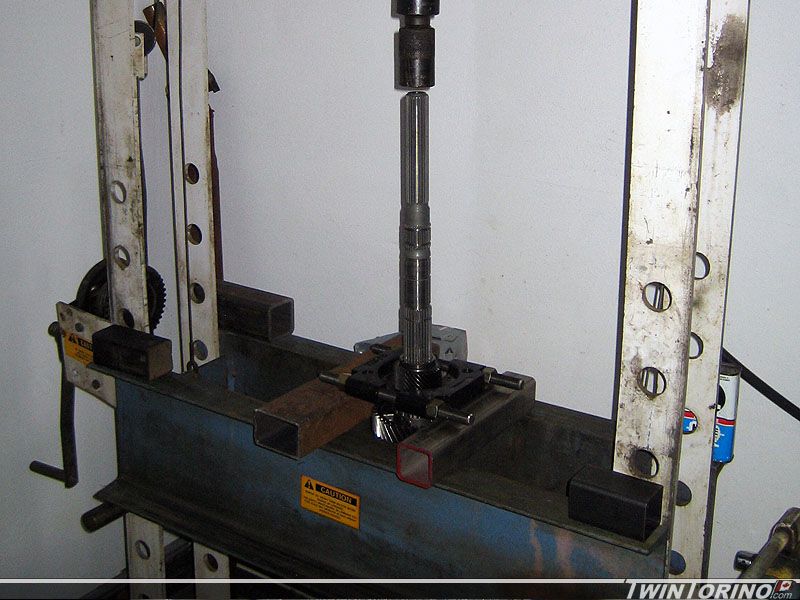
Ebay used press coming in handy..
New sycro billet keys and blocker rings installed and ready to go:
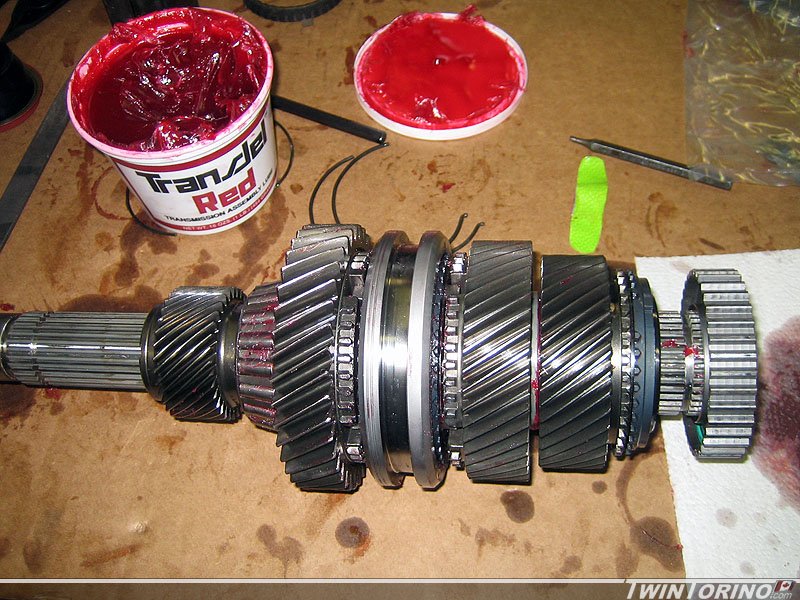
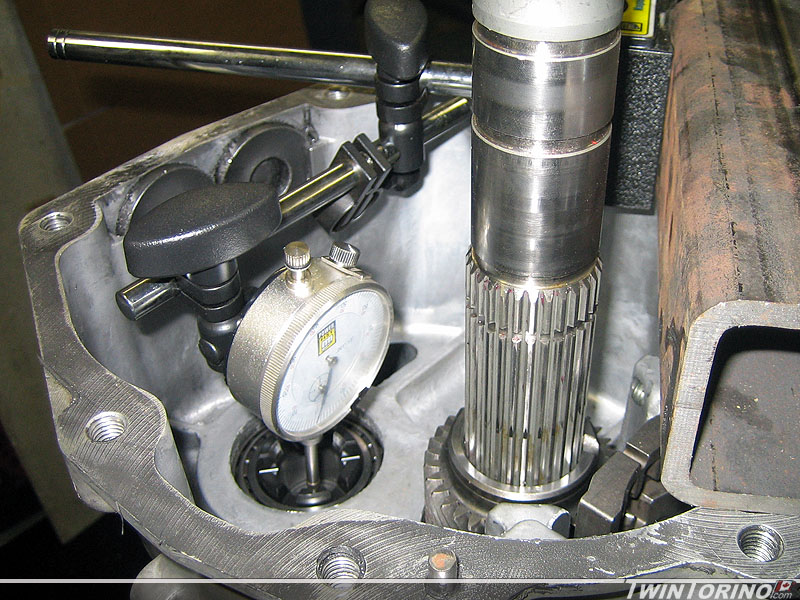
Measuring shaft preloads (since they use tapered roller bearings) and added shims to get 0.000 end play.
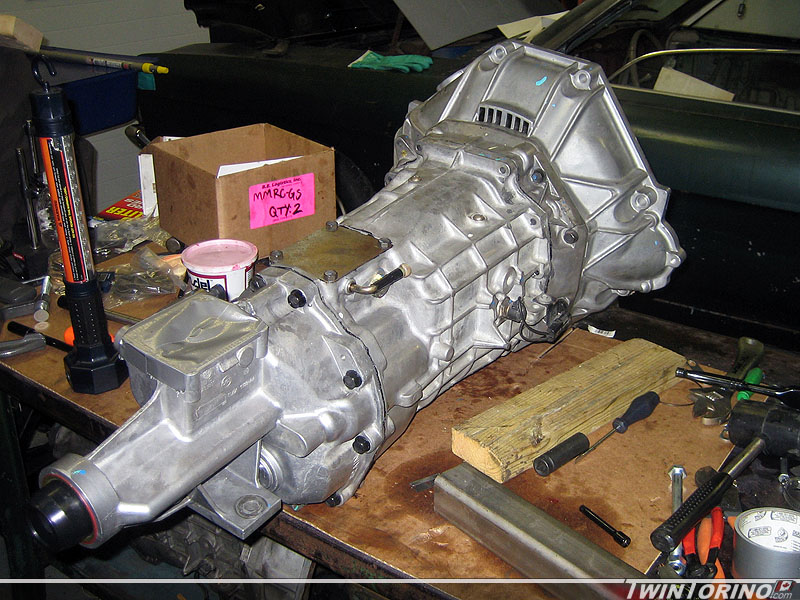
All done, cleaned up and ready to install:
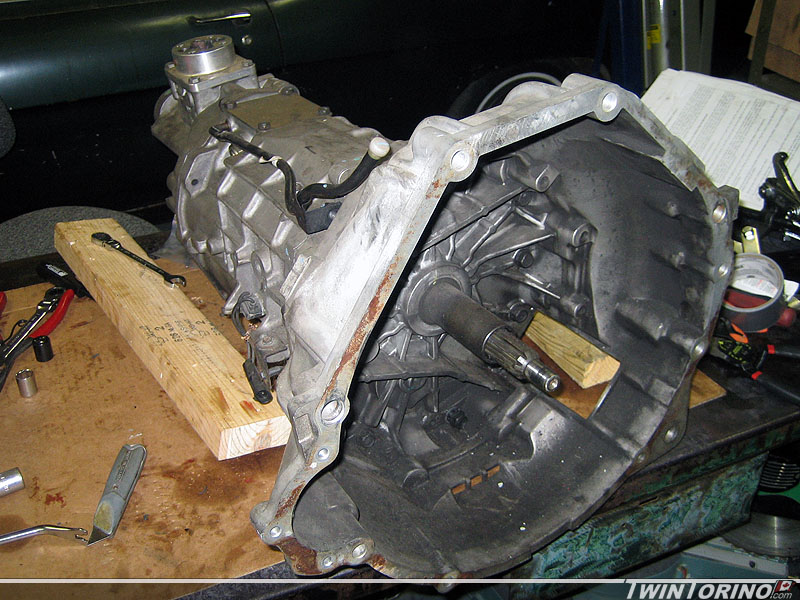
Trans #2 ready to tear down. This one should go much faster.
T56 Carnage..
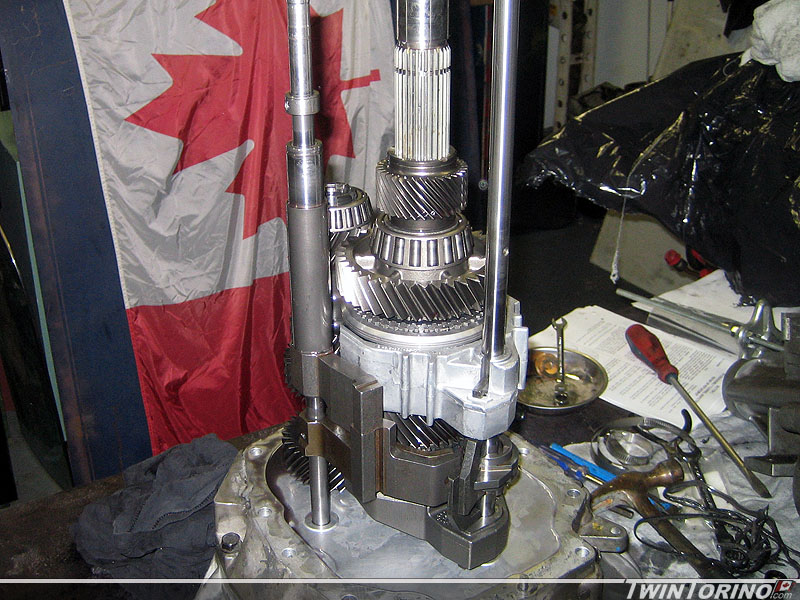
Tonights theme was Tremec T56 6-speed trans rebuild. We bought 2 of these knowing there was some internal damage, but the price was right. Symptoms were hard to shift into 3/4 gears, and also the transmission was popping out of 3rd and 4th while driving. This is a classic symptom in these transmission of failed stamped steel keys in the trans. This is a faily easy job as long as you have gear pullers available and heavy duty snap ring pliers. Another evening we should have this one cleaned up/rebuild and another torn down.
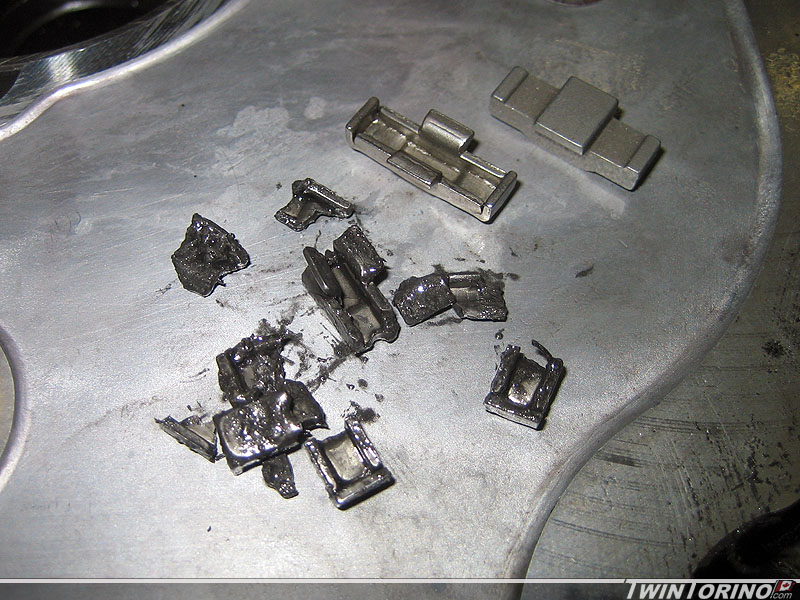
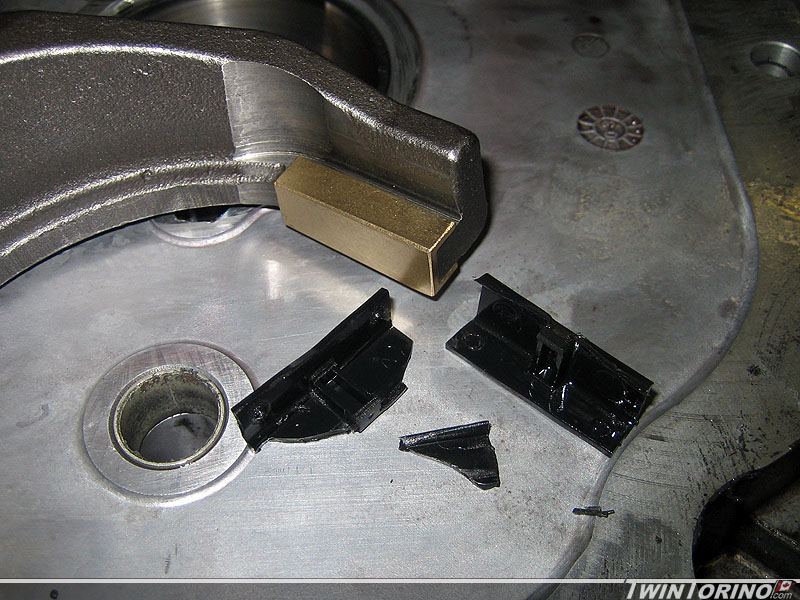
As you can see below – the fragments found in the trans of the stamped steel keys, what the stamped steel keys originally looked like, and the upgraded billet keys. Also the difference between the bronze shift fork pads and the plastic originals (the other ones were in pieces all through the trans). Transmissions will also receive carbon kevlar synchronizer rings and an upgraded steel shift fork (from aluminum). Otherwise all the gears in the trans were in great shape with no noticeable wear.
Subframe Connectors Tacked In..
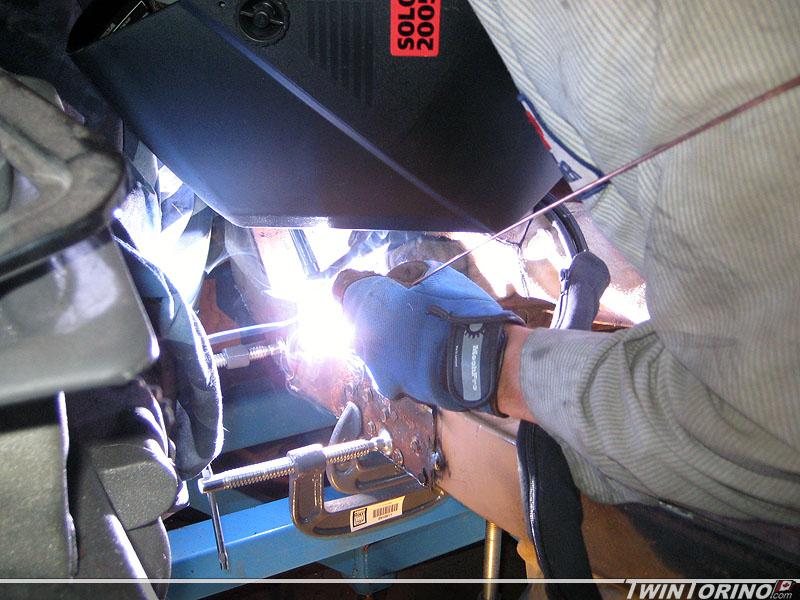
Got the subframe connectors clamped in and tacked into position. Coated everything with SEM copper weld through primer and started welding them in for good. Don’t think they are are going anywhere now :). The old transmission crossmember worked out perfect to stiffen these up and tie them into the subframe.
Mach 4V Rebuild..
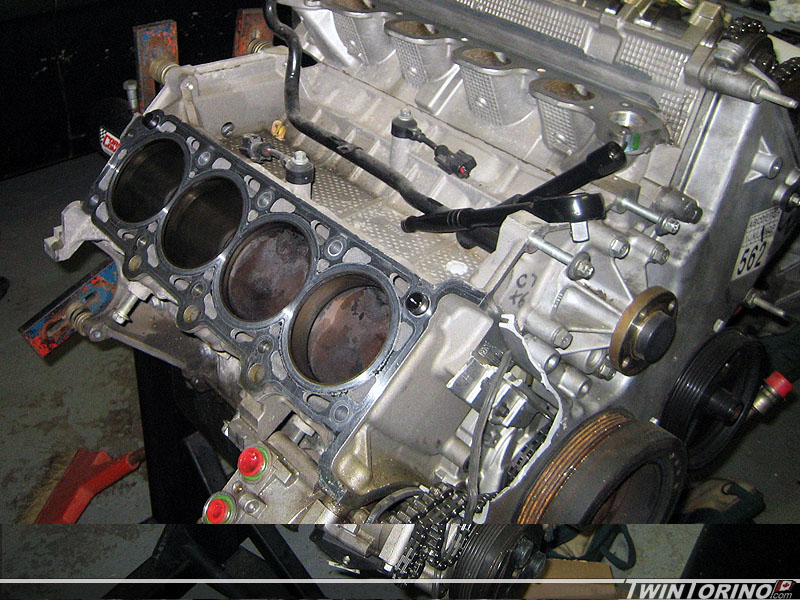
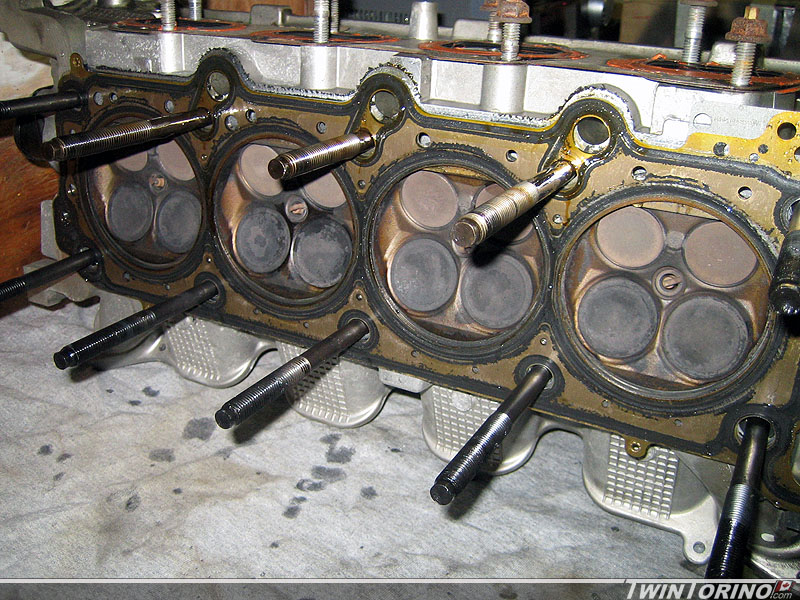
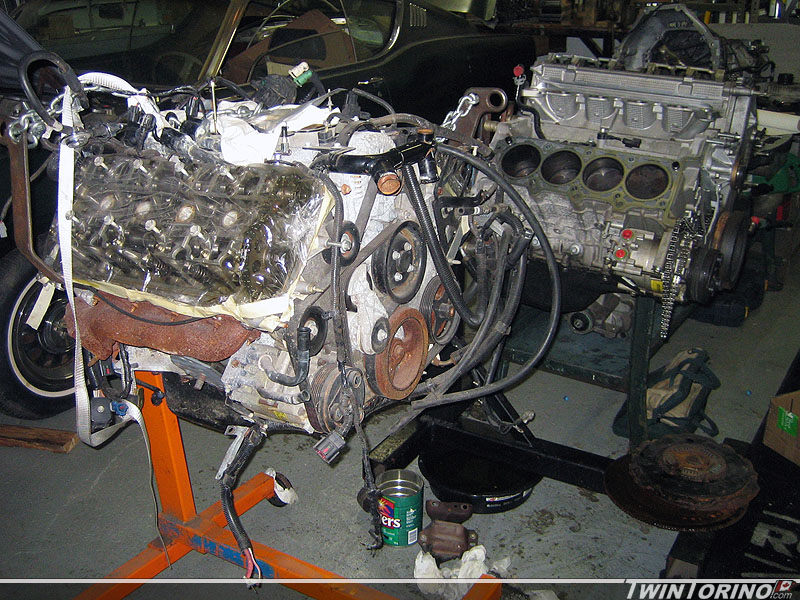
Finally time to start working on the fun part of this project – the powertrain. We have 2 kits to completely rebuild and upgrade the 6-speed transmissions, and the engines will just get a refreshing/upgrade and make sure everything is OK inside. After all, they are only 5 years old.
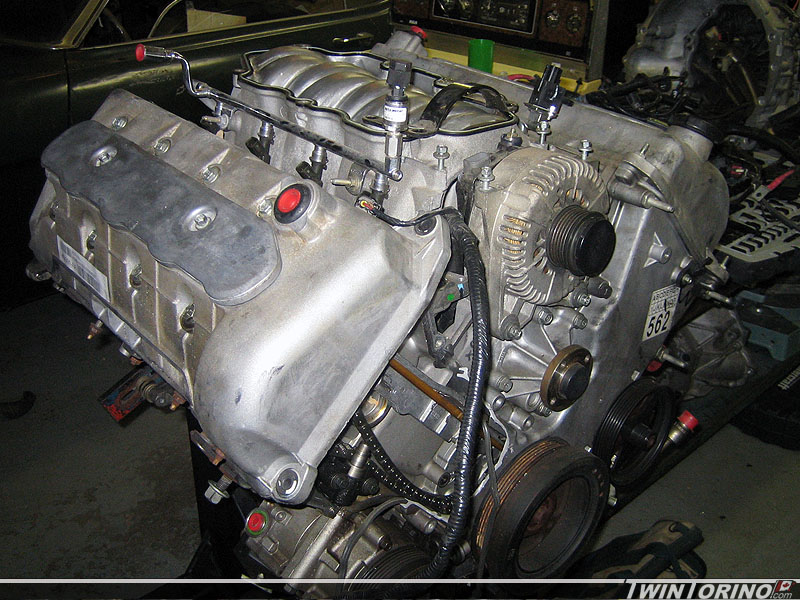
One of the engines we bought came from a car that was a write-off and have some issues with the front cover being cracked as you can see. We took a risk on this (since we only have pics to go by) and hoped that there was no internal damage from the timing chain coming off. Sure enough when we pulled the head off, all was well inside. Gotta love the 4 valve heads :).

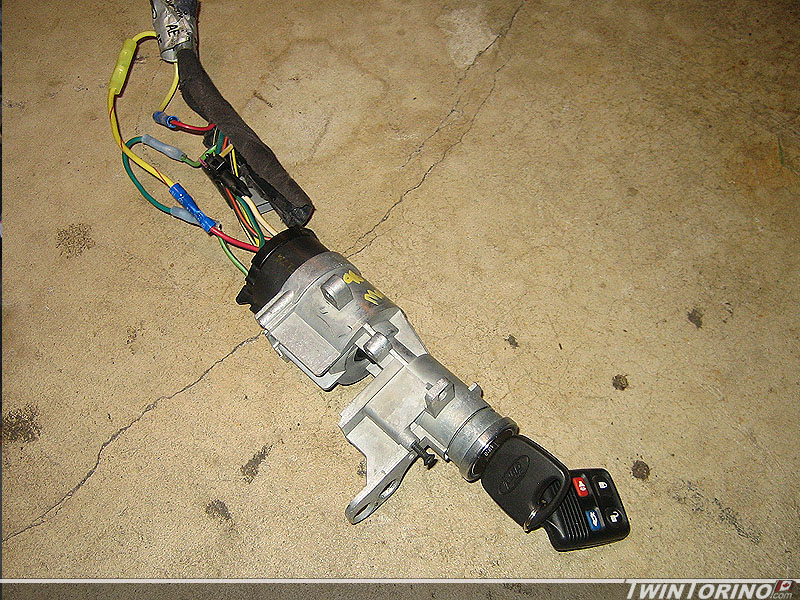
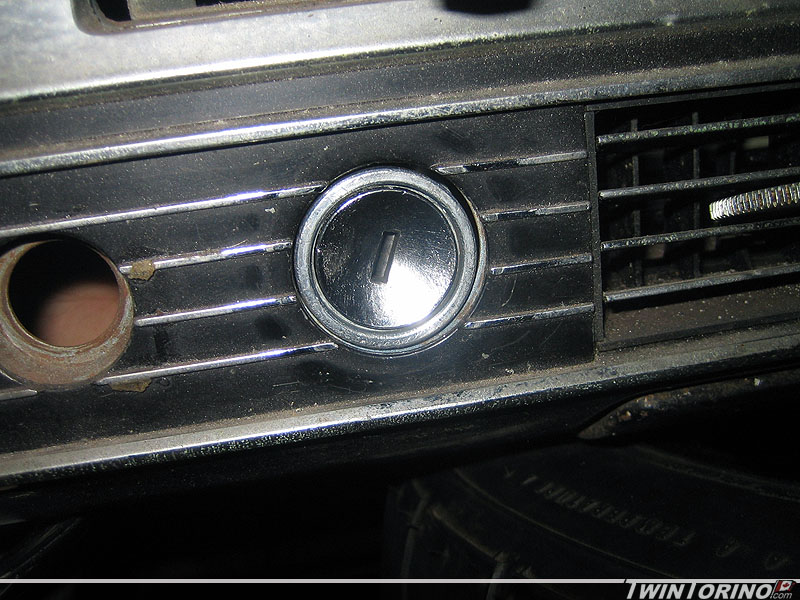
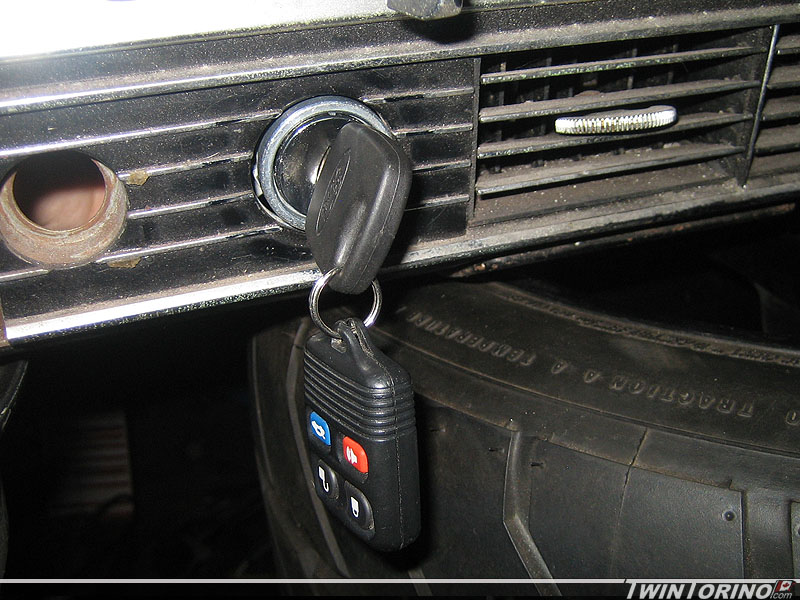
Key In Dash..
I have been trying to figure out what the heck to do with my ignition switch on the dash.. as the electrical portion of the projects is quickly approaching. Since the entire car revolves around a 2004 Mustang’s electrical system, I needed to use something that would allow me to use a Mustang key in the dash. Only problem is new Mustangs have their keys on the column, which means the mechanisms are totally different as is the electrical. After looking all over the place.. I found several Lincolns have a key in the dash. I found this 1998 Lincoln Mark VIII lately which fits quite nicely. Once the original ring is in place, should look close to stock. It fits and looks quite nicely. The goal here is to make it look close to stock.
These pics show how the part fits without any mods whatsoever. Just need to modify the part slightly so the stock ring will fit.