Articles Written By: Craig
Suspension Brakes and Chassis Continue..
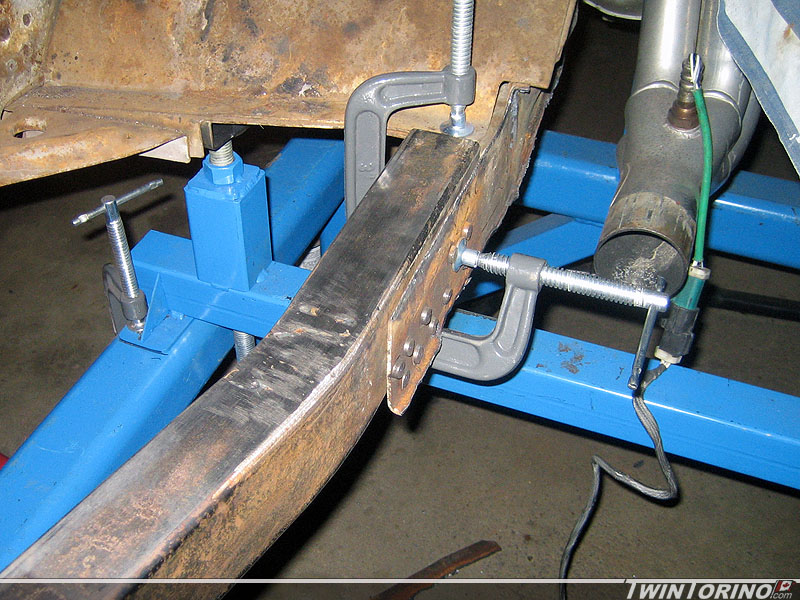
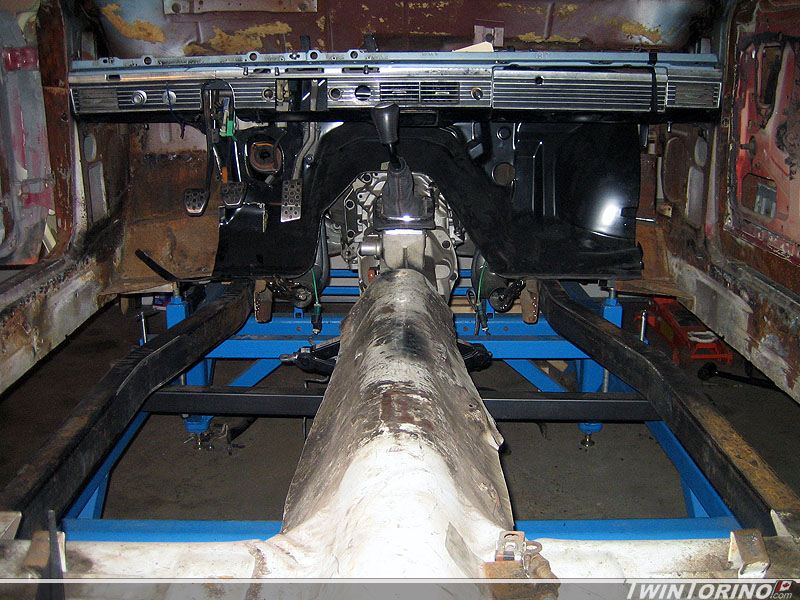
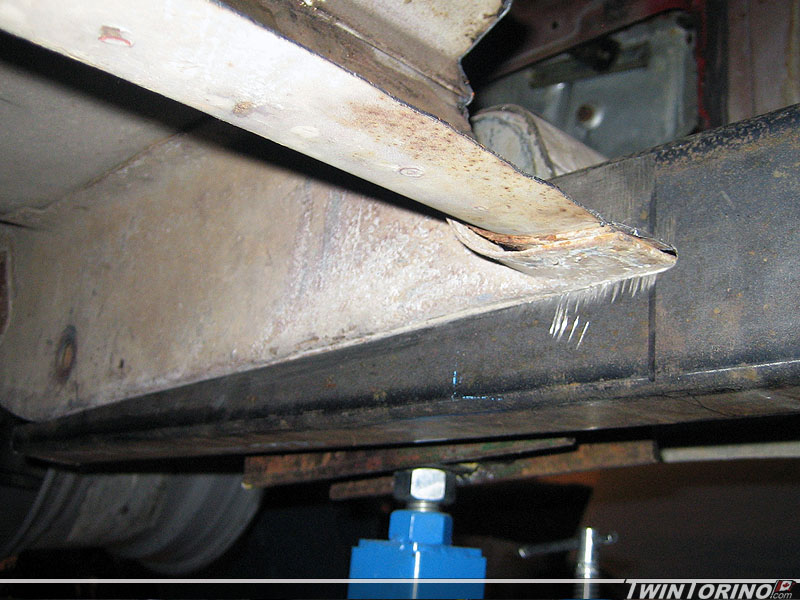
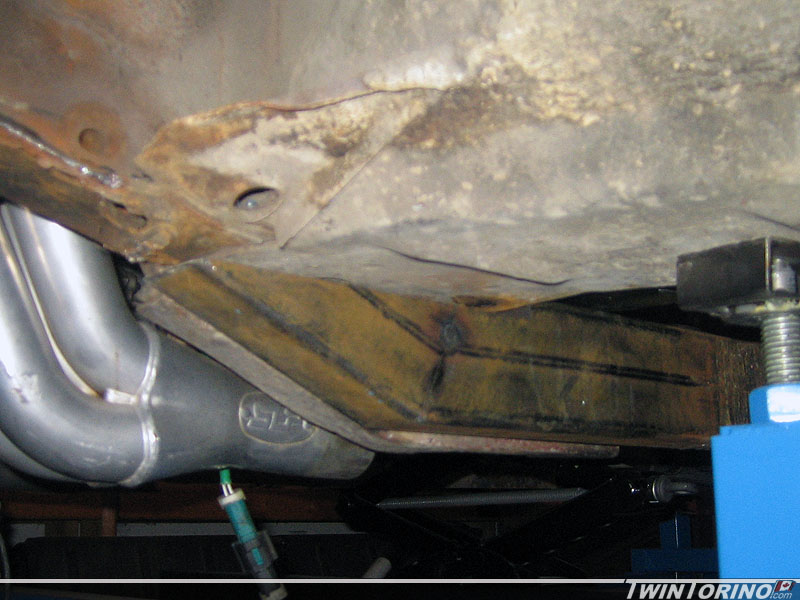
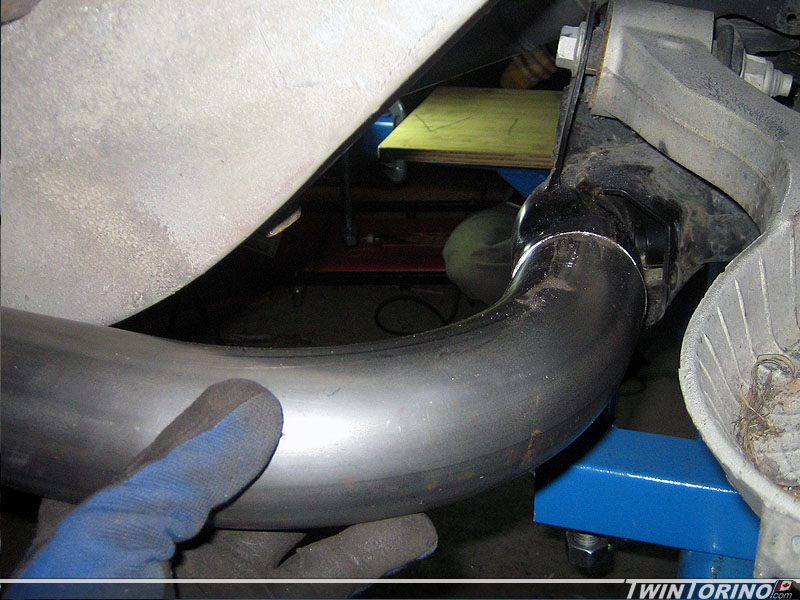
Made some more progress this week. Old trans mount brackets were modified so they now mate up with the subframe connectors. Once they are welded to the subframe connector – they should look like they are supposed to be there. This will also free up some room for the exhaust.
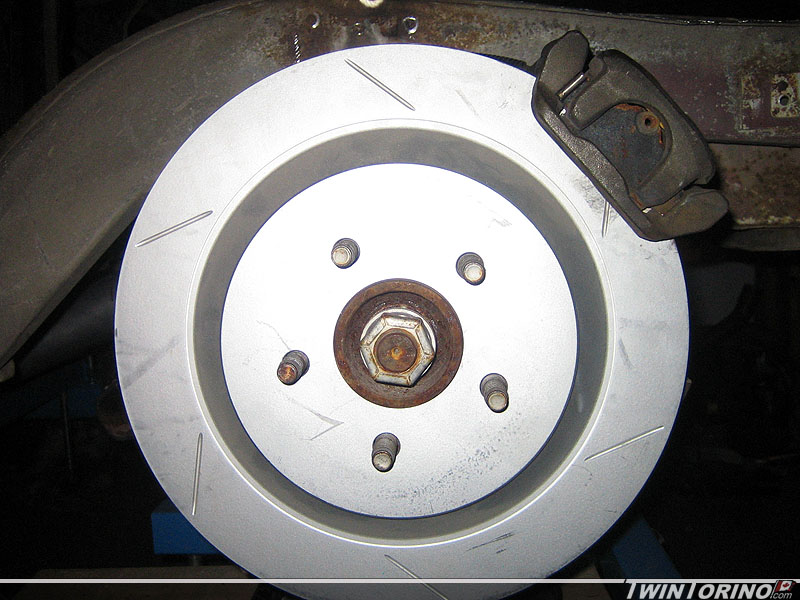
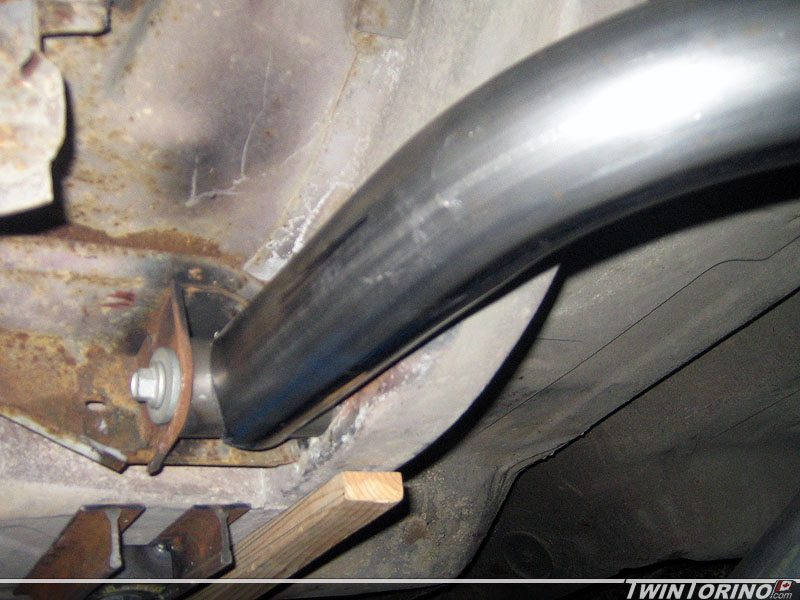
Driver’s and pass side connectors are now complete as well. Finished off the front IRS mounting bracket piece that fits into the old leaf spring pocket. Just need to be welded once everything is assembled on the vehicle. Also mounted up the rear 13″ rotors – as expected they need to mached to work in our applicaition (since they were designed for a car with Mustang GT brakes and not Cobra brakes). The caliper sits too high as you can clearly see.
Subframe Connectors Conform to Body
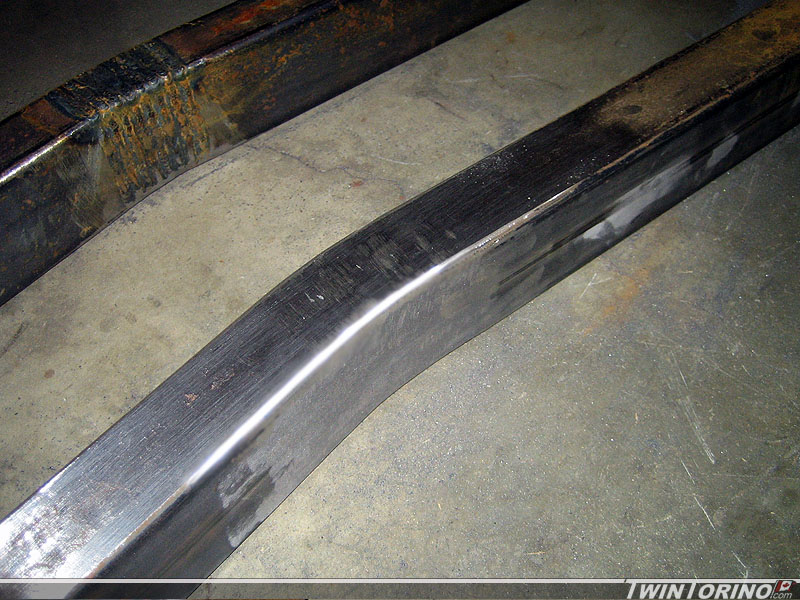
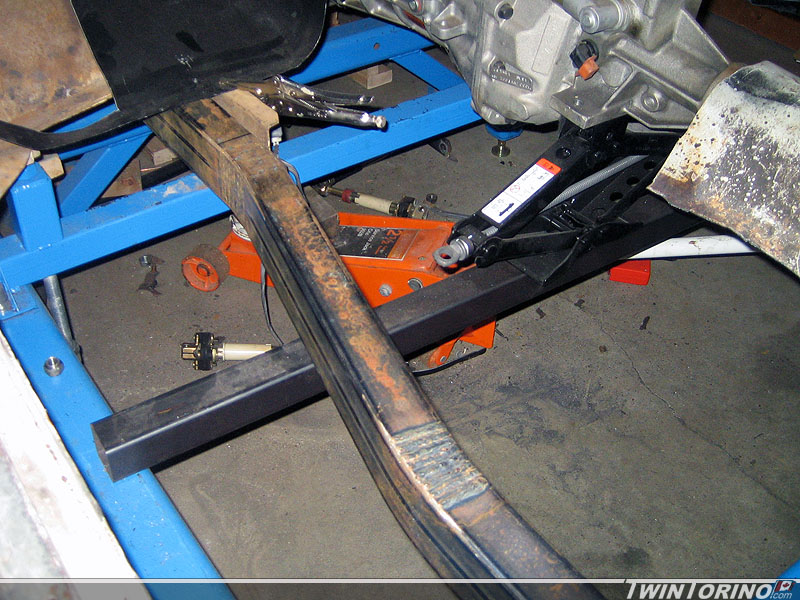
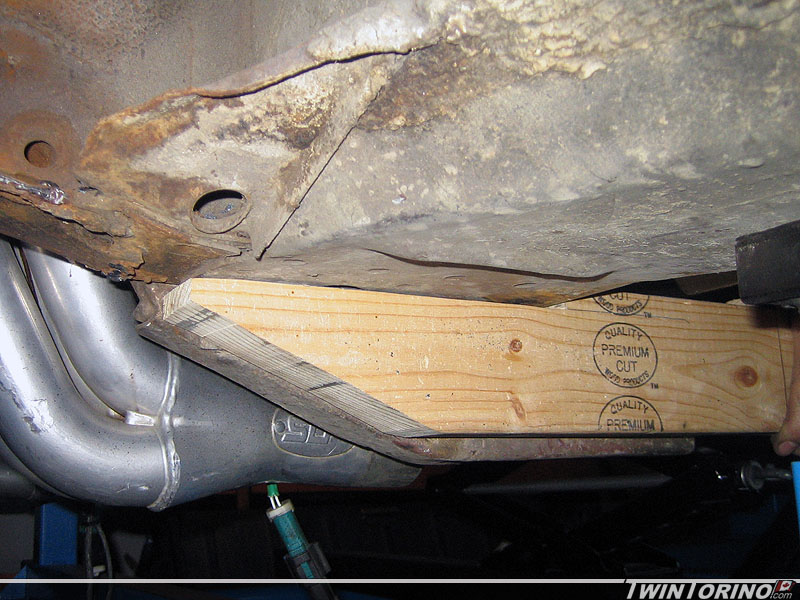
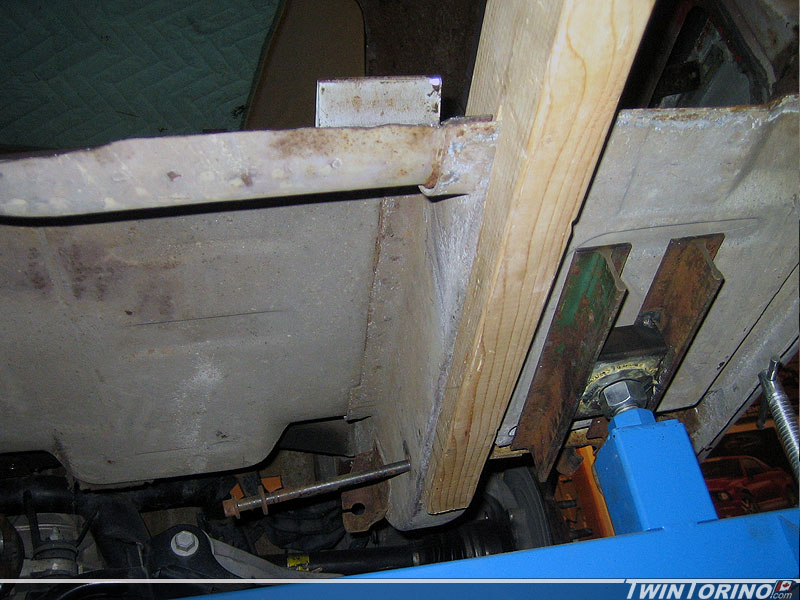
Subframe connectors are now ready to weld in (finally). Just need to prep all the areas for welding now. Very happy with how they fit. There is lots of weld area to tie these into the existing front and rear subframes. Should increase the stiffness of the chassis quite a bit. If all goes well.. they should look they are supposed to be there. Also need to rework the brace that used to hold the trans crossmember so it sits flush with the subframe connector.
Rear IRS Cradle Mounts and First Rotisserie Parts..
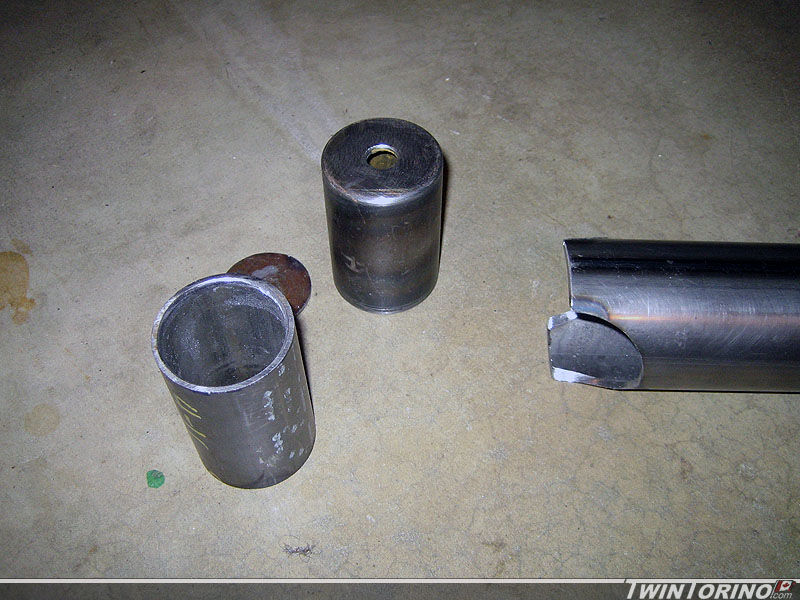
Almost finished the pass side front IRS mount. Getting closer and closer to sitting this thing on the ground – can’t wait. The front brackets are basically ready to weld in. These things will hopefully look factory installed when we are done.
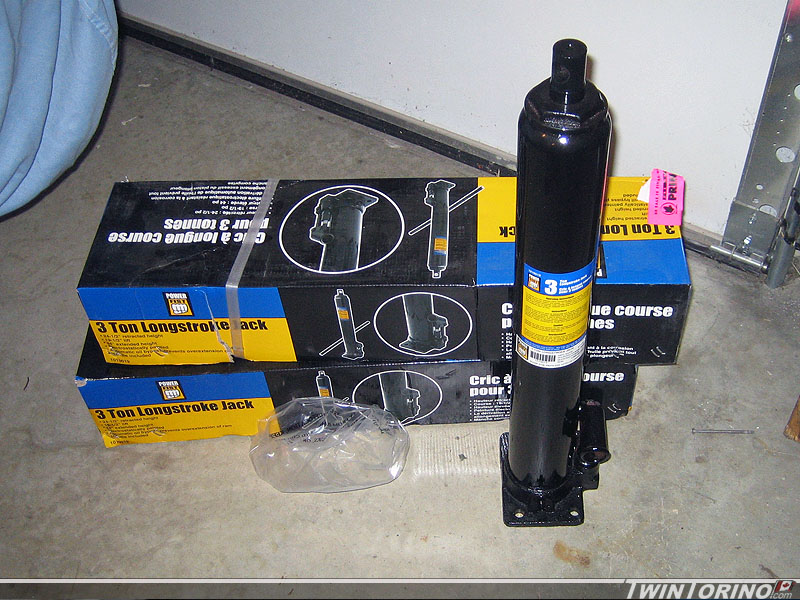
3 ton jacks finally went on sale at Princess Auto (Canadian version of Harbor Freight). This is the first step of getting th roisserie underway. We will be grabbing steel for it in the next couple of weeks. Hope to be building the rotisserie within the next month.
Front IRS Mounts…
Also have the fabrication nearly complete on the front IRS cradle suspension mounts. As you can see, they tie into the existing leaf spring mount. We cut a sction of 2″ steel and notched out the 2.5″ main tube – worked perfect. Another days worth of work and they will be ready to weld in. Getting closer to getting the car down on the ground. We decided to rigid mount these instead of using rubber bushings like the factory ones.
Subframe Connector Concept..
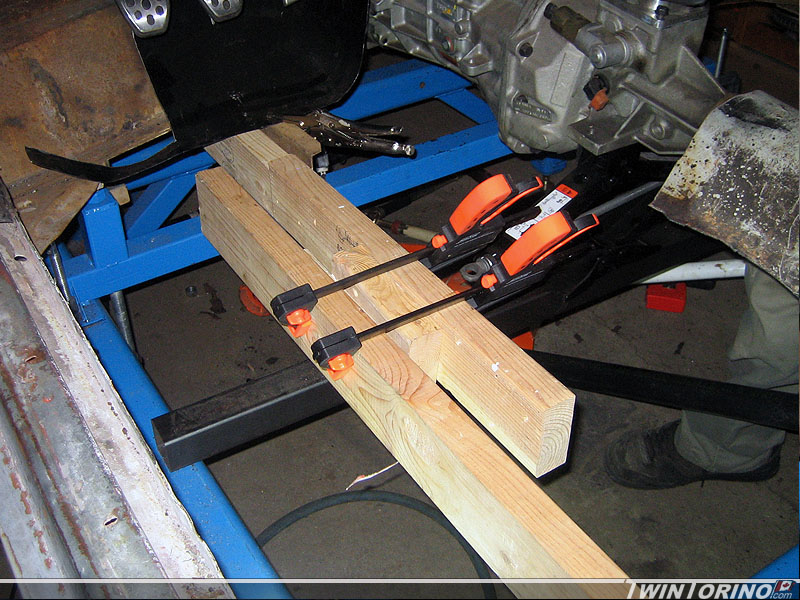
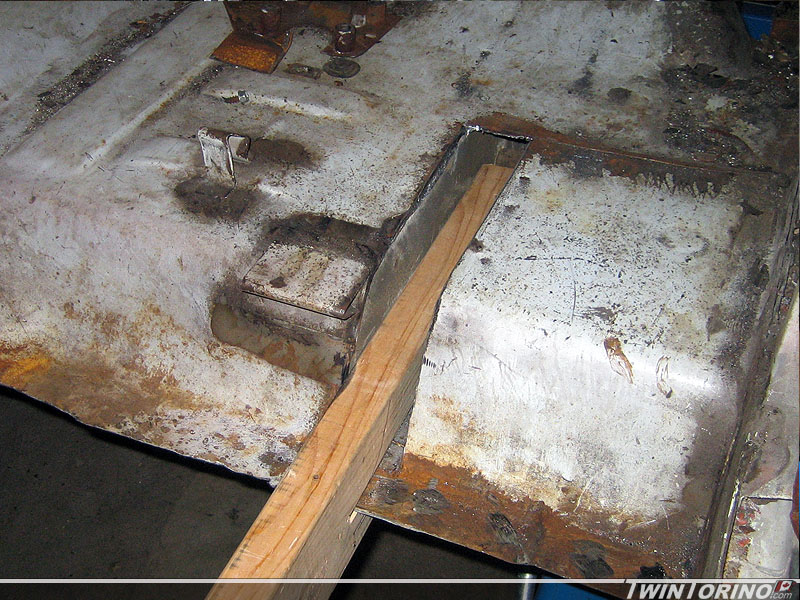
Made some more progress in the past week or two on the car. It was finally time to cut out the drivers side floor section to make room for subframe connectors and the new floors. Have the subframe connectors all figured out now. Used some 2×4’s to determine the overall diemsions and how to cut the steel. Came out quite nicely. Pictures can do the talking on these. As you can see – they tie directly into the rear frame rails (requiring cutting into the framerail area from above) and will also tie into the front frame rails. When all is said and done – they should look somewhat natural. Next comes cutting the actual connectors to shape and welding them in. To do this, a bandsaw was desirable so we ended up finding a broken one locally for $25 (wood/metal) so that should be up and running in the next couple of days.
Mustang Suspension Parts Stash
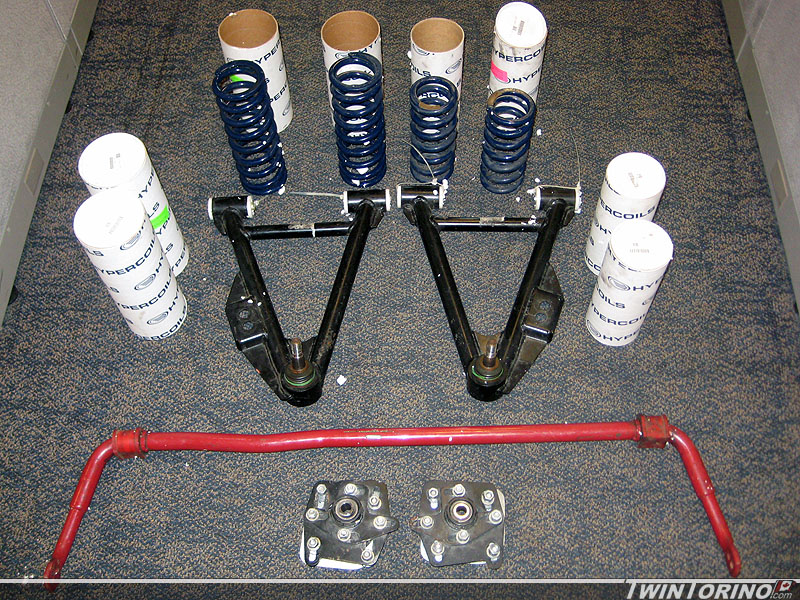
Managed to find several more Mustang performance parts (used of course) from one person that almost completes the parts needed to finish the suspensions for both cars. This includes 4 sets of Hypercoil springs (2 1/2 ID front, 2 1/4 ID rear), Maximum Motorsports tubular lower control arms and caster camber plates, and rear Eibach IRS swaybar (29mm). Almost there – can’t wait to take the first lap around the track!
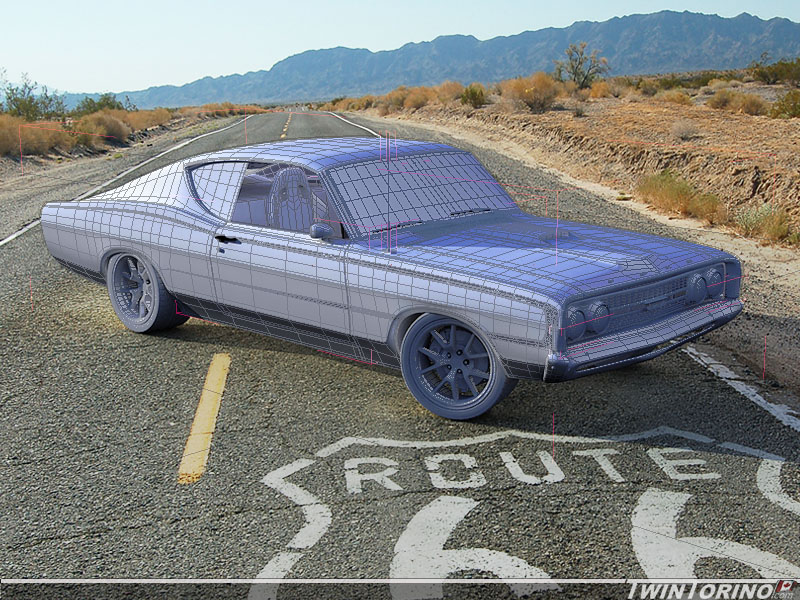
Final Renderings Complete
Also finished up close to a final rendering of the car. Just need to add a couple things like the hash marks etc and update the brakes. I like the stock looking C stripe the more I look at it.. glad I pryed myself away from the 2-tone. The background is in Arizona and was taken by a friend of mine.
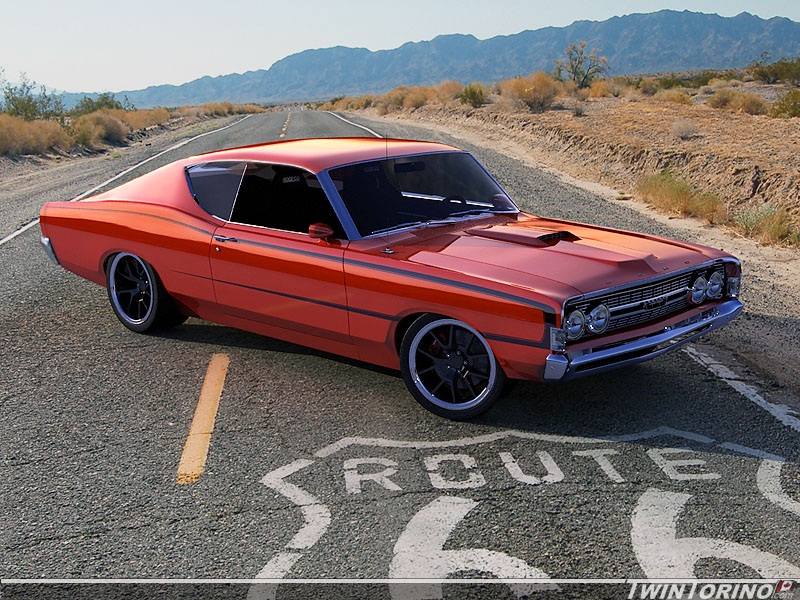
Program used is 3D Studio Max. It was definitely not the most pleasant program to learn, but is very powerful once you get the hang of it. The car is in 3 dimensions so you can rotate it. It is actually made up of a mesh of small rectangular elements which are all smoothed together to produce the surfaces you see. Each one of the elements is assigned a texture, refectiveness, transparency etc. This is what it looks like before texturing.
Also finished up close to a final rendering of the car. Just need to add a couple things like the hash marks etc and update the brakes. I like the stock looking C stripe the more I look at it.. glad I pryed myself away from the 2-tone. The background is in Arizona and was taken by a friend of mine.
Engine and Transmission Positions..
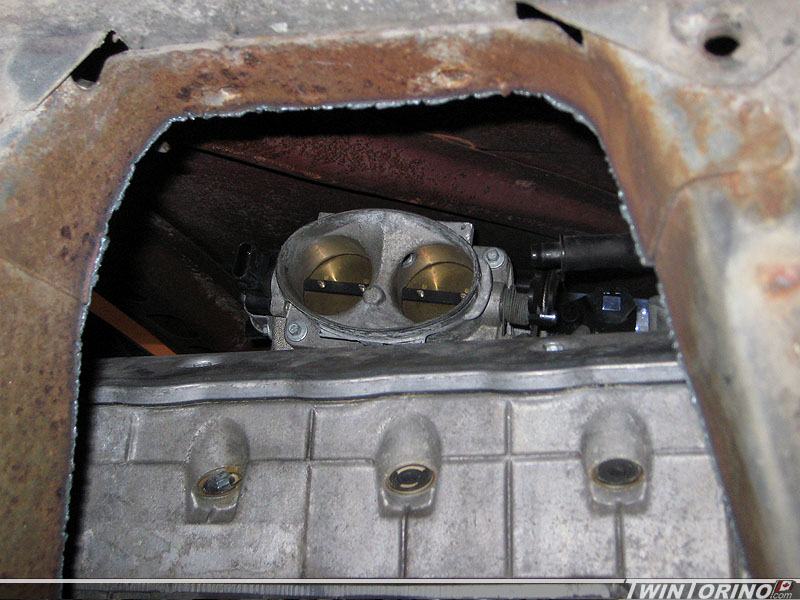
Managed to get the powertrain in it’s actual position this week. Finally starting to feel like a car now. Put the hood on to find that we actually have hood clearance which we were not really sure about it. Have around 15-20mm from the throttle body to the hood. Won’t need to modify the hood thankfully. Still detaing on whether to run a shaker. Kinda leaning towards not using it and keeping the stock hood. The engine ended up 4″ rearward of the front suspension in comparison to an SN95 Mustang.
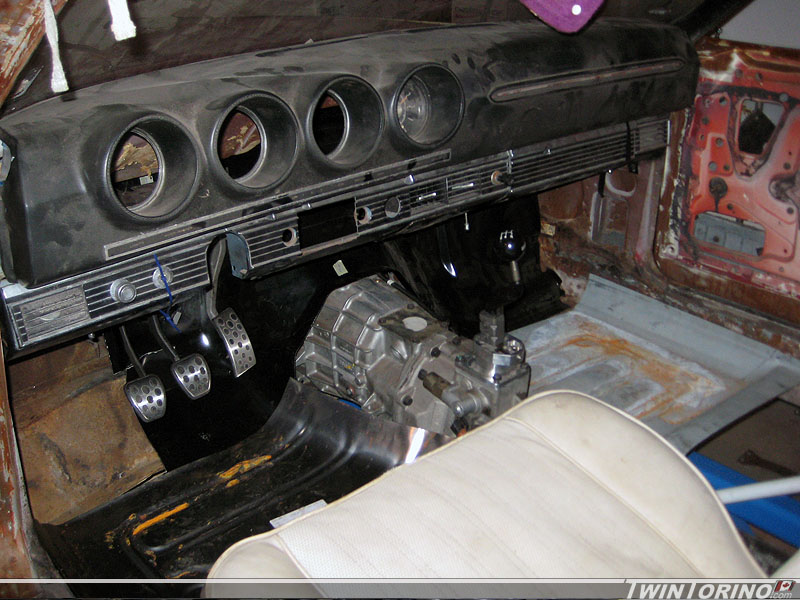
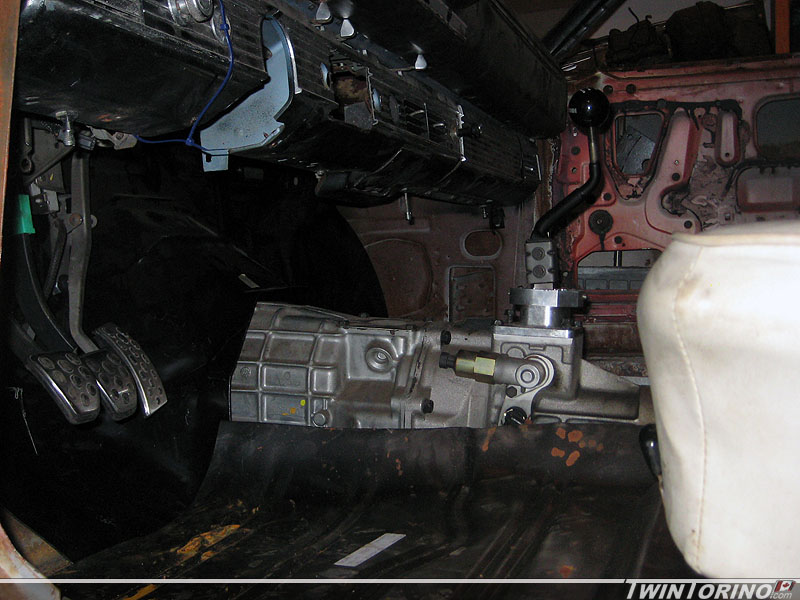
Also got the 6-speed in. After struggling with getting it to work with the stock trans tunnel – it was clear that it was not going to fit. The plasma cutter made that go away quickly – A new custom tunnel will be made up. Otherwise, the shifter is in the perfect location and feels great going through the gears. The handle shown is just for mockup – I will likely modify a hurst shifter or something like that and then use a custom boot.
Now time to get the firewall finished up and get the floors and subframe connectors installed and welded up.
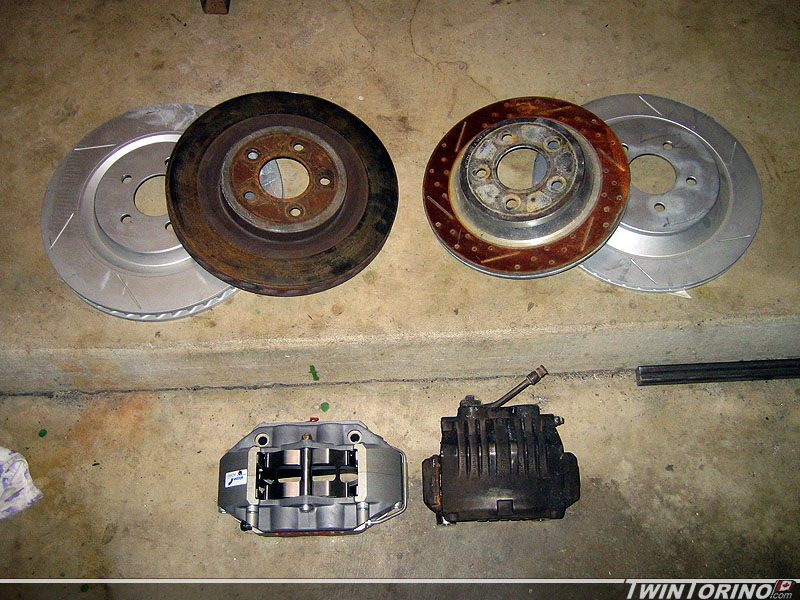
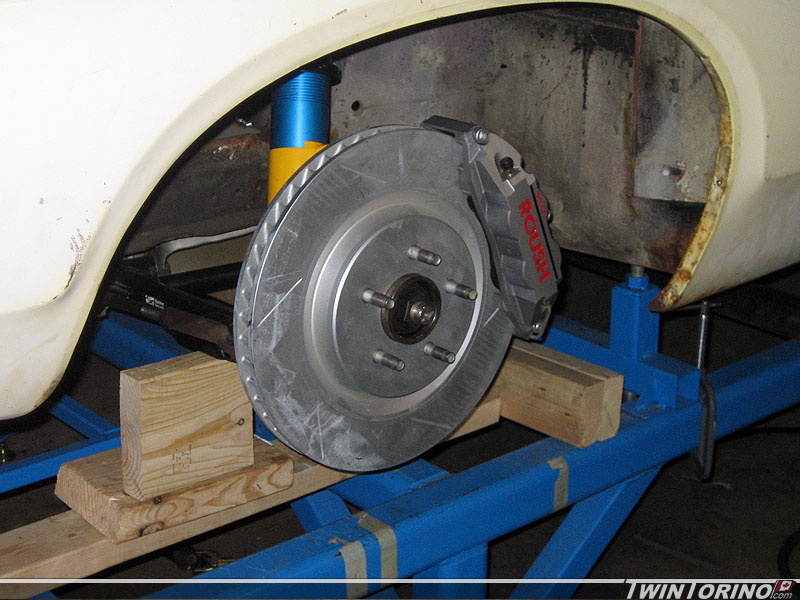
Roush Alcon Brakes..
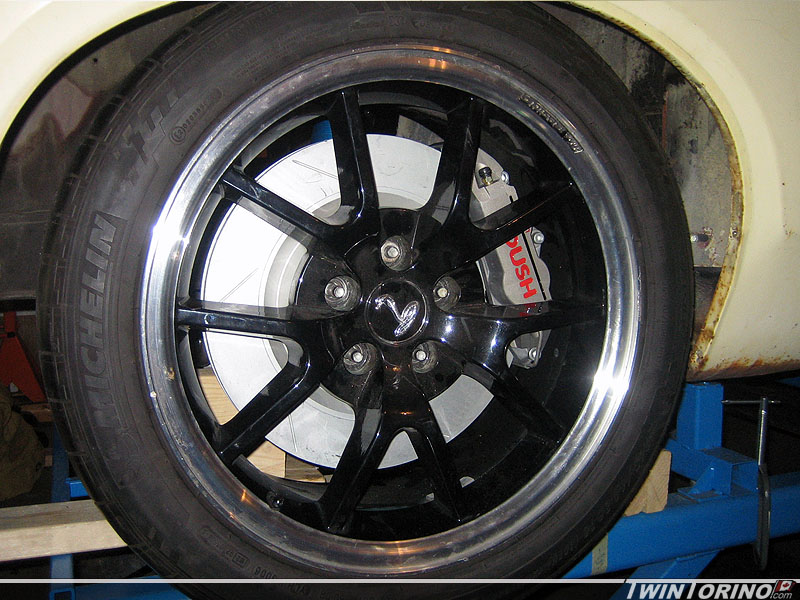
Well.. I typically run on a tight budget and hate to buy anything new.. but I had to make an exception. I found this set (technically 2 sets I guess) of Roush Alcon brakes at a great price on clearance. I just had to have them. The calipers and rotors and made by Alcon, and the misc hardware and mounting brackets are made by Roush. This kit is made for the Roush Stage 3 Mustangs from 1999-2004 (SN95). The front rotors are 14″ (compared to the 13″ Cobras) and the rears are 13″ (compared to the 11.65″ Cobras). The calipers are 4 piston with race/track pads. Can’t wait to see how these work. The barely fit within the 18″ FR500 wheels. I have had issues in the past with melting the dust boots on the Cobra brakes, so hopefully that problem will go away.
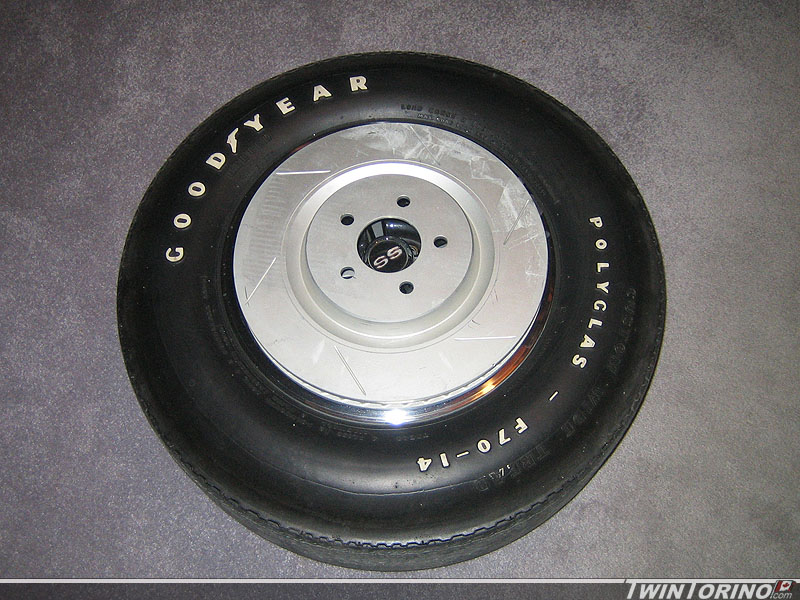
How big are 14″ rotors? They are the same size as the rims on a 1969 Camaro..
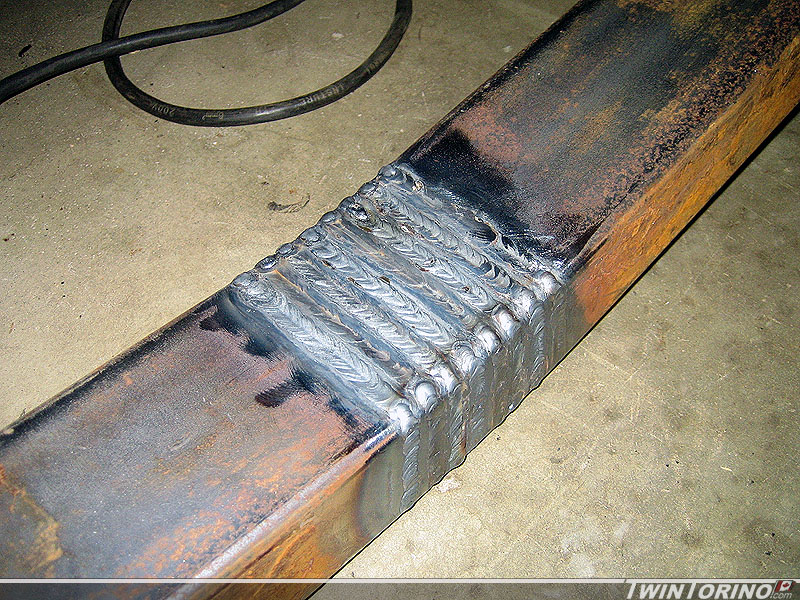
Subframe Connector Bend Welds..
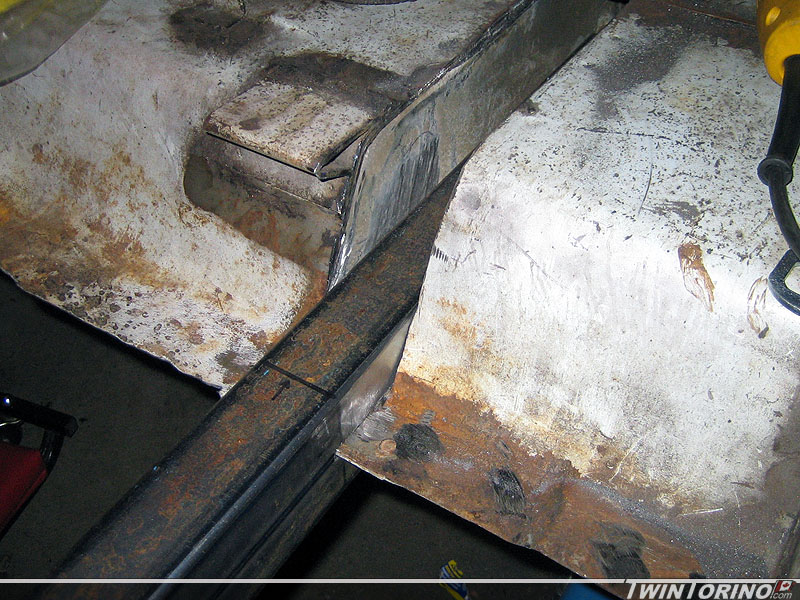
I finished up cutting and welding the second connector yesterday. Also started to grind away some of the weld to smooth the surface out. Very happy with the end result. Should be able to get them cut to length and start cutting up the floors to make them fit this week.
We also decided to go after a completely different braking system as I ran into a deal I couldn’t pass up. Pics to come this week.